No Bake Oreo Balls
This post may contain affiliate links.
Every party needs a tray of finger food desserts like these no bake Oreo Balls for that quick sweet bite to satisfy the sweet tooth without racking up massive calories. Also known as Oreo truffles, these delicious Oreo truffle bites are a favorite treat.
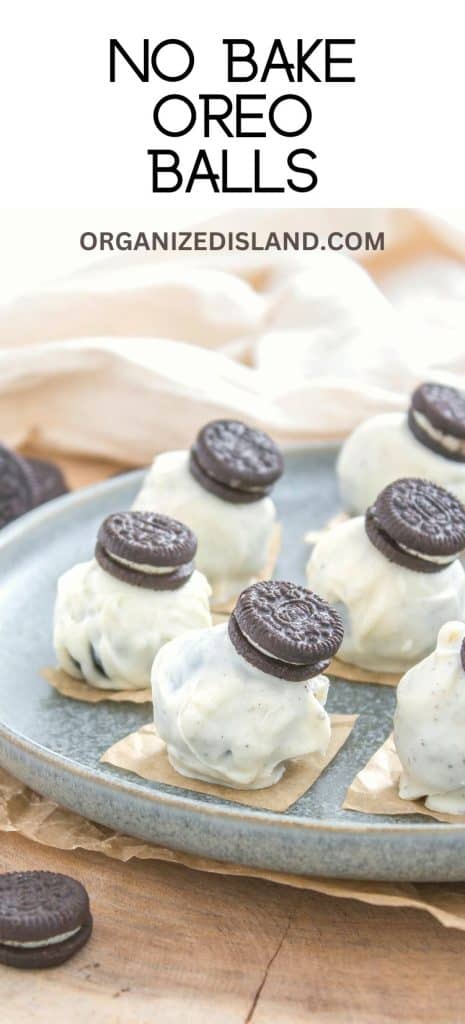
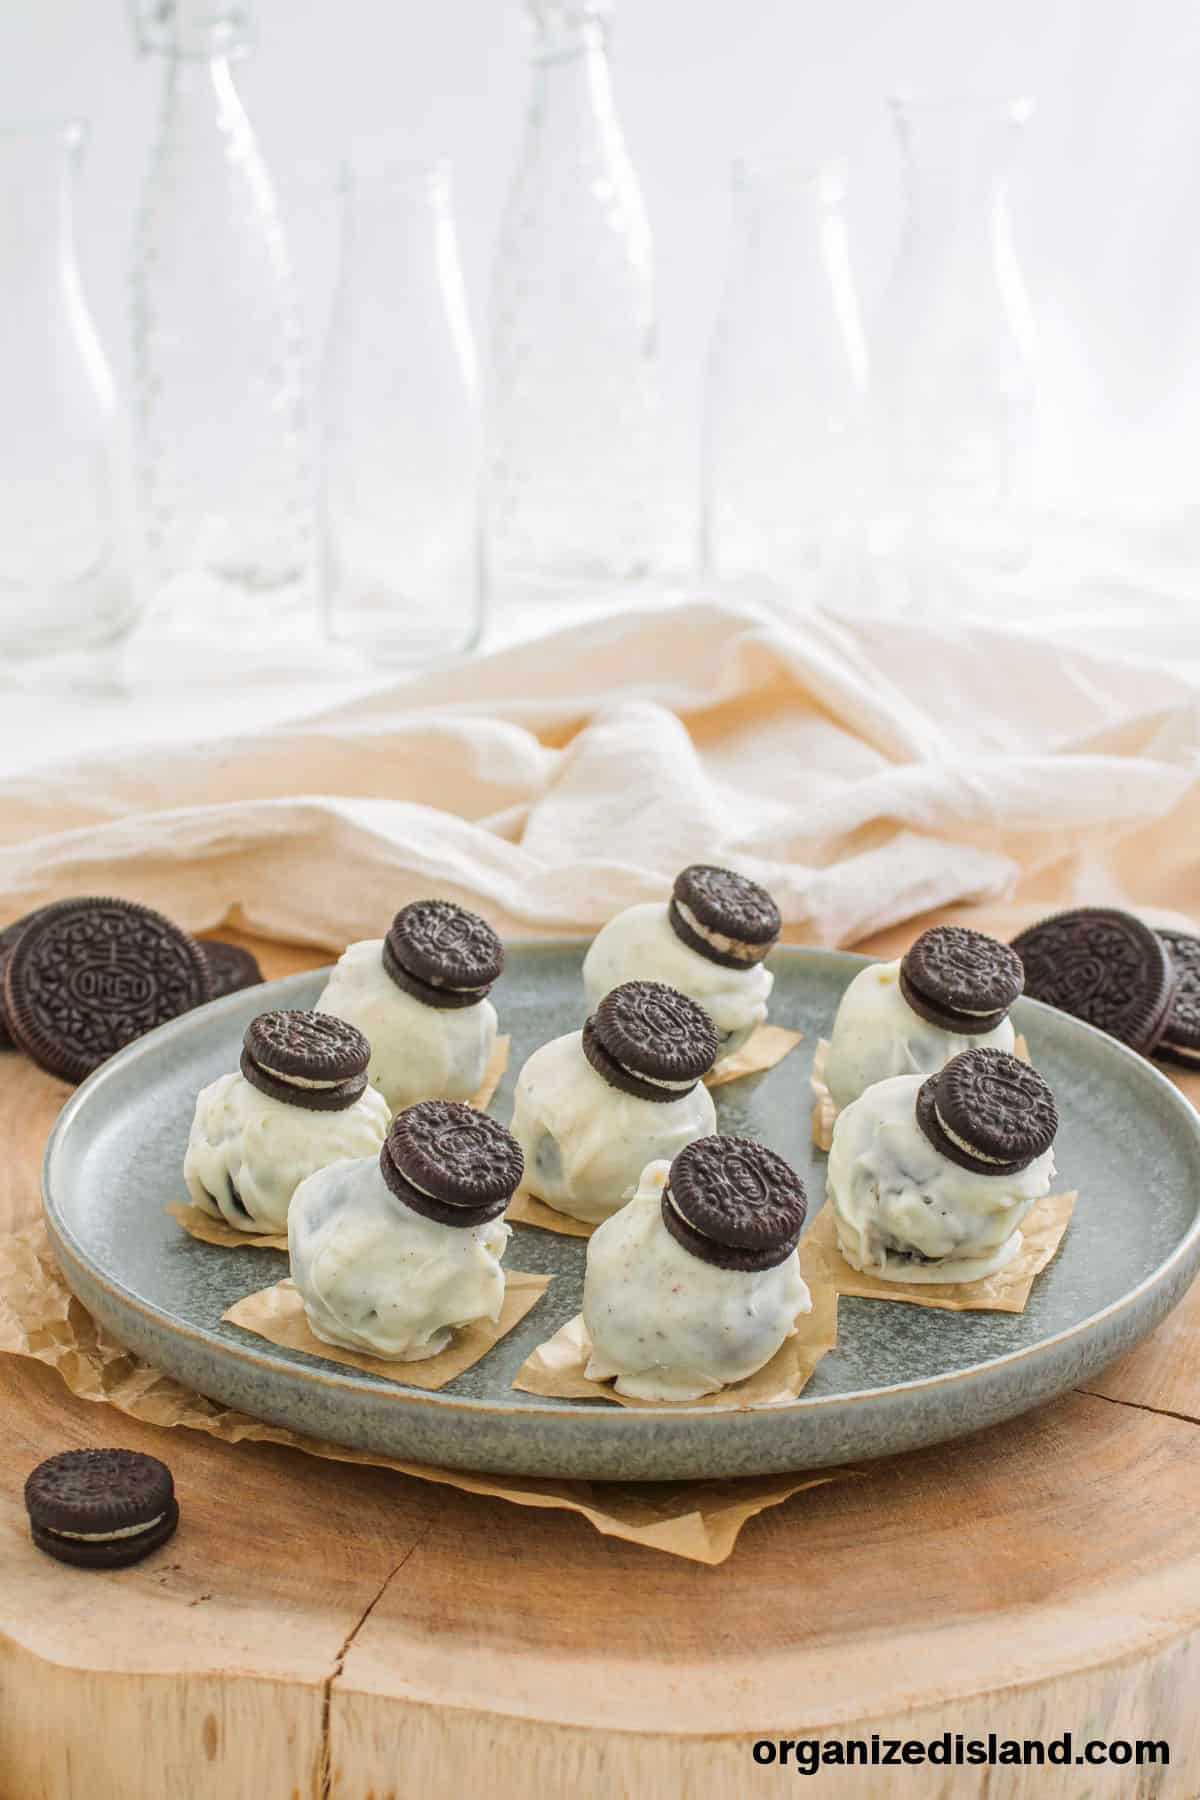
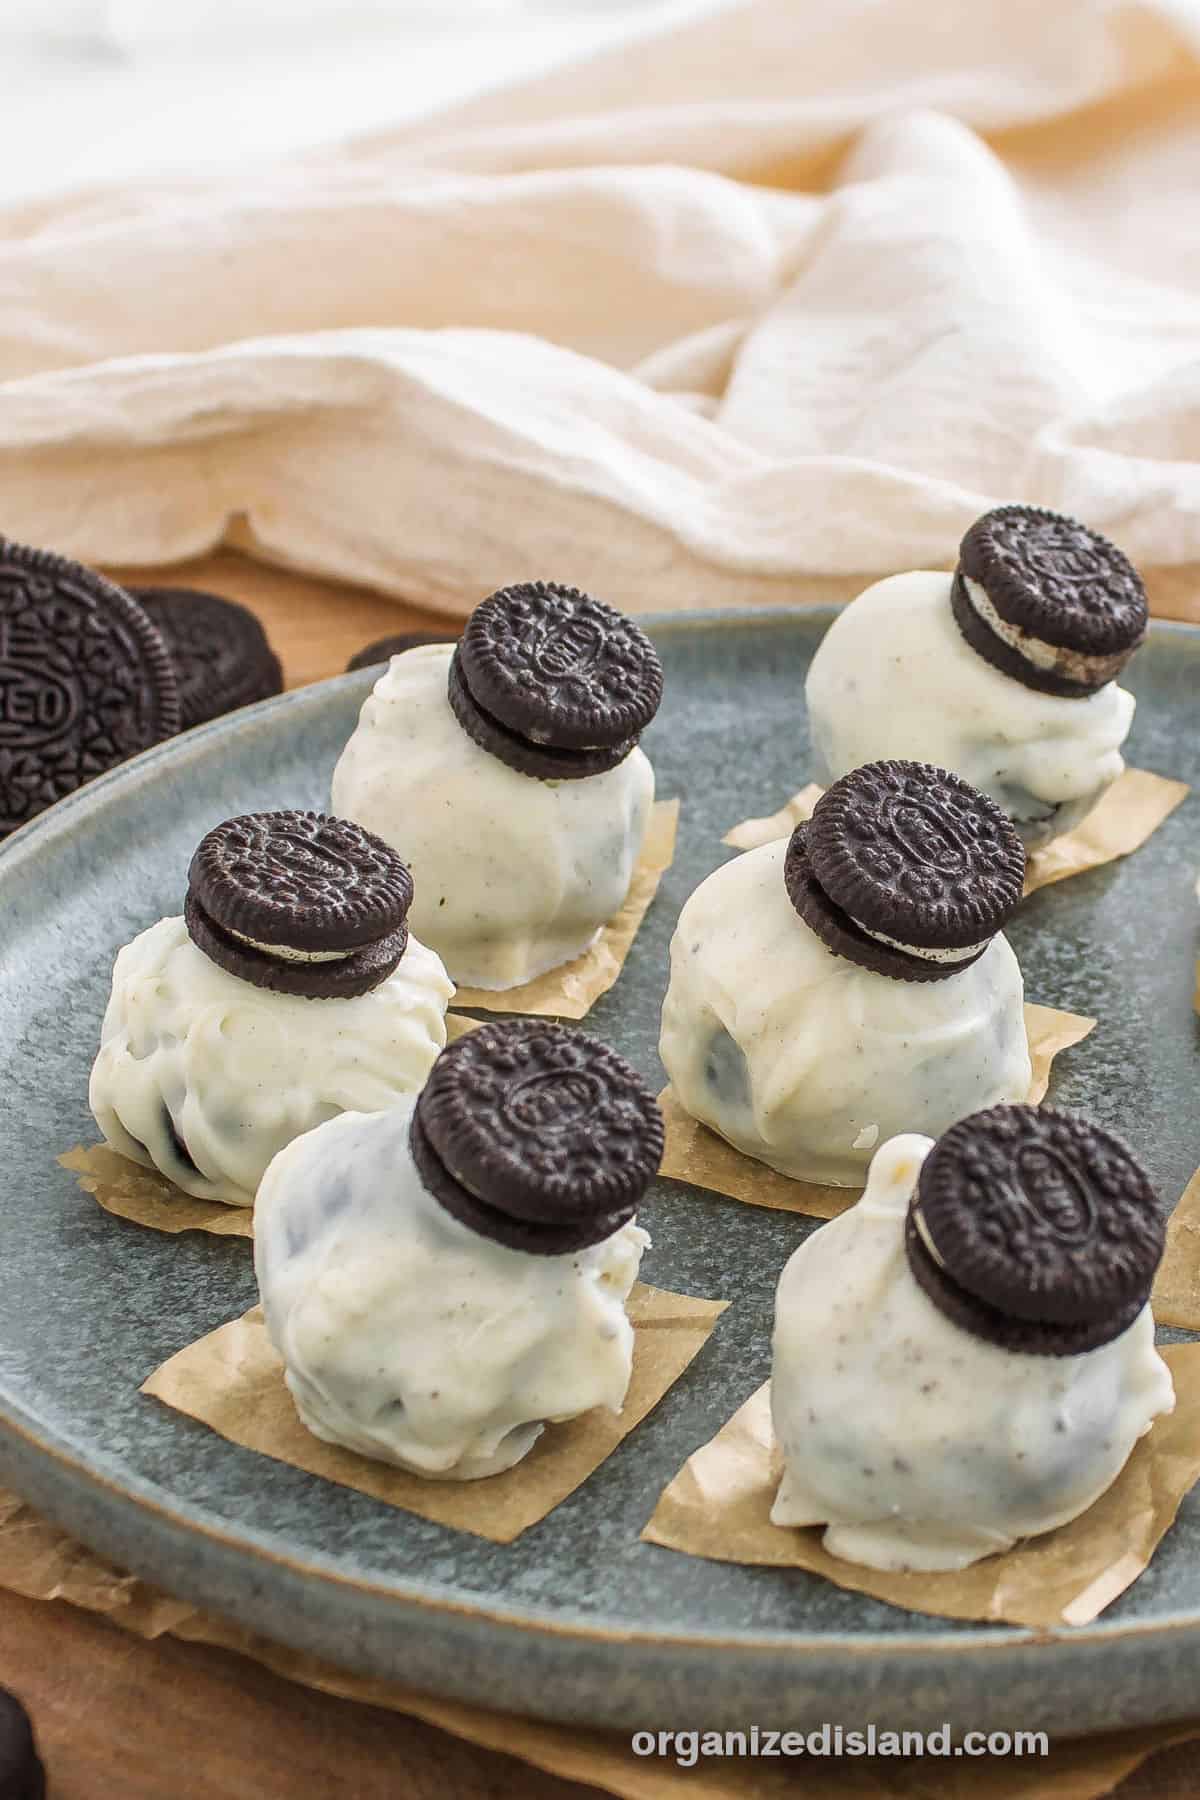
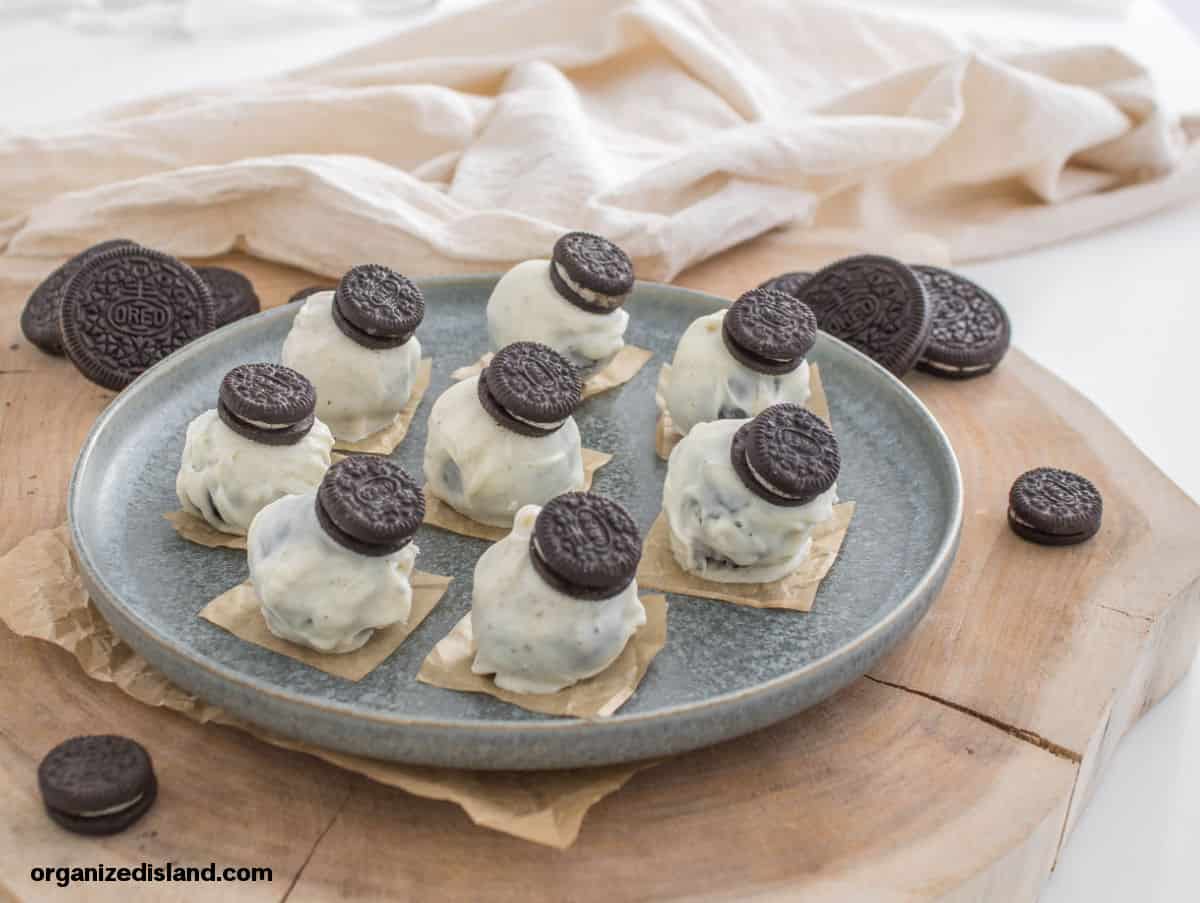
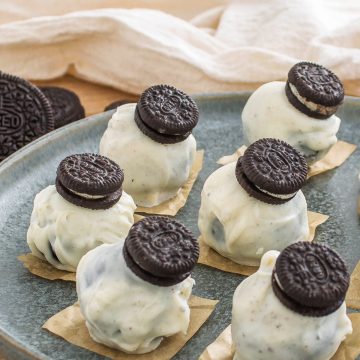
These easy Oreo balls are crushed Oreo cookies and cream cheese enveloping a Cookies-N-Creme Kiss, all surrounded with white chocolate and topped off with a mini Oreo or your colorful sprinkles.
Truffles are so easy to make – check out my Easter Truffles, my Strawberry Truffles, my Carrot Cake truffles and my Bailey’s Truffles.
Why You’ll Love This Recipe
Easy Peasy. This Oreo balls recipe is simple. All you need are basically a package of Oreos, softened cream cheese, and some white chocolate bark. making this no bake recipe a breeze. You can make these Oreo cream cheese balls no time!
Crowd Favorite. Everyone loves these little Oreo cookie balls. They are the perfect grab-and-go sweet for a party finger food.
Make-Ahead Convenience. You can make these Oreo balls several days ahead of time as long as you have room to keep them in the refrigerator or freezer. Refrigerated, they will last two or three days in an airtight container.
If you freeze them, pull them out several hours before your event to start thawing. The good news is, you can even enjoy them partially frozen!
Equipment Needed
Food Processor. It makes crushing the cookies and mixing the ingredients so easy!
Sheet Pan. To keep the Oreo balls separated while they are chill.
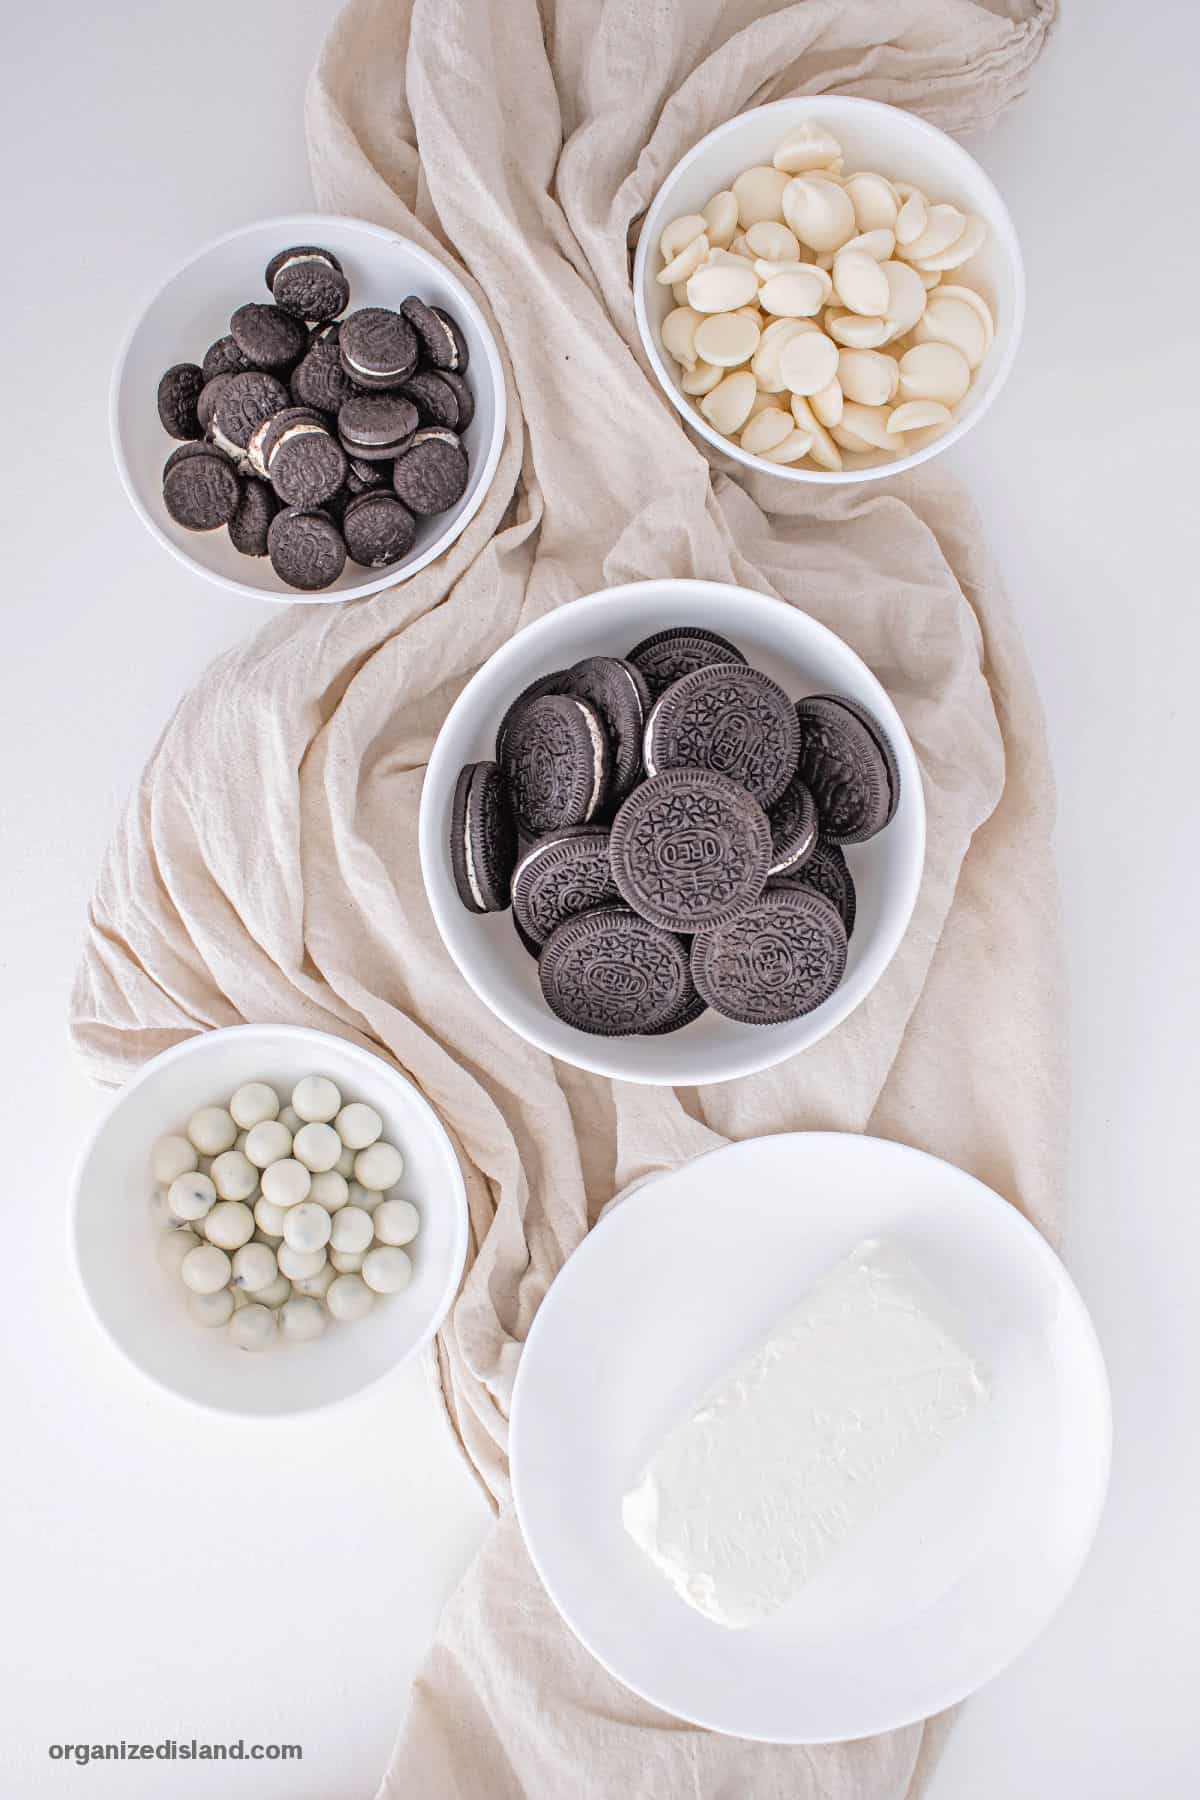
Ingredients for Oreo Balls
Just a few simple ingredients are needed for this recipe. Refer to the recipe card for the measurements.
Oreo Cookies. Just the regular kind is perfectly fine.
Cold Cream Cheese. You’ll only need half a cream cheese brick for this recipe.
Melted White Chocolate. Use your microwave!
Mini Oreo Cookies. For decoration on the outside.
Hershey’s Cookies ‘N’ Creme Kisses. Optional: This added ingredient adds a crunchy texture to the center of the balls.
How to Make Oreo Balls
Instructions
Save The Recipe!
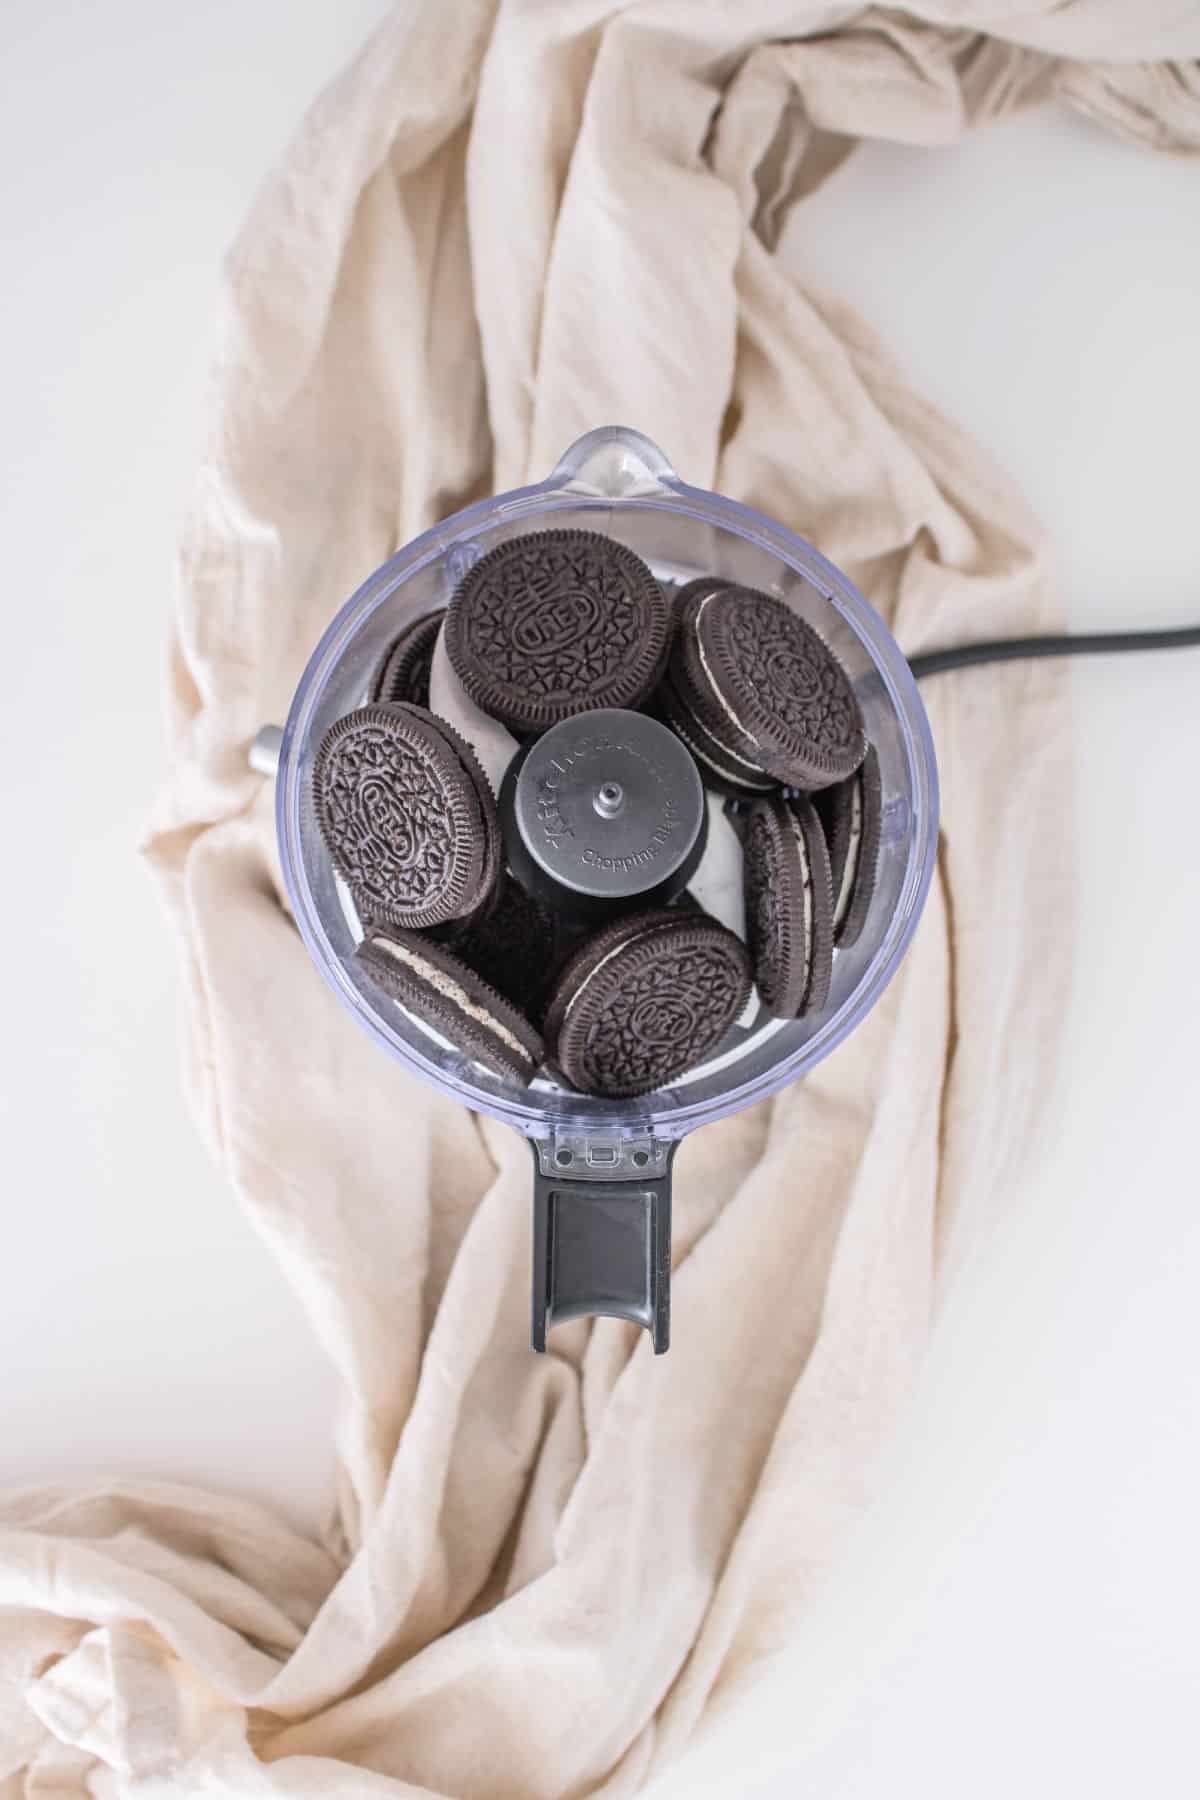
First, pulse your Oreos in the food processor until the mixture becomes a fine crumbs.
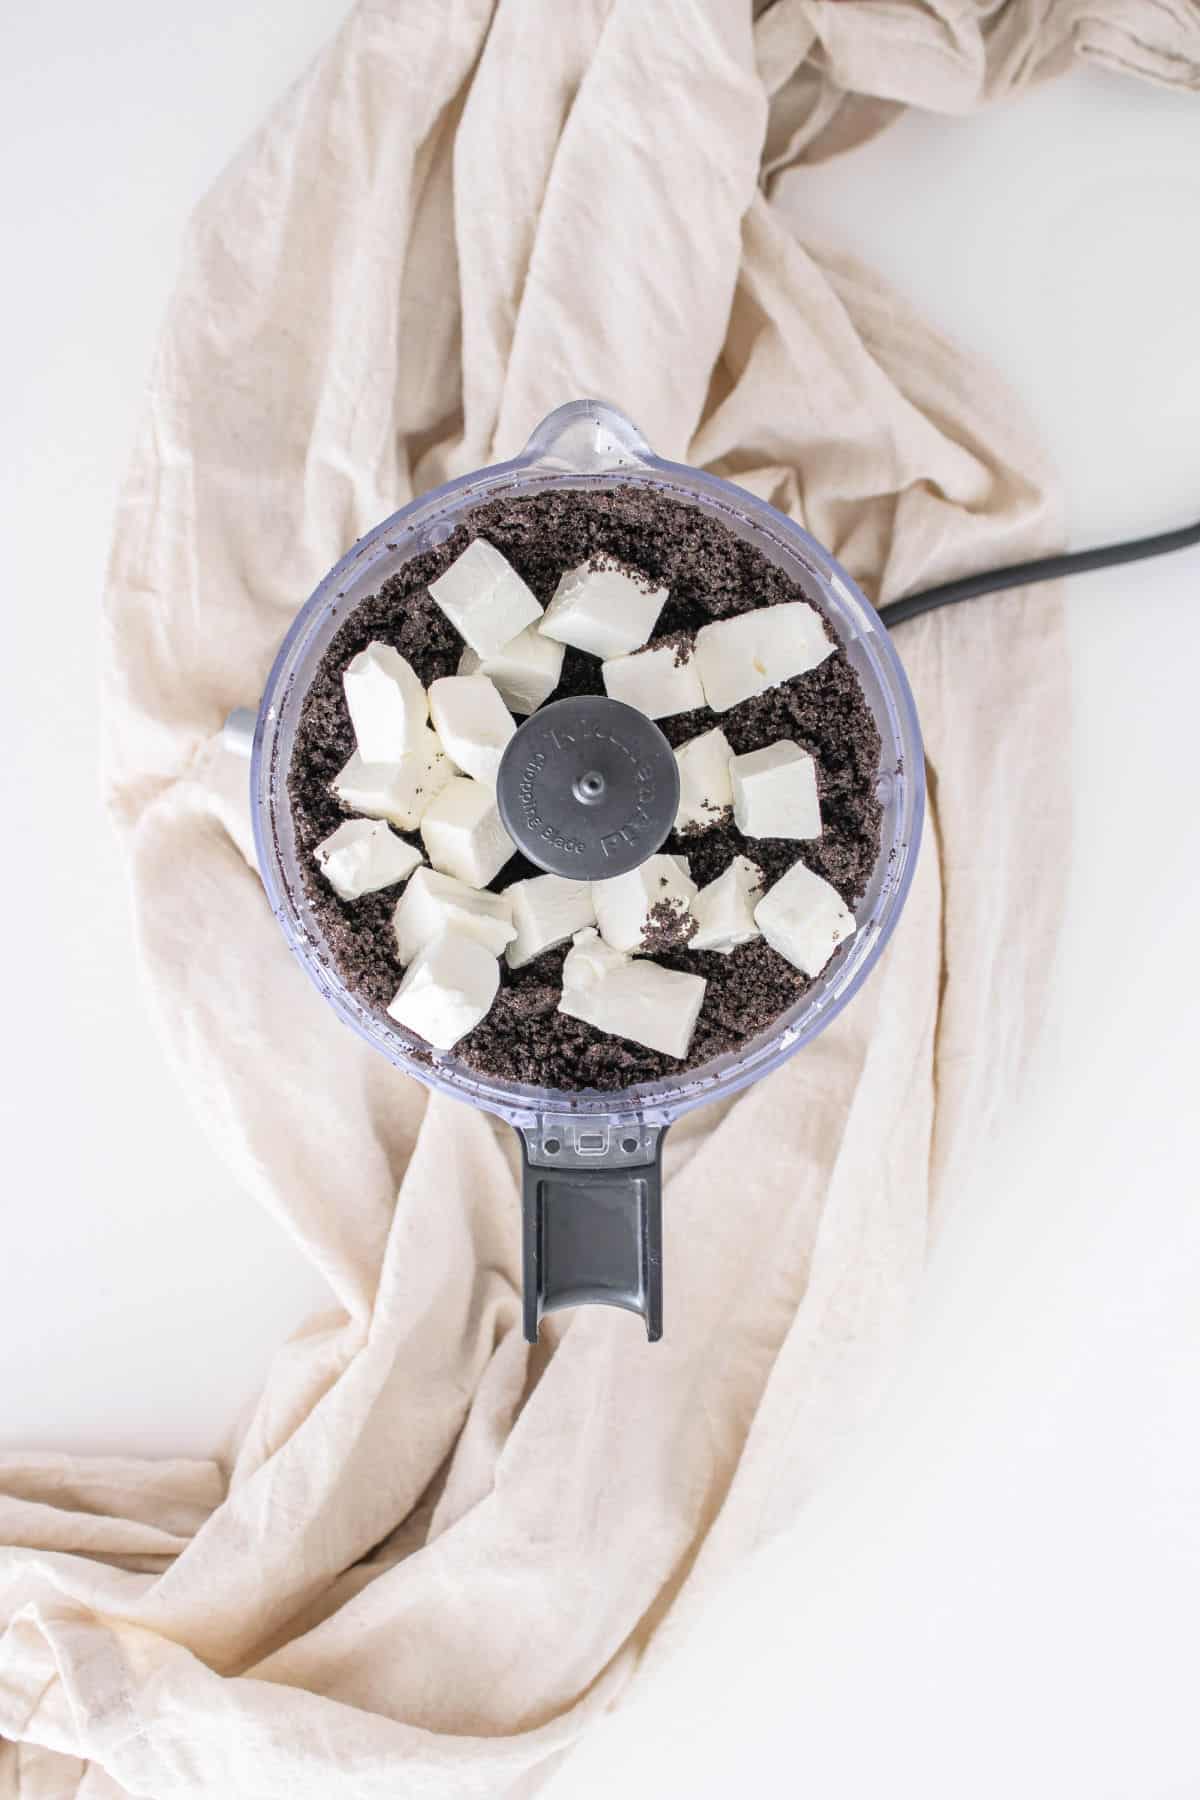
Next, add the cream cheese and mix cream cheese by pulsing until the mixture has a cookie dough consistency.
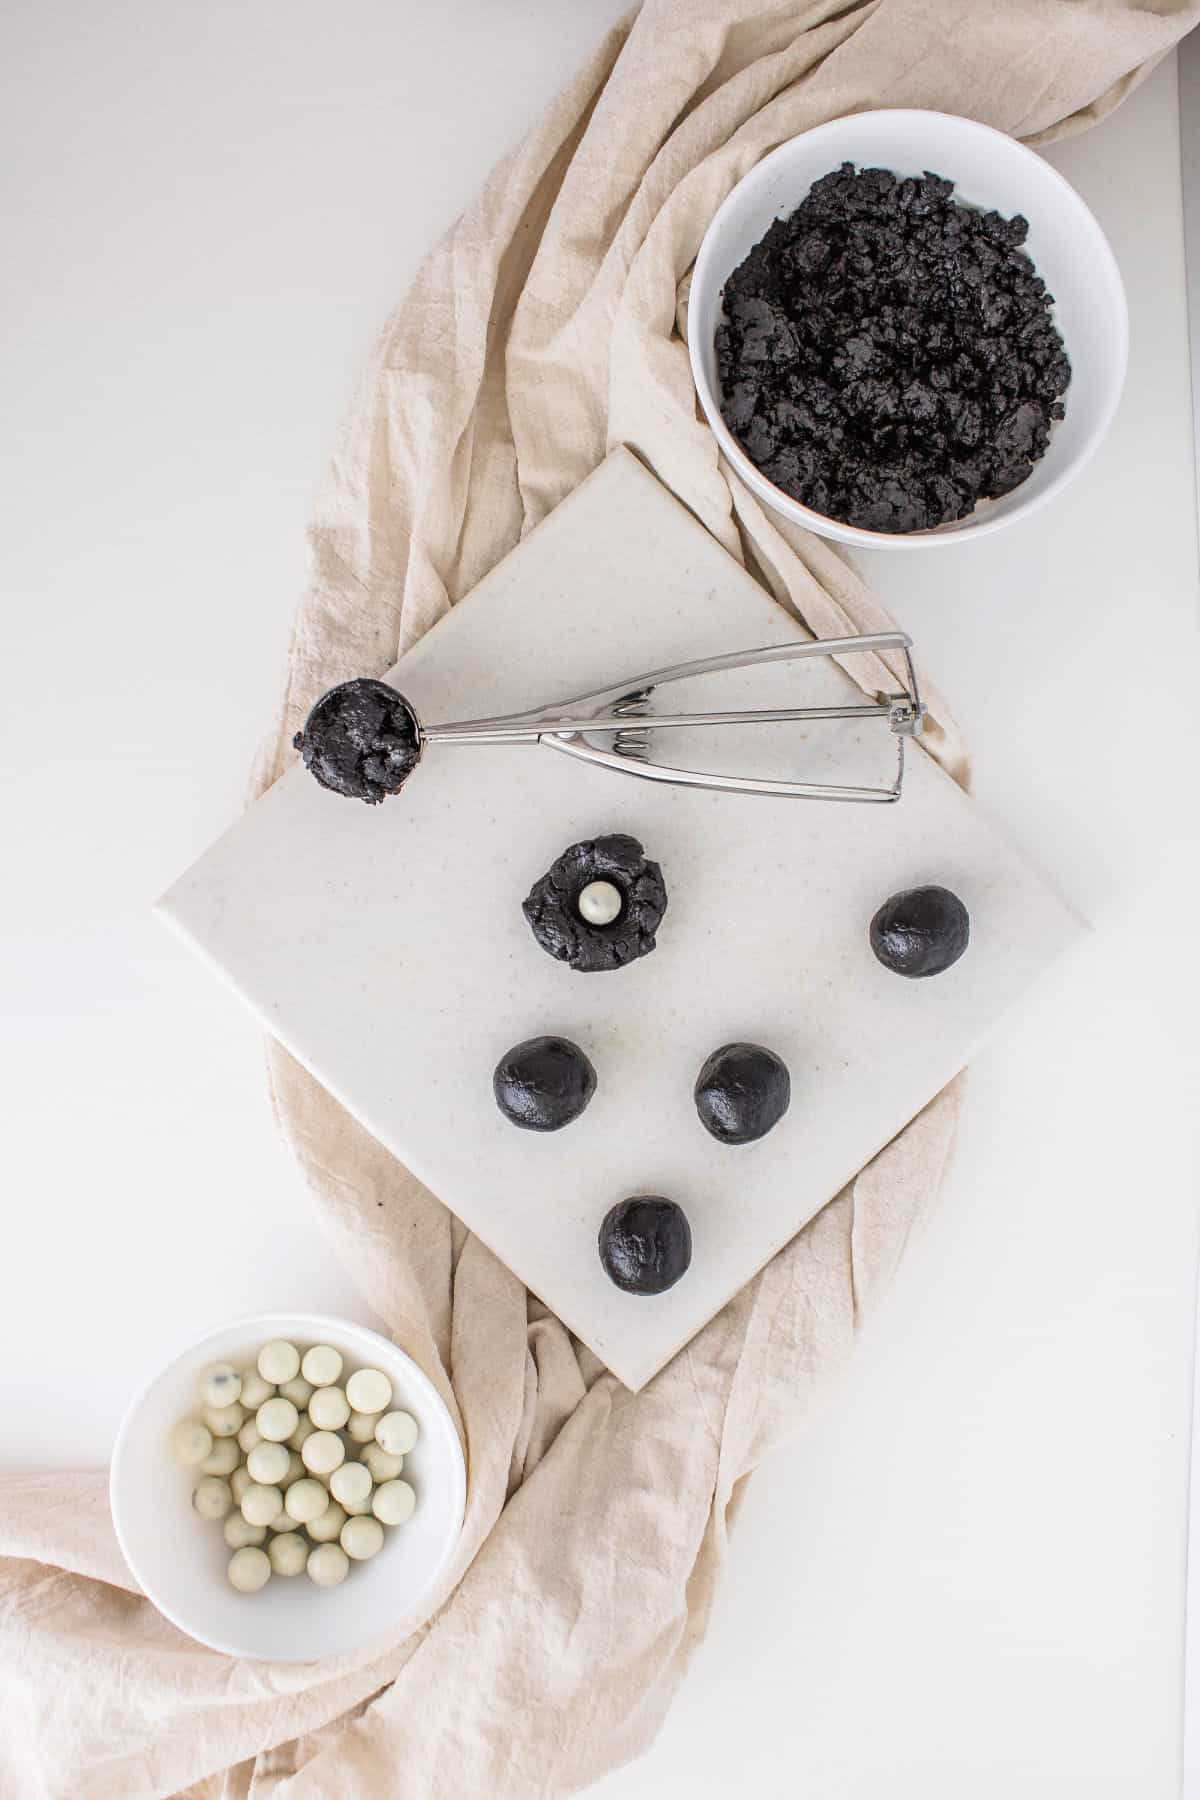
Form this mixture into balls. If you want to stick a Cookies-N-Creme Kiss in the center of each ball, now is the time.
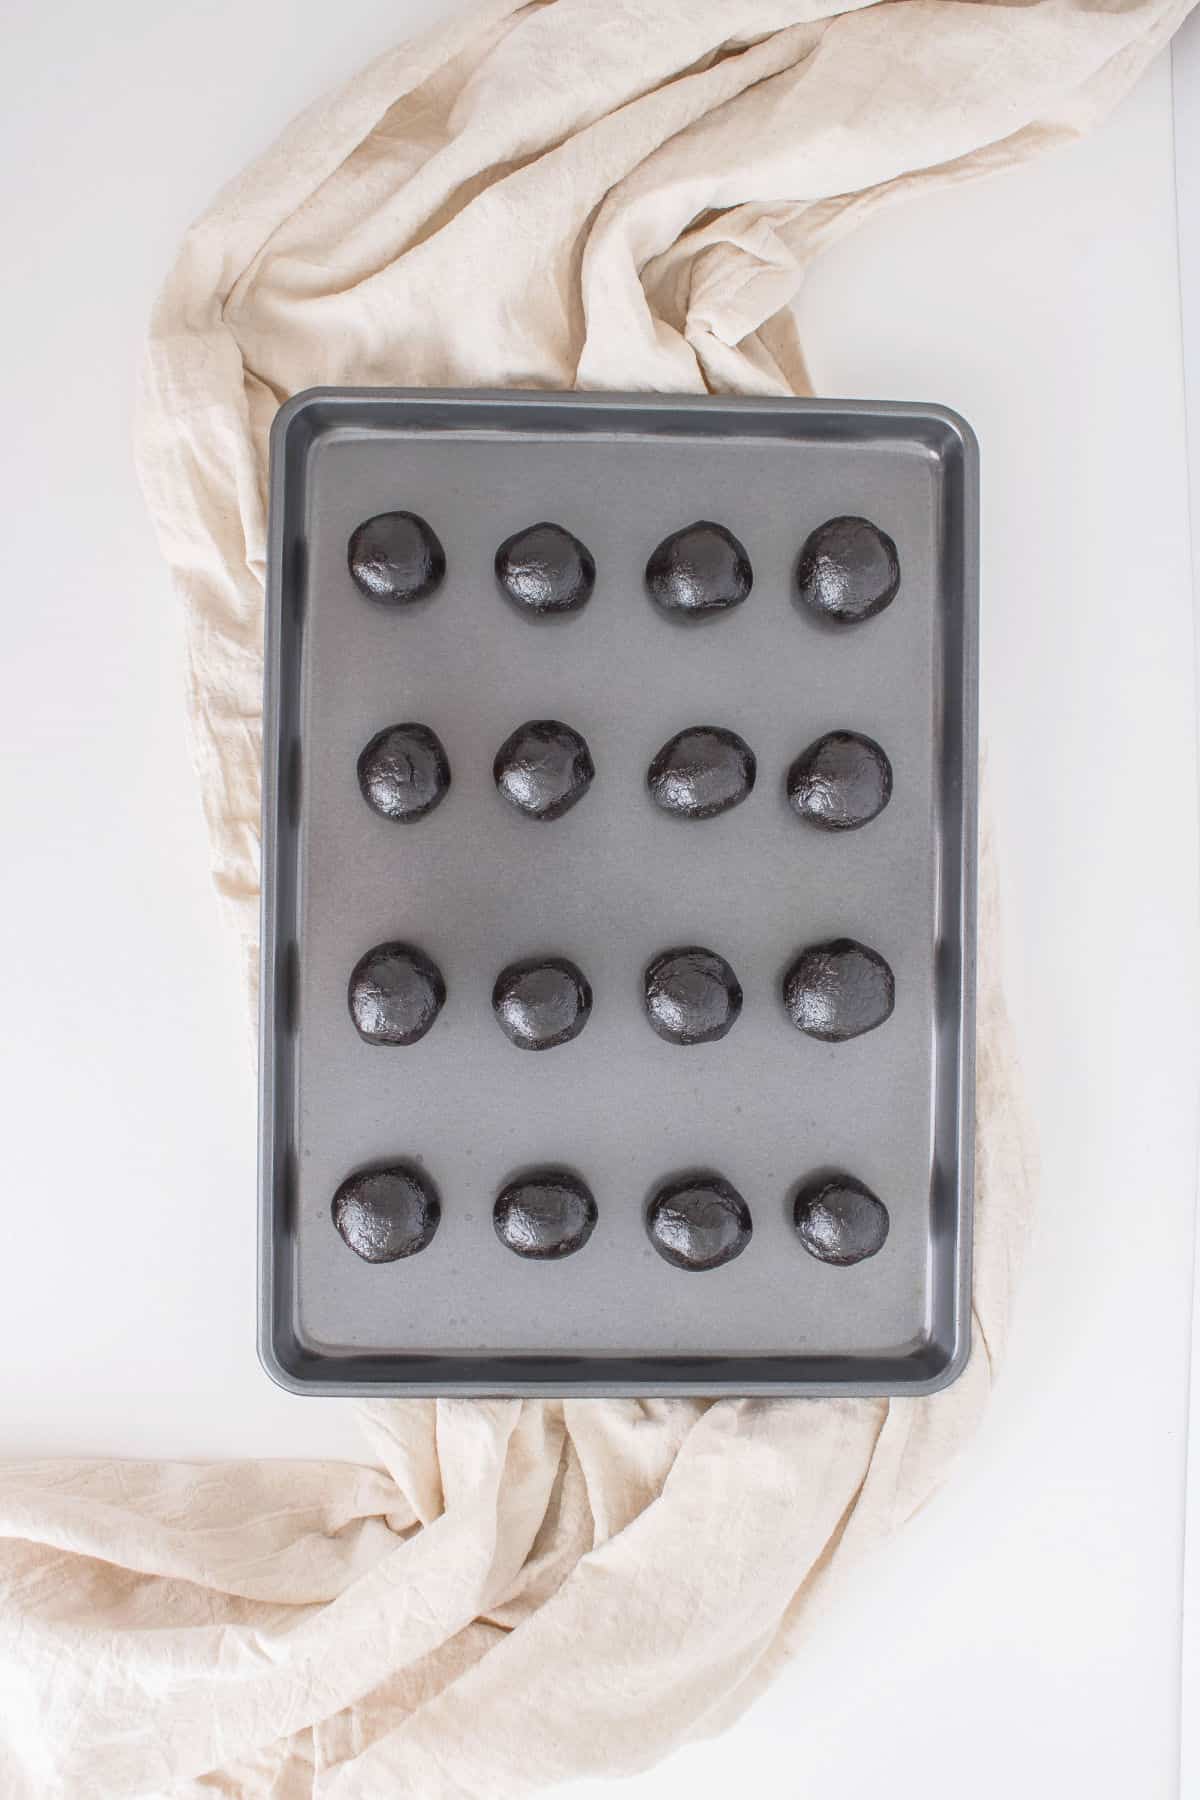
Spread the Oreo balls on a baking sheet lined with parchment paper and refrigerate them for at least one hour so that the chocolate coating sets. You could also place them in the freezer for about 25 minutes.
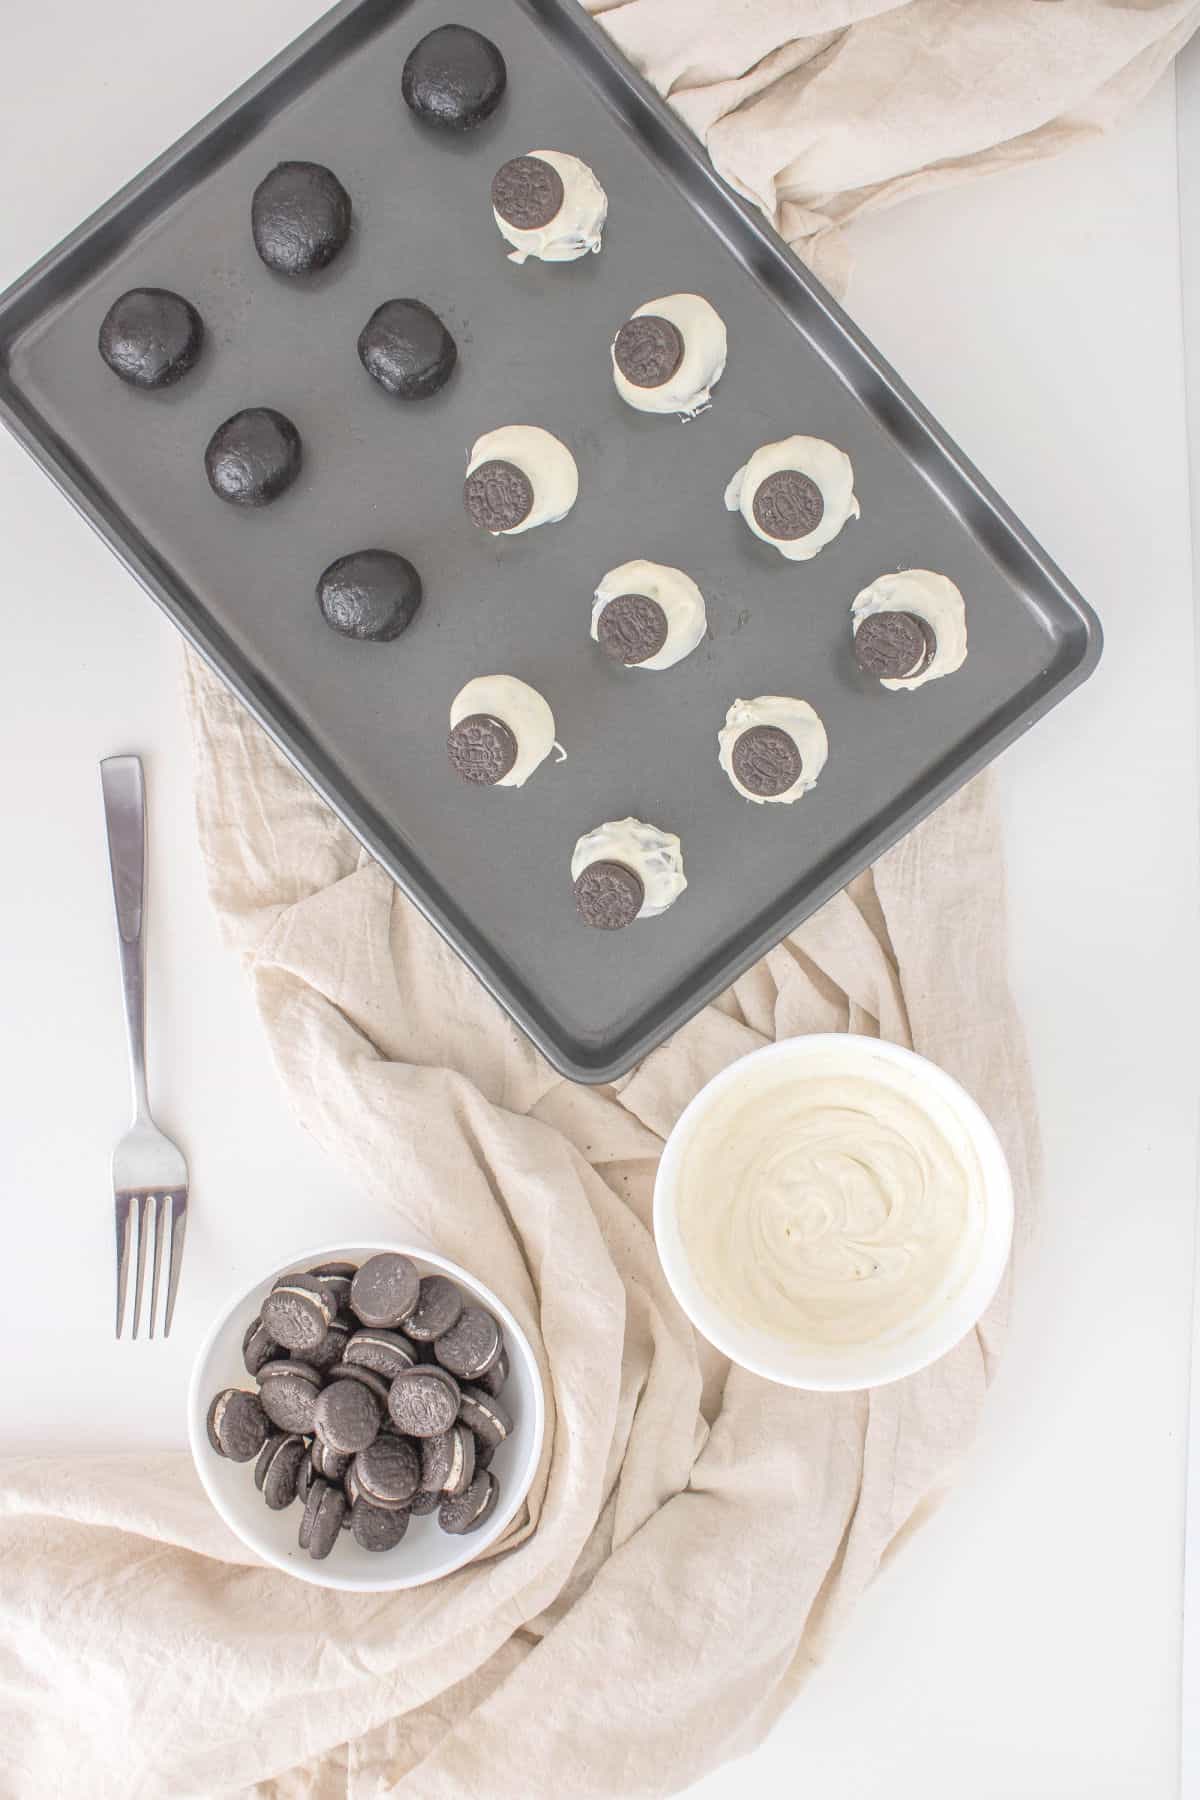
Melt the white chocolate bark. Dip the Oreo balls in the melted vanilla candy coating. Place them on a baking sheet as you go and add a mini Oreo or other crushed Oreo crumbs while the chocolate is still melted. Refrigerate them again for at least an hour before serving.
Full directions are in recipe card.
Variations & Substitutions
- White chocolate chips or white chocolate candy melts may be used to sub for the white chocolate bark.
- Use dark chocolate or milk chocolate instead of white chocolate for a different look.
- Decorate the outside with chocolate sprinkles instead of the mini Oreos.
- Take just the cookie part of the Oreo (not the creamy center) and crush those to sprinkle on your truffles for a different take.
- Seasonal sprinkles or party-theme sprinkles are always a welcome variation. This is also a perfect treat for baby showers and birthday parties.
- If you do not have a food processor, you can use a baggie and rolling pin to make the crushed cookies.

Timesaving Tips for Best Results
A safe way to melt chocolate is to microwave chocolate chips for 10-15 seconds each time until the chocolate is completely melted. You’ll need to stir with a spatula each time to help the chocolate melt and reduce lumps.
Decorate the dipped truffles as fast as possible because the chocolate that comes in contact with the cold Oreo ball will harden fast, and you need the chocolate melted enough to add the mini Oreo or other decoration on the surface so that it will stick.
If you want to add an extra crunchy texture to the center of your balls, add one Hershey’s Cookies ‘N’ Creme Kiss to the center of the ball. Grab a ball of Oreo dough and press in the center to make a hole in the middle. Then add the Hershey’s Cookies ‘N’ Creme chocolate and manually cover it with the Oreo dough using your hands.
Allow gravity to drain the excess chocolate off each ball before placing it on the baking sheet and adding decorations.
More Desserts Made With Oreo Cookies
For more Oreo Desserts, try these Oreo Rice Krispies – they are a fun and easy treat that everyone loves.
No Bake Oreo Balls
Equipment
- Parchment or Wax Paper
Ingredients
- 24 Oreo cookies
- 4 oz cream cheese cold and cubed
- 1 cup melted white chocolate
- 12 mini Oreo cookies
- 12 Hershey's Cookies 'N' Creme Drops Optional: This added ingredient adds a crunchy texture to the center of the balls.
Instructions
- Add 24 Oreo cookies to a food processor and pulse for about 30 seconds, or until the mixture becomes a fine cookie crumb.
- Add the cubed cream cheese to the food processor and pulse for 30 seconds, or until the mixture has a cookie dough consistency.
- Using a cookie scoop, make balls with the Oreo mixture. If you want to add an extra crunchy texture to the center of your balls, add one Hershey's Cookies 'N' Creme Drop/Bite/Kiss to the center of the ball. Grab a ball of Oreo dough and press in the center to make a whole in the middle. Then add the Hershey's Cookies 'N' Creme chocolate and manually cover it with the Oreo dough using your hands.
- Align the Oreo balls on a lined baking sheet and place then in the refrigerator for at least one hour, or place them in the freezer for 25 minutes.
- Melt your chocolate according to the directions on the package directions. Usually, a safe way to melt chocolate is to microwave chocolate chips for 10-15 seconds each time until the chocolate is completely melted. You’ll need to stir with a spatula each time to help the chocolate melt and reduce lumps.
- When the chocolate has a creamy consistency, dip the Oreo balls and use a fork to rotate the ball and cover all the surface with white chocolate. Then, allow the gravity to drain the excess of chocolate and place each ball on the prepared baking sheet again. Make sure to align the Oreo balls, separated from each other.
- Once you put the Oreo ball on the tray, place a mini Oreo cookie on top of the Oreo balls while the chocolate is still melted. Repeat this process for one each of the balls. This particular step should be done as fast as possible because the chocolate that comes in contact with the cold Oreo ball will harden fast, and you need the chocolate melted enough to add the mini Oreo on the surface.
- Once again, put the Oreo balls in the refrigerator for one hour at least before serving. Enjoy!
Notes
Nutrition
I hope you enjoyed this no bake treat recipe!
If you are not yet subscribing to my CELEBRATE THE SEASON newsletter, you can subscribe here. I share delicious recipes for the season and a few things that I don’t share here. I email you only once a week as I know how valuable your time is and respect that tremendously!