Easy Rainbow Popsicles Recipe
This post may contain affiliate links.

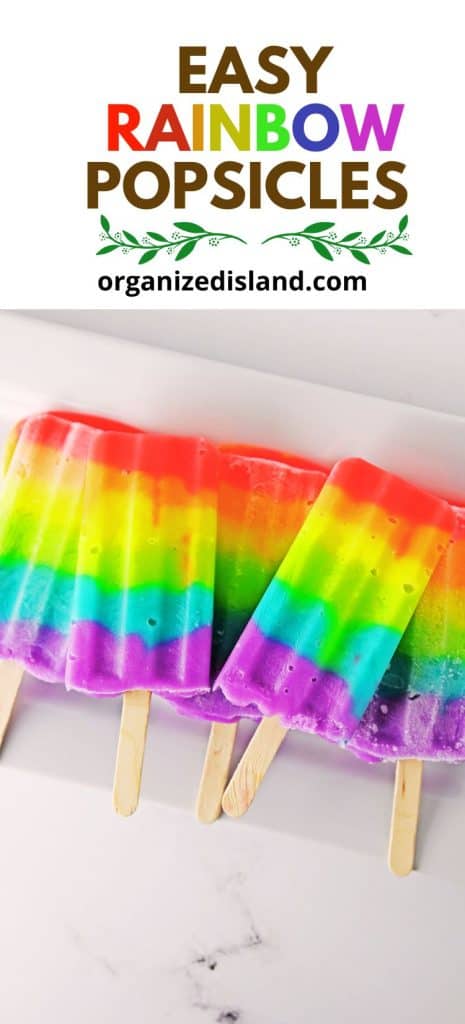
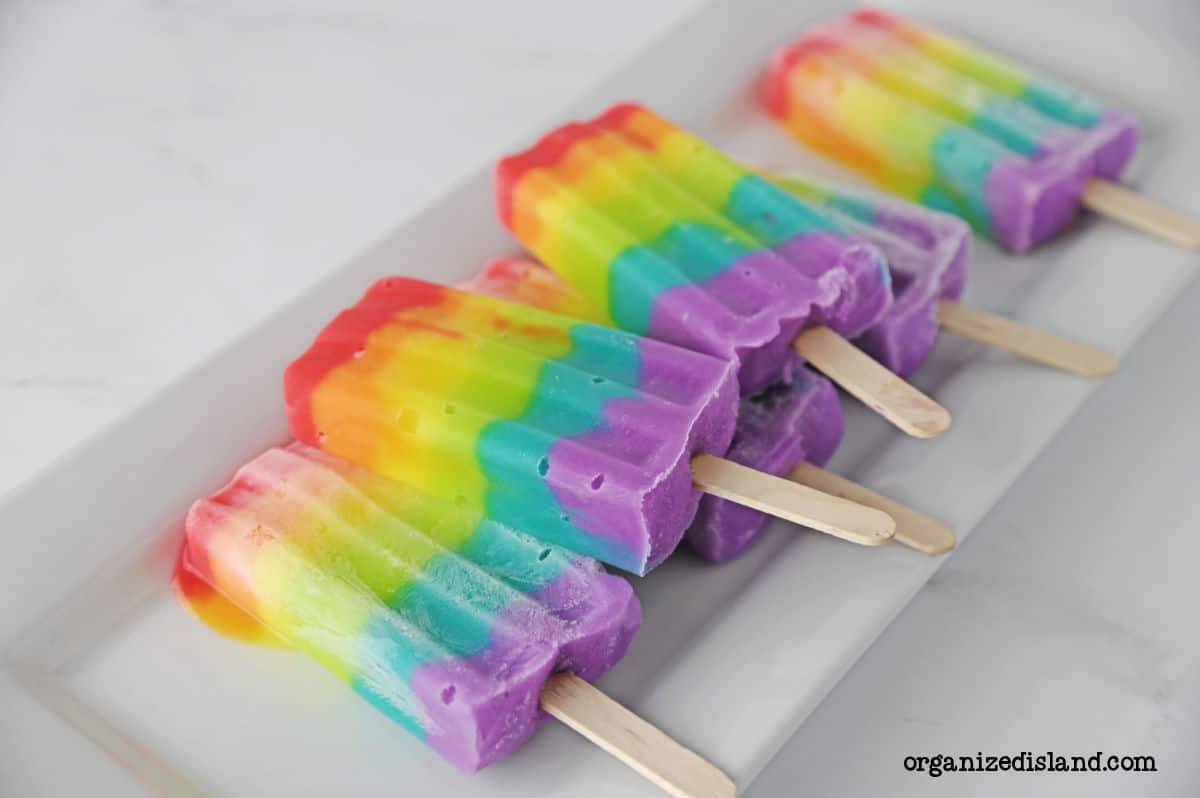
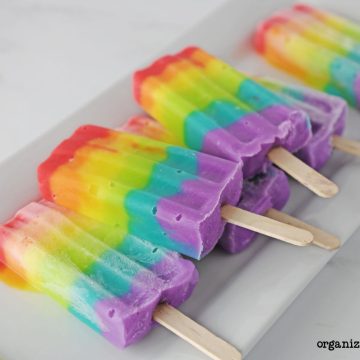
Rainbow popsicles are the perfect frozen treat to beat the heat on hot days. This homemade popsicle recipe will not only cool you down but also delight your taste buds with its vibrant colors and refreshing flavors.
Made with simple ingredients and vibrant colors, these healthy rainbow popsicles are a big hit for the whole family. Whether you’re enjoying them poolside, at a picnic, or as an after-school treat, these rainbow popsicles are sure to bring a smile to your face.
This is one of our easy ice cream recipes you will
Why You’ll Love This Recipe:
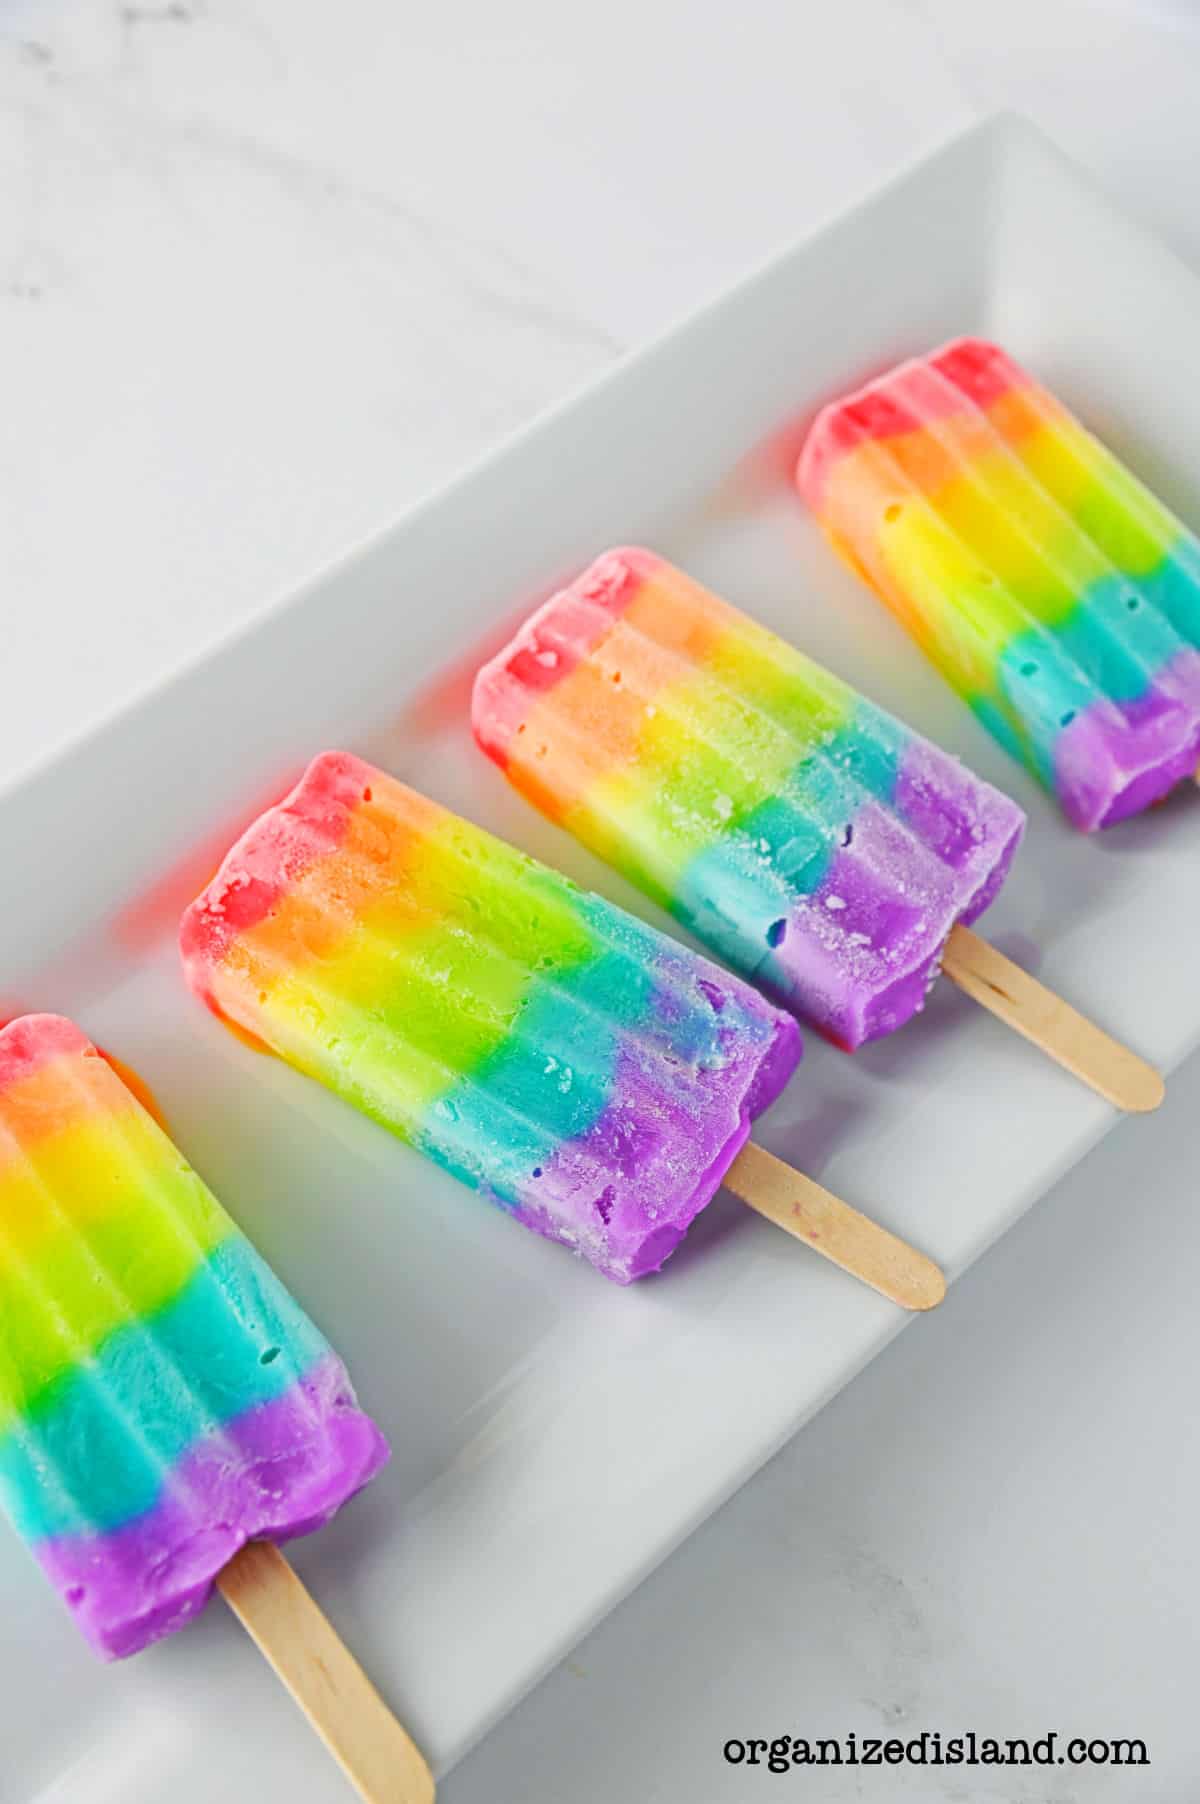
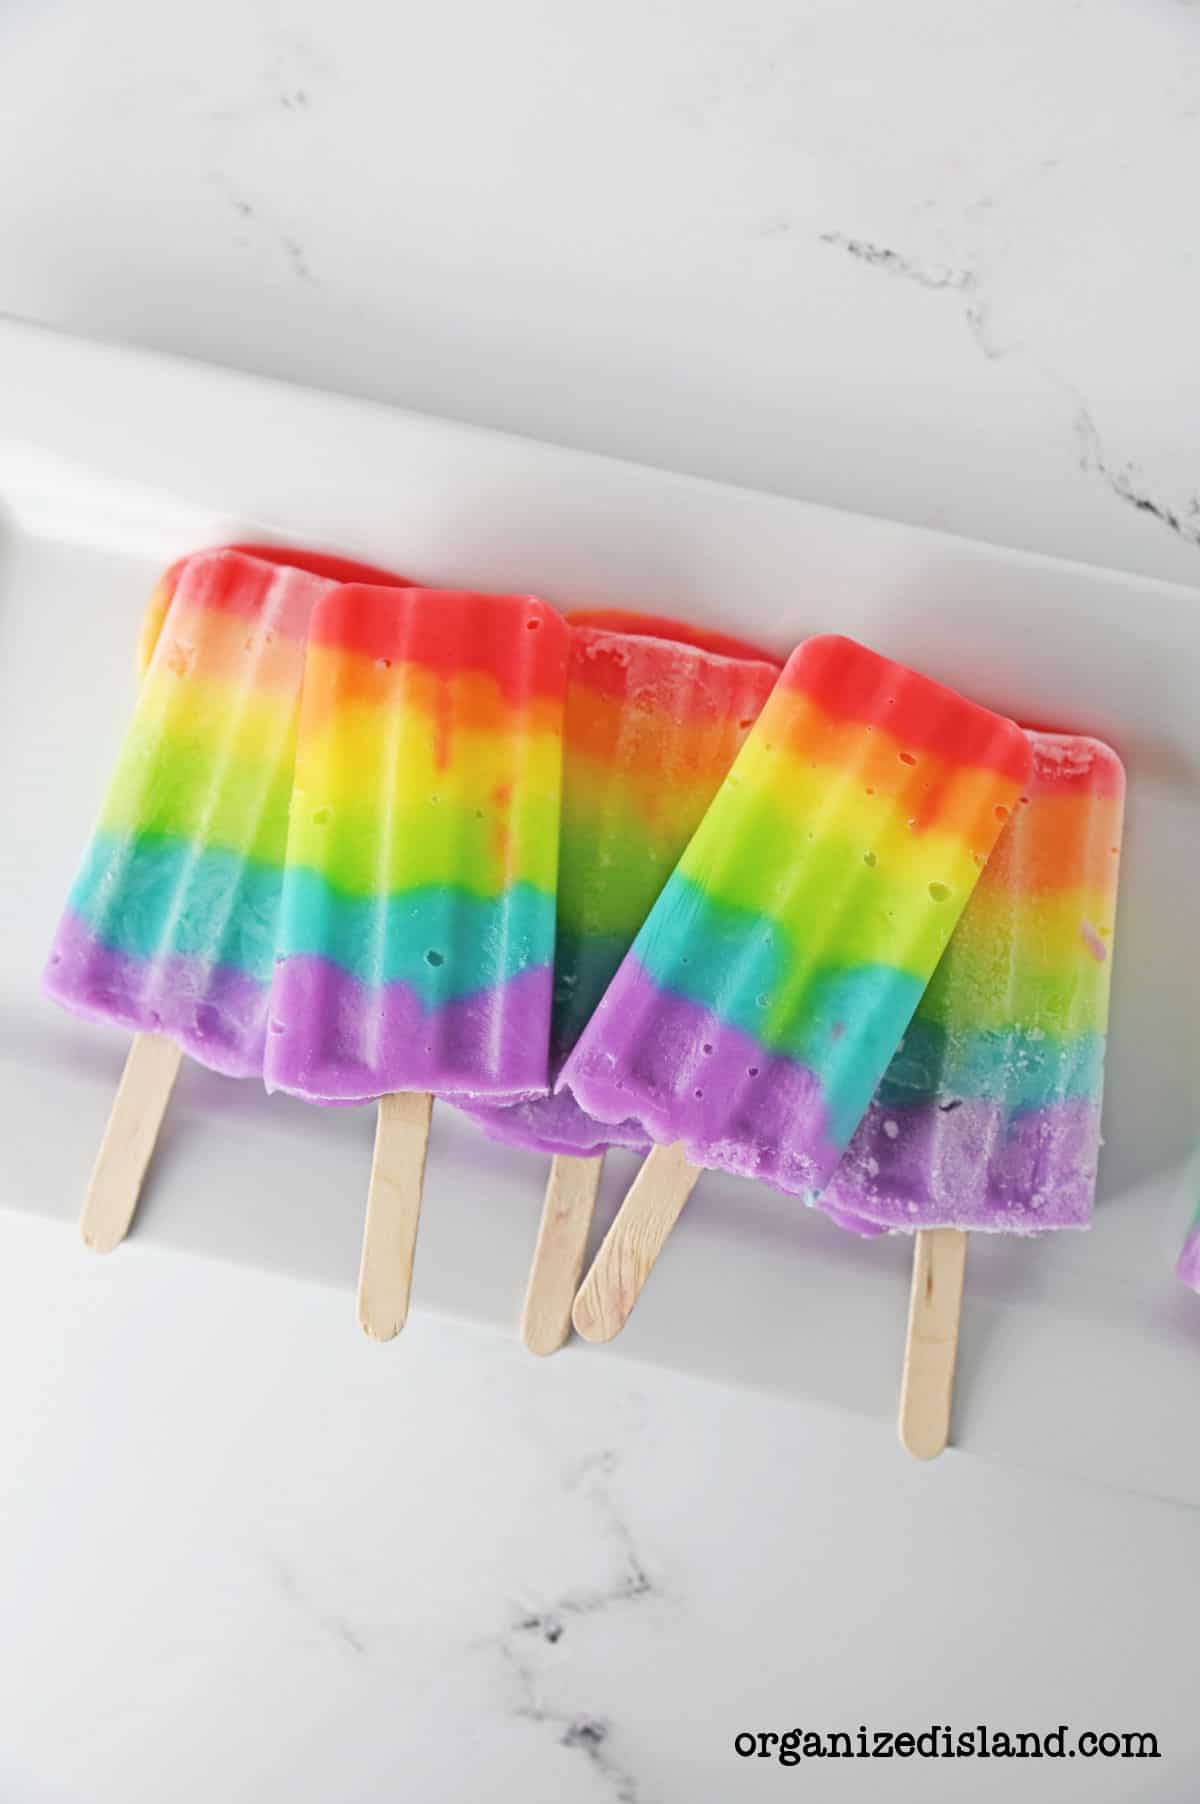
Fun and visually appealing: The beautiful rainbow layers make these popsicles a feast for the eyes.
Refreshing treat: Each layer offers a different fun color and delicious cheesecake flavor, creating a delightful taste experience. Perfect on a hot summer day!
Easy to make: With three simple ingredients and straightforward instructions, this homemade popsicles recipe is perfect for beginners and kids. Ice cream pops make for an easy treat to make ahead too.
Ingredients for this rainbow popsicle recipe
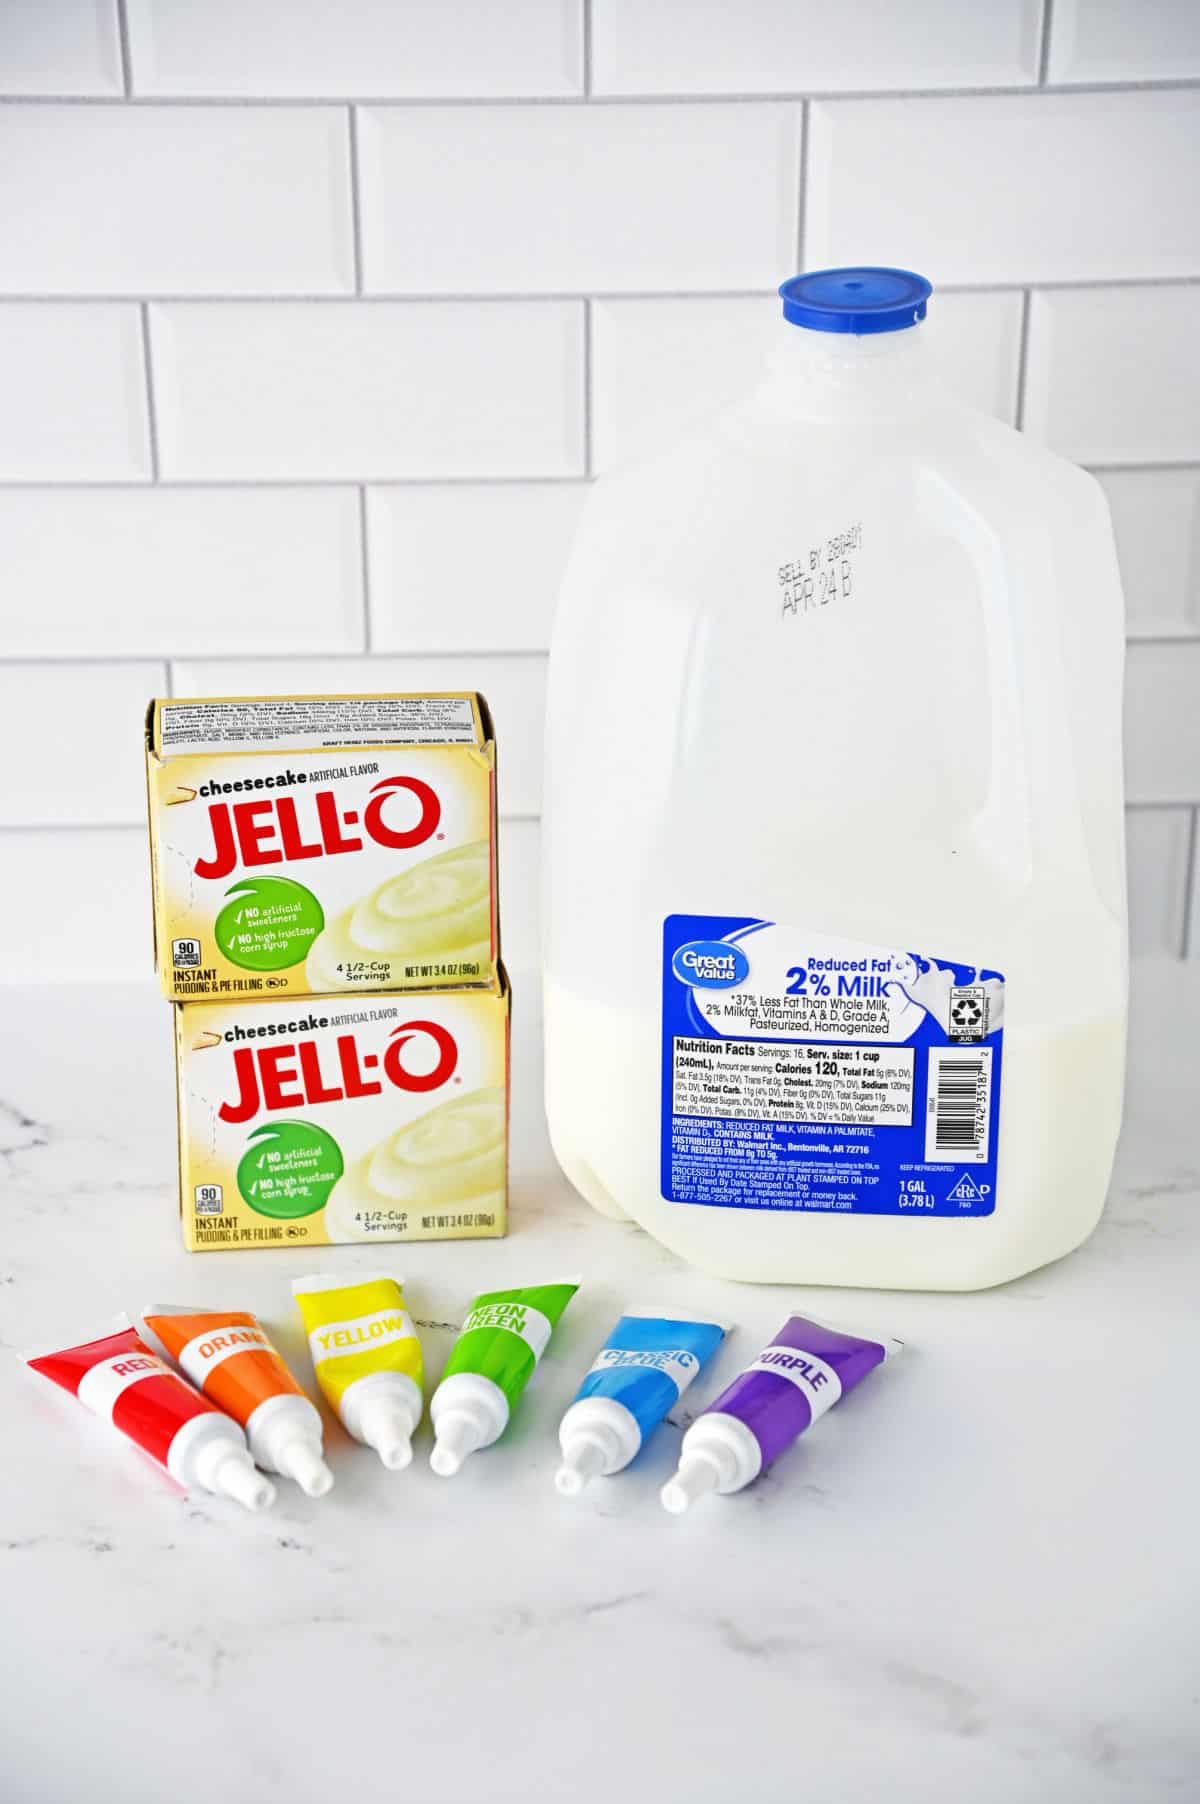
- Boxes of cheesecake pudding mix
- Milk – whole or 2% works best
- Gel food coloring – red, orange, yellow, green, blue, and purple
Equipment and kitchen tools
- Mixing bowls
- Whisk
- Popsicle mold
- Popsicle sticks
- Piping bags
How to make this rainbow popsicles recipe
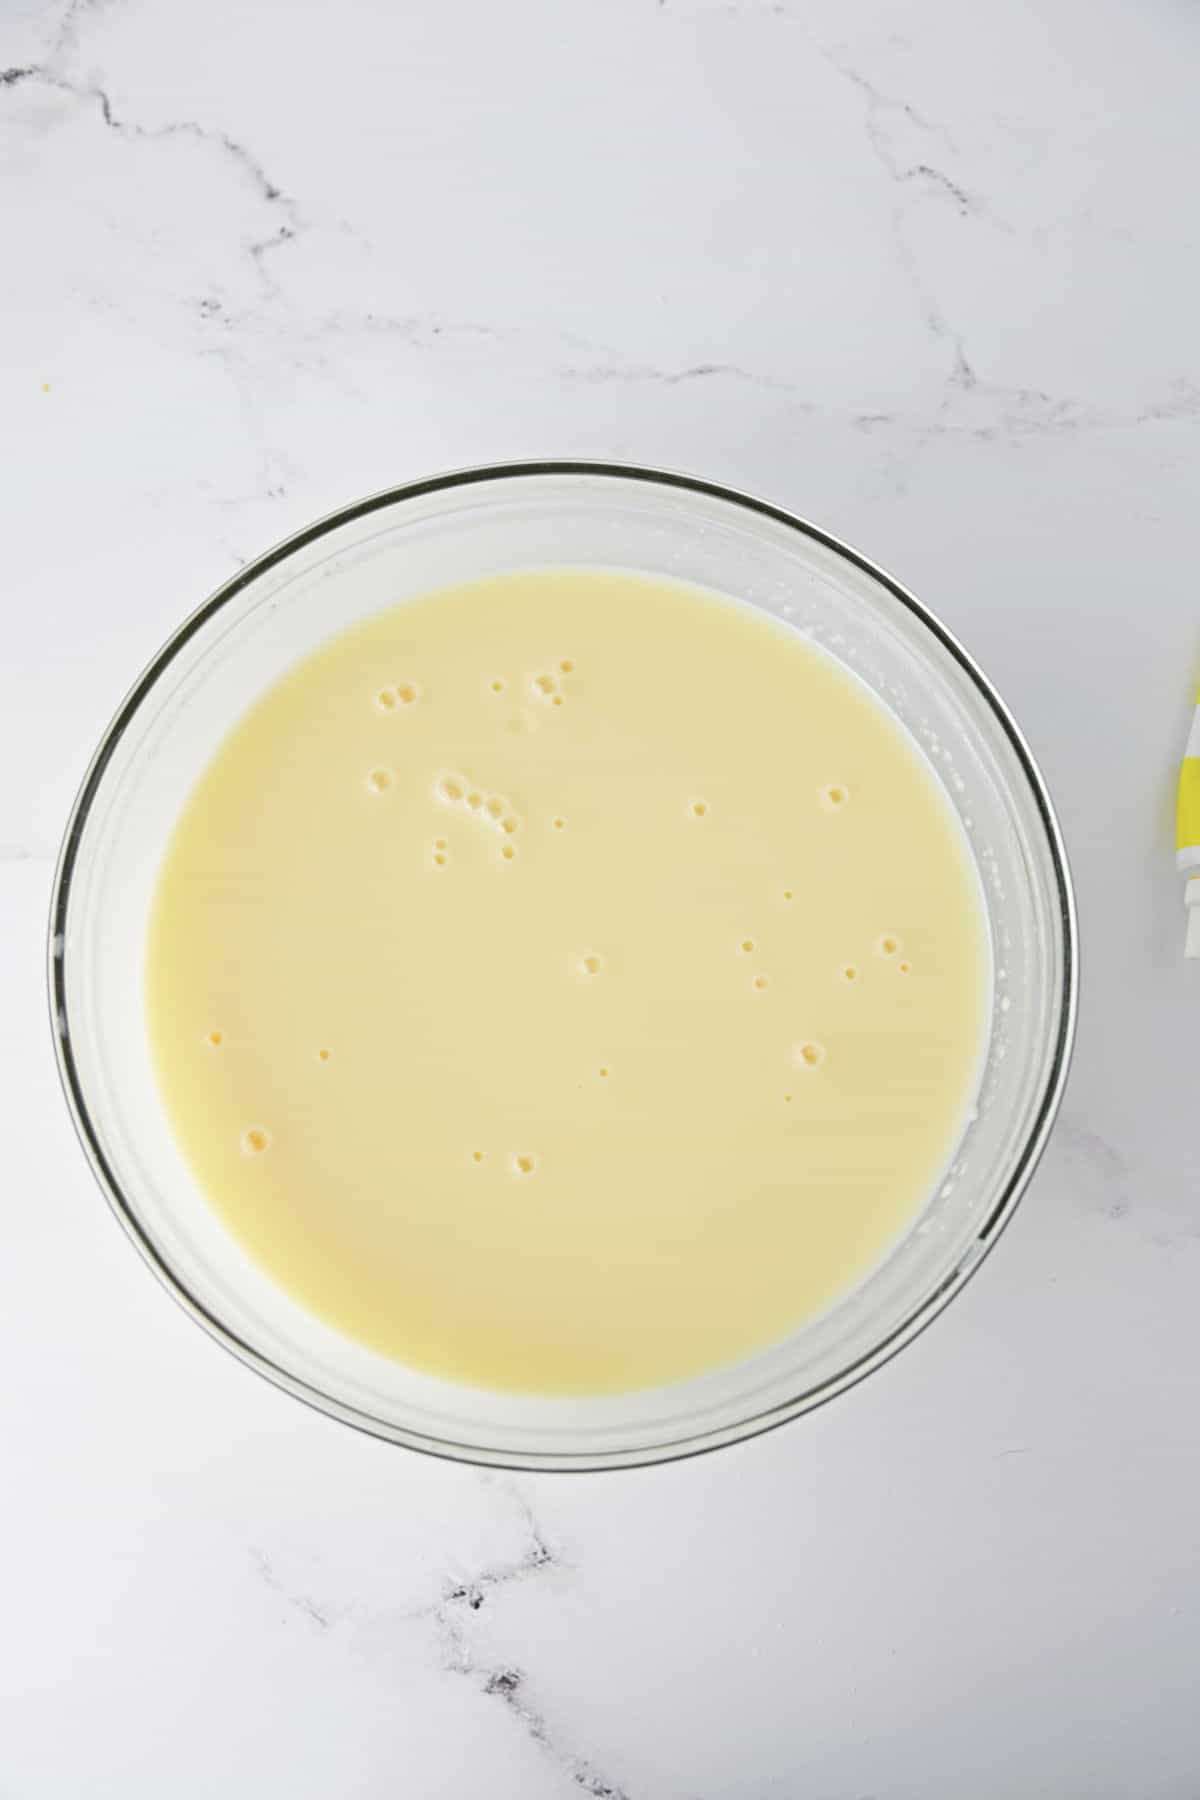
Step 1 – In a large bowl, whisk together pudding mix and milk, about 2 minutes.
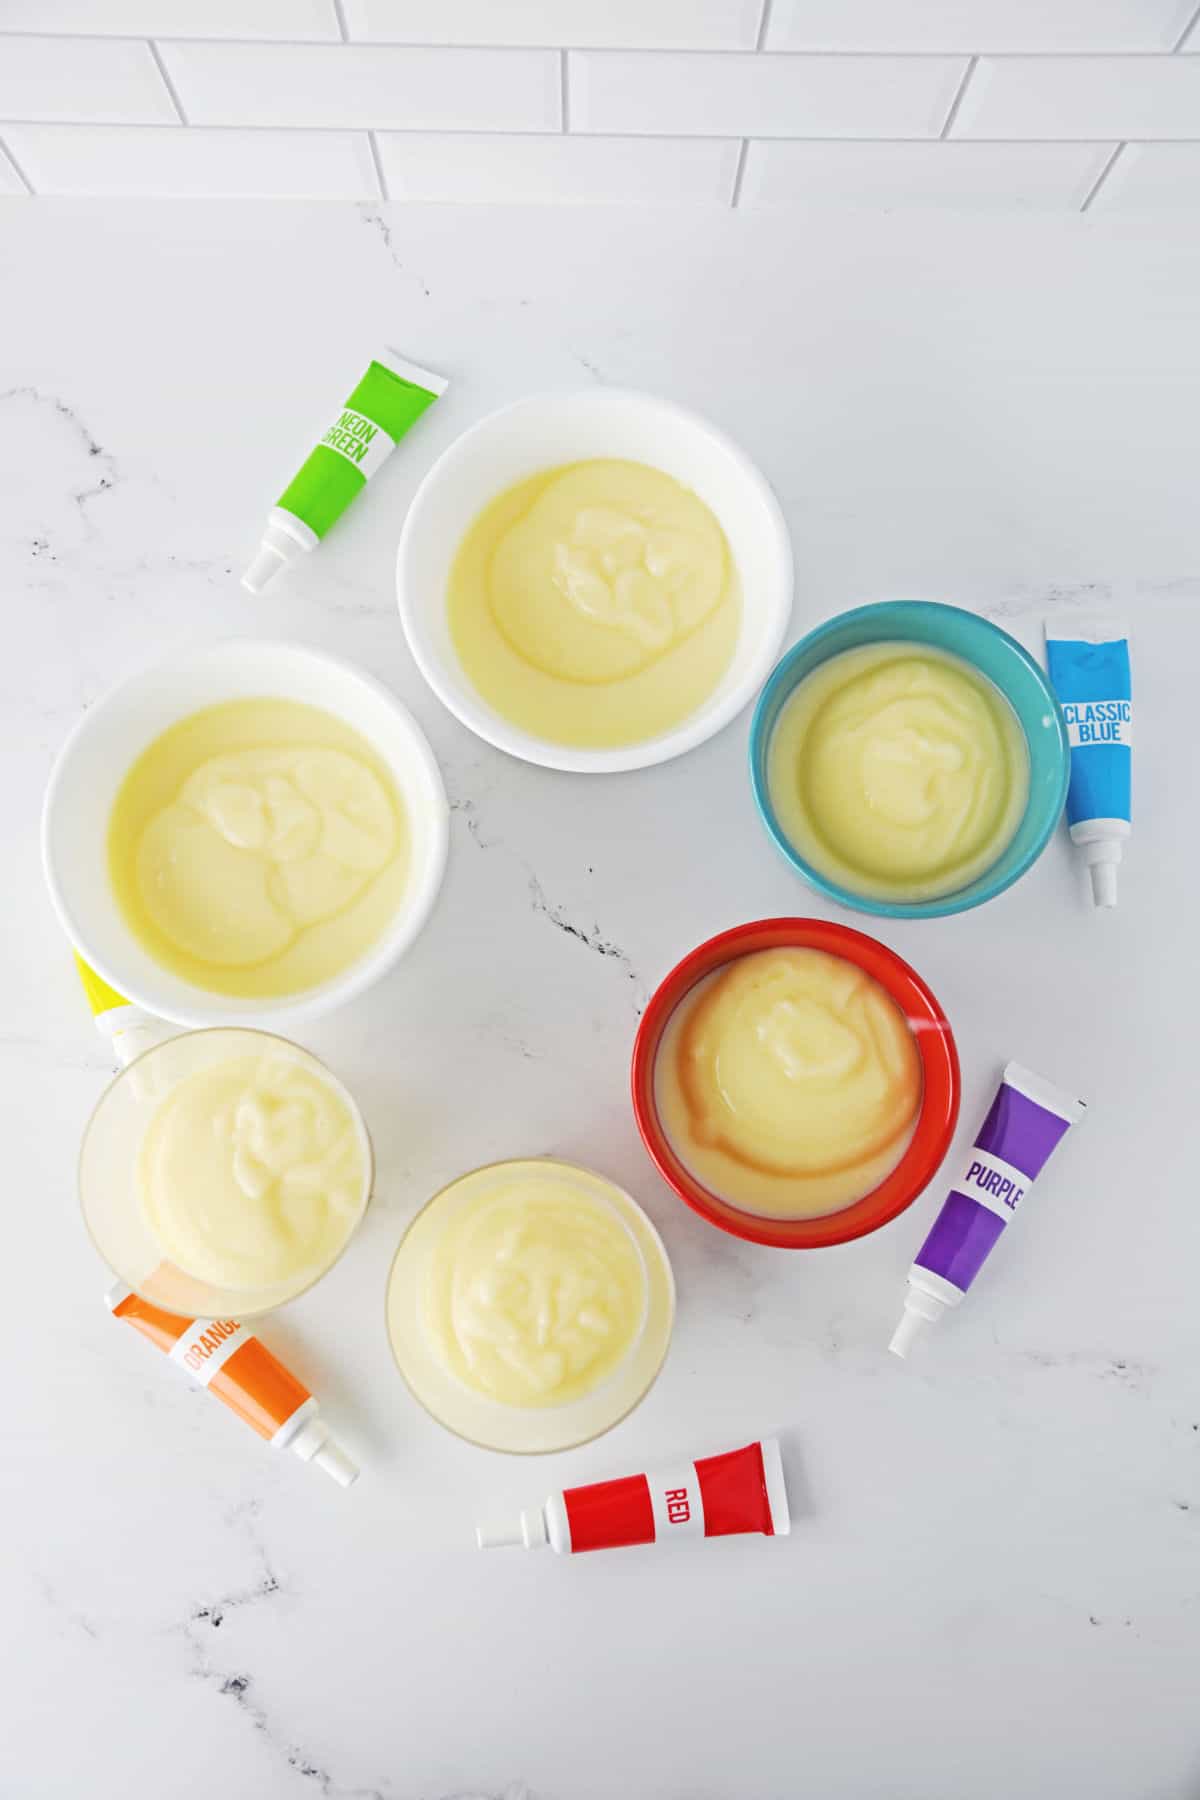
Step 2 – Divide the pudding evenly between 6 smaller bowls or containers.
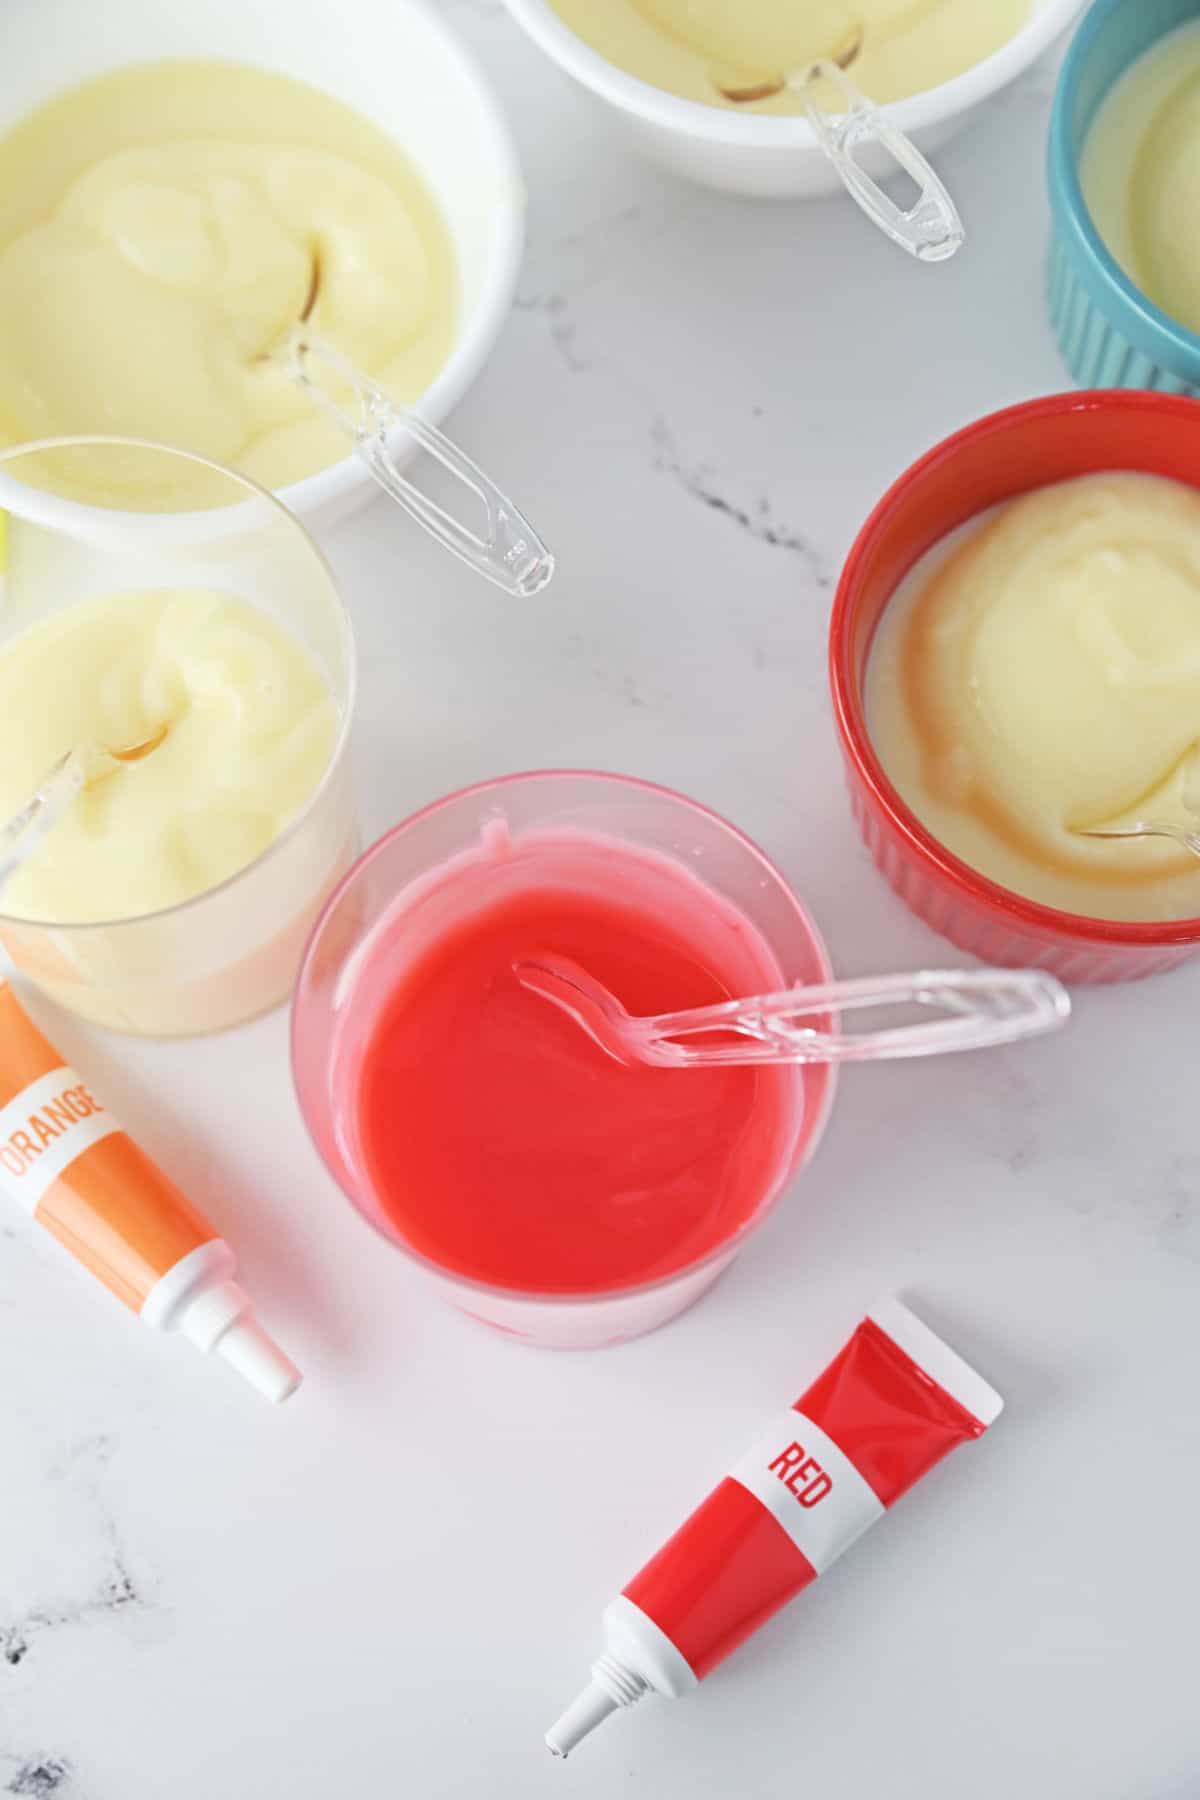
Step 3 – Add 2 drops of each different color into different containers, and stir to color the pudding mix.
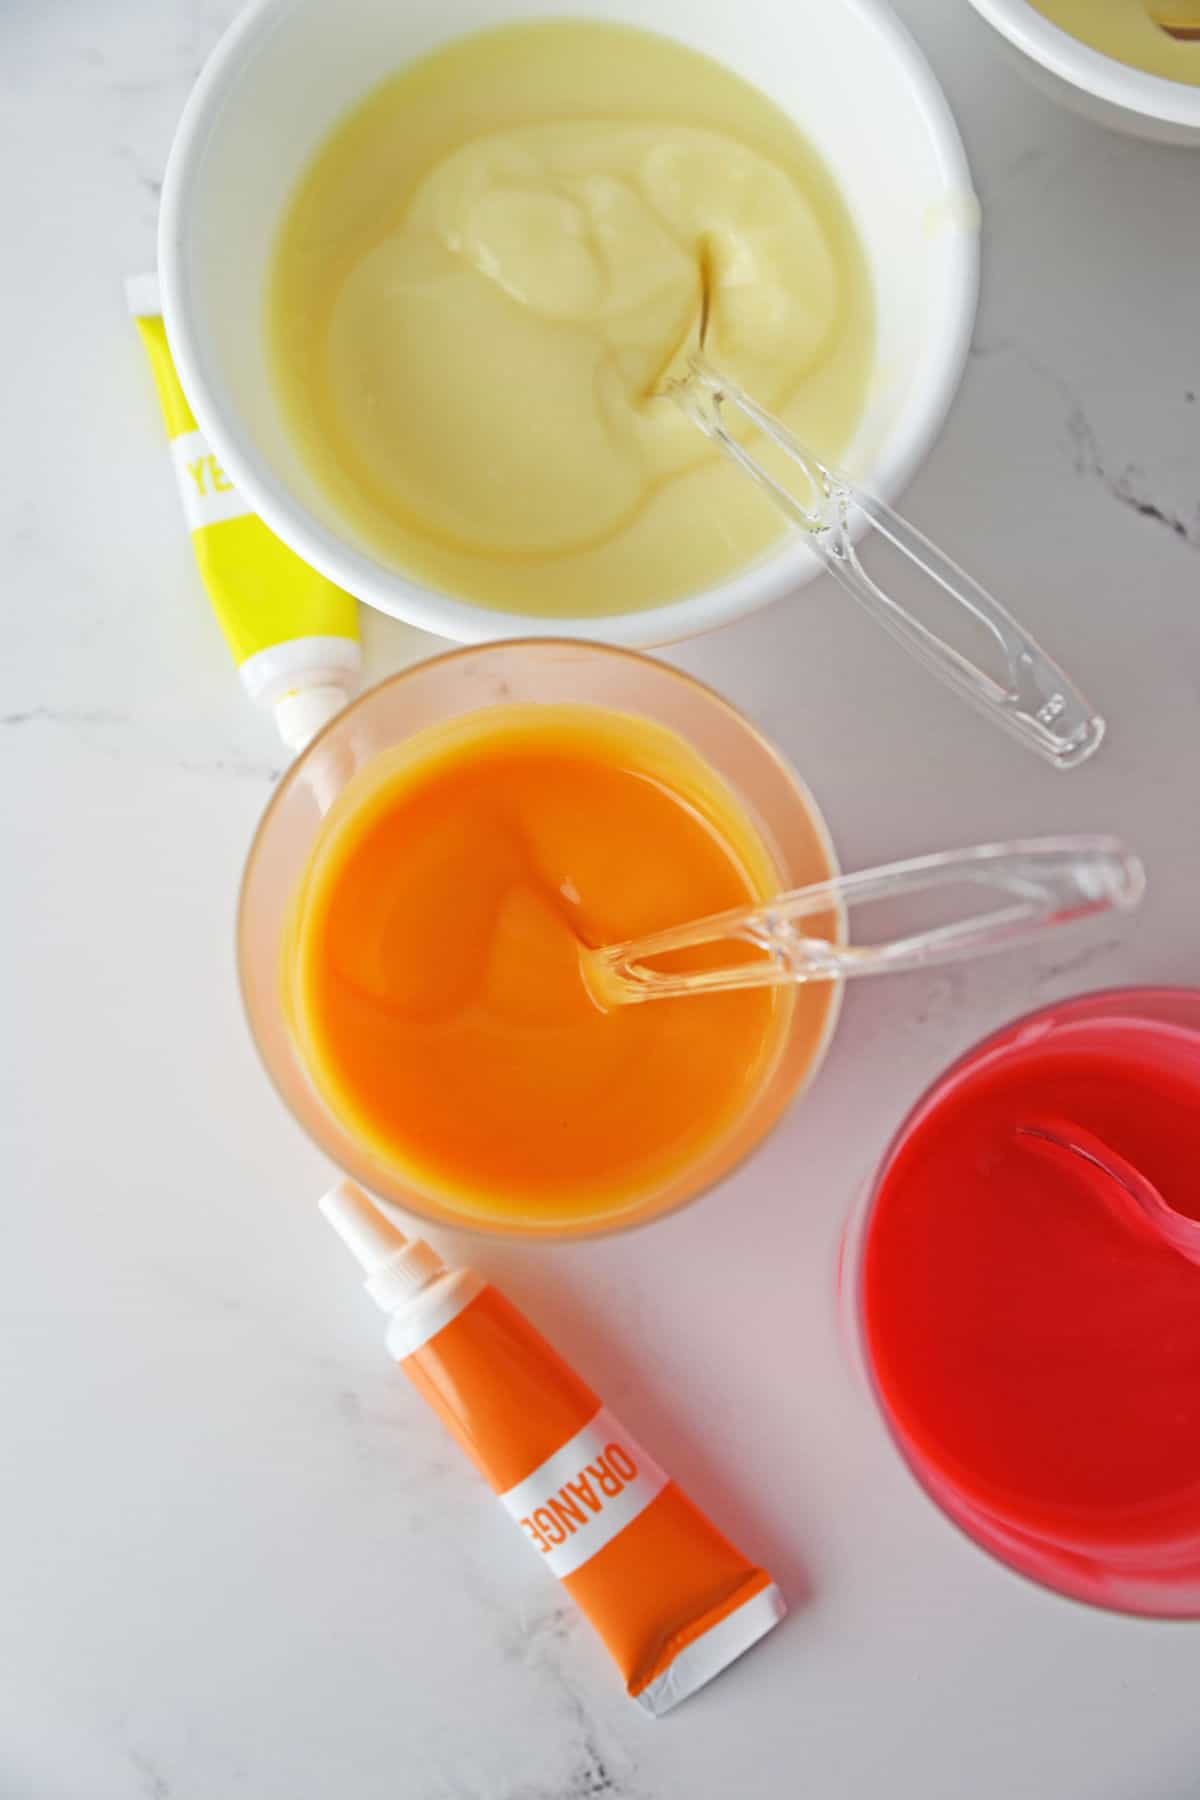
Step 4 – To add the pudding to your popsicle molds, pour each color into a separate frosting piping bag. This is the easiest way to get the colors in without them smearing the sides of the molds and blurring the colors too much.
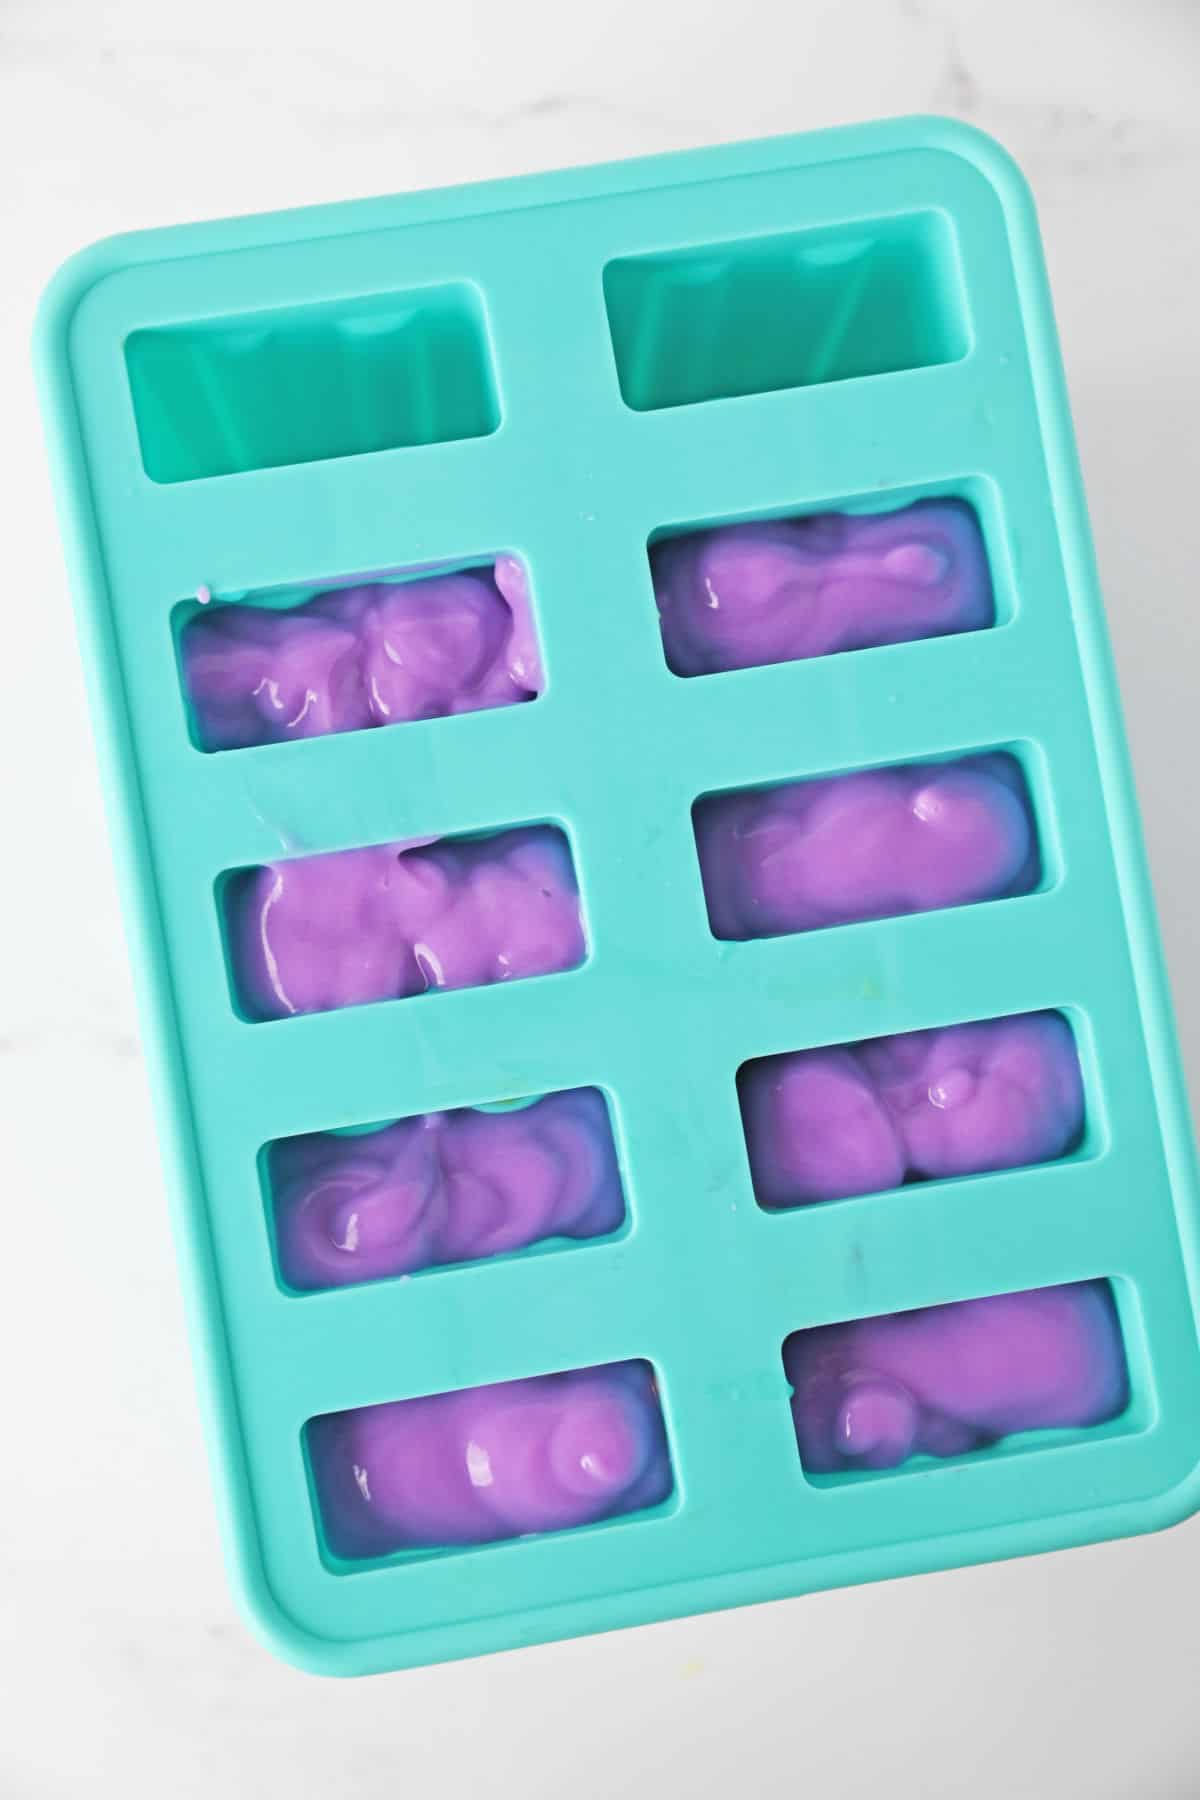
Step 5 – Snip off the tip and divide the pudding between the 8 molds, starting with the red layer first, then the orange layer, yellow layer, green layer, blue layer, and purple layer.
Each popsicle will need about 4—5 teaspoons of each color for each layer, you will most likely have just a bit of extra left of each color that you can discard, or use up in another tray.
Save The Recipe!
Once you have all of the layers done, insert popsicle sticks to your molds and freeze the popsicles overnight.
Tips for best results
- Use gel food coloring for vibrant and long-lasting colors. Feel free to experiment with different colors!
- If you don’t have piping bags, you can use small plastic bags and cut off a corner for pouring.
- Freeze the popsicles overnight to ensure they are completely frozen and hold their shape well.
- To create a smooth transition between layers, freeze each layer for about 10-15 minutes before adding the next layer. To create distinct layers, it’s crucial to freeze each layer individually before adding the next one. This ensures that the layers remain separate and don’t mix together.
Substitutions and Variations
- Instead of cheesecake pudding mix, you can use vanilla or any other pudding flavor you prefer.
- Experiment with different fruit juices or fruit purees to create unique flavors for each layer.
- For a dairy-free version, substitute milk with coconut milk or almond milk.
Recipe FAQs
No, you still need to use pudding for this recipe, but you can definitely add in some fruit puree or blended frozen fruit to add extra flavor. However, keep in mind that using fresh fruit might result in a slightly different texture and consistency.
Once frozen, you can store the popsicles in an airtight container or freezer bag for up to 2 months. However, for the best taste and texture, it’s recommended to consume them within 2 weeks.
Absolutely! If you prefer a simpler approach, you can pour one color of the pudding mix into the popsicle molds and freeze them. You can experiment with different flavors and colors for each batch.
A: The recipe can be easily adjusted to accommodate dietary restrictions. For a dairy-free version, use non-dairy milk and pudding mix. You can also opt for a sugar-free pudding mix or if you are watching your sugar intake.
Yes, you can use various types of popsicle molds, such as silicone molds, Dixie cups, or even ice cube trays with popsicle sticks. The key is to make sure they are freezer-safe and have space for multiple layers.
More great summer dessert recipes
Rainbow Popsicles
Equipment
- small bowls
- Piping bags recommneded
Ingredients
- 2 3.4 oz. boxes cheesecake pudding mix
- 4 cups milk
- Gel food coloring in red orange, yellow, green, blue, and purple
Instructions
- In a large bowl, whisk together pudding mix and milk, about 2 minutes.
- Divide the pudding evenly between 6 smaller bowls or containers.
- Add 2 drops of each different color into different containers, and stir to color the pudding mix.
- To add the pudding to your popsicle molds, pour each color into a separate frosting piping bag. This is the easiest way to get the colors in without them smearing the sides of the molds and blurring the colors too much.
- Snip off the tip and divide the pudding between the 8 molds, starting with red first, then orange, yellow, green, blue, and purple.
- Each popsicle will need about 4-5 teaspoons of each color for each layer, you will most likely have just a bit of extra left of each color that you can discard, don’t feel like you have to use up all of each color.
- Once you have all of the layers done, add your popsicle sticks to your molds and freeze the popsicles overnight.
Notes
Nutrition
If you are not yet subscribing to my CELEBRATE THE SEASON newsletter, you can subscribe here. I share easy recipes for the season that the entire family is sure to love and also a few things that I don’t share here. I will email you only once a week as I know how valuable your time is and respect that tremendously!
I think my vegan kiddos will love this as it’s so pretty and colorful.
Thank you for sharing your links with us at #271 SSPS Linky. See you again next week.
What a fun and festive recipe! These look perfect for a hot summer day! I am excited to feature your post at the Senior Salon Pit Stop link party tomorrow. Thank you for joining us! Sharing on Facebook and pinned.
Hugs,
Maria @ kraftyplanner.com
You had me at cheesecake pudding! Not what I was expecting, and so happy I checked out your recipe. Cannot wait to try it!
Thanks Cara!
OMGSH! FABULOUS, Raquel.
We will be featuring you starting Wednesday at the Creative Crafts Linky Party! Pinned and shared!
Creatively, Beth
That is so exciting – thank you!
These are just so fun! And very colorful too. This post will be a feature this week. #HomeMattersParty
Thank you so much Donna!!!
I love this Rainbow Popsicles recipe because it’s fun, colorful, and tastes amazing! It’s the best summer treat I’ve ever had!