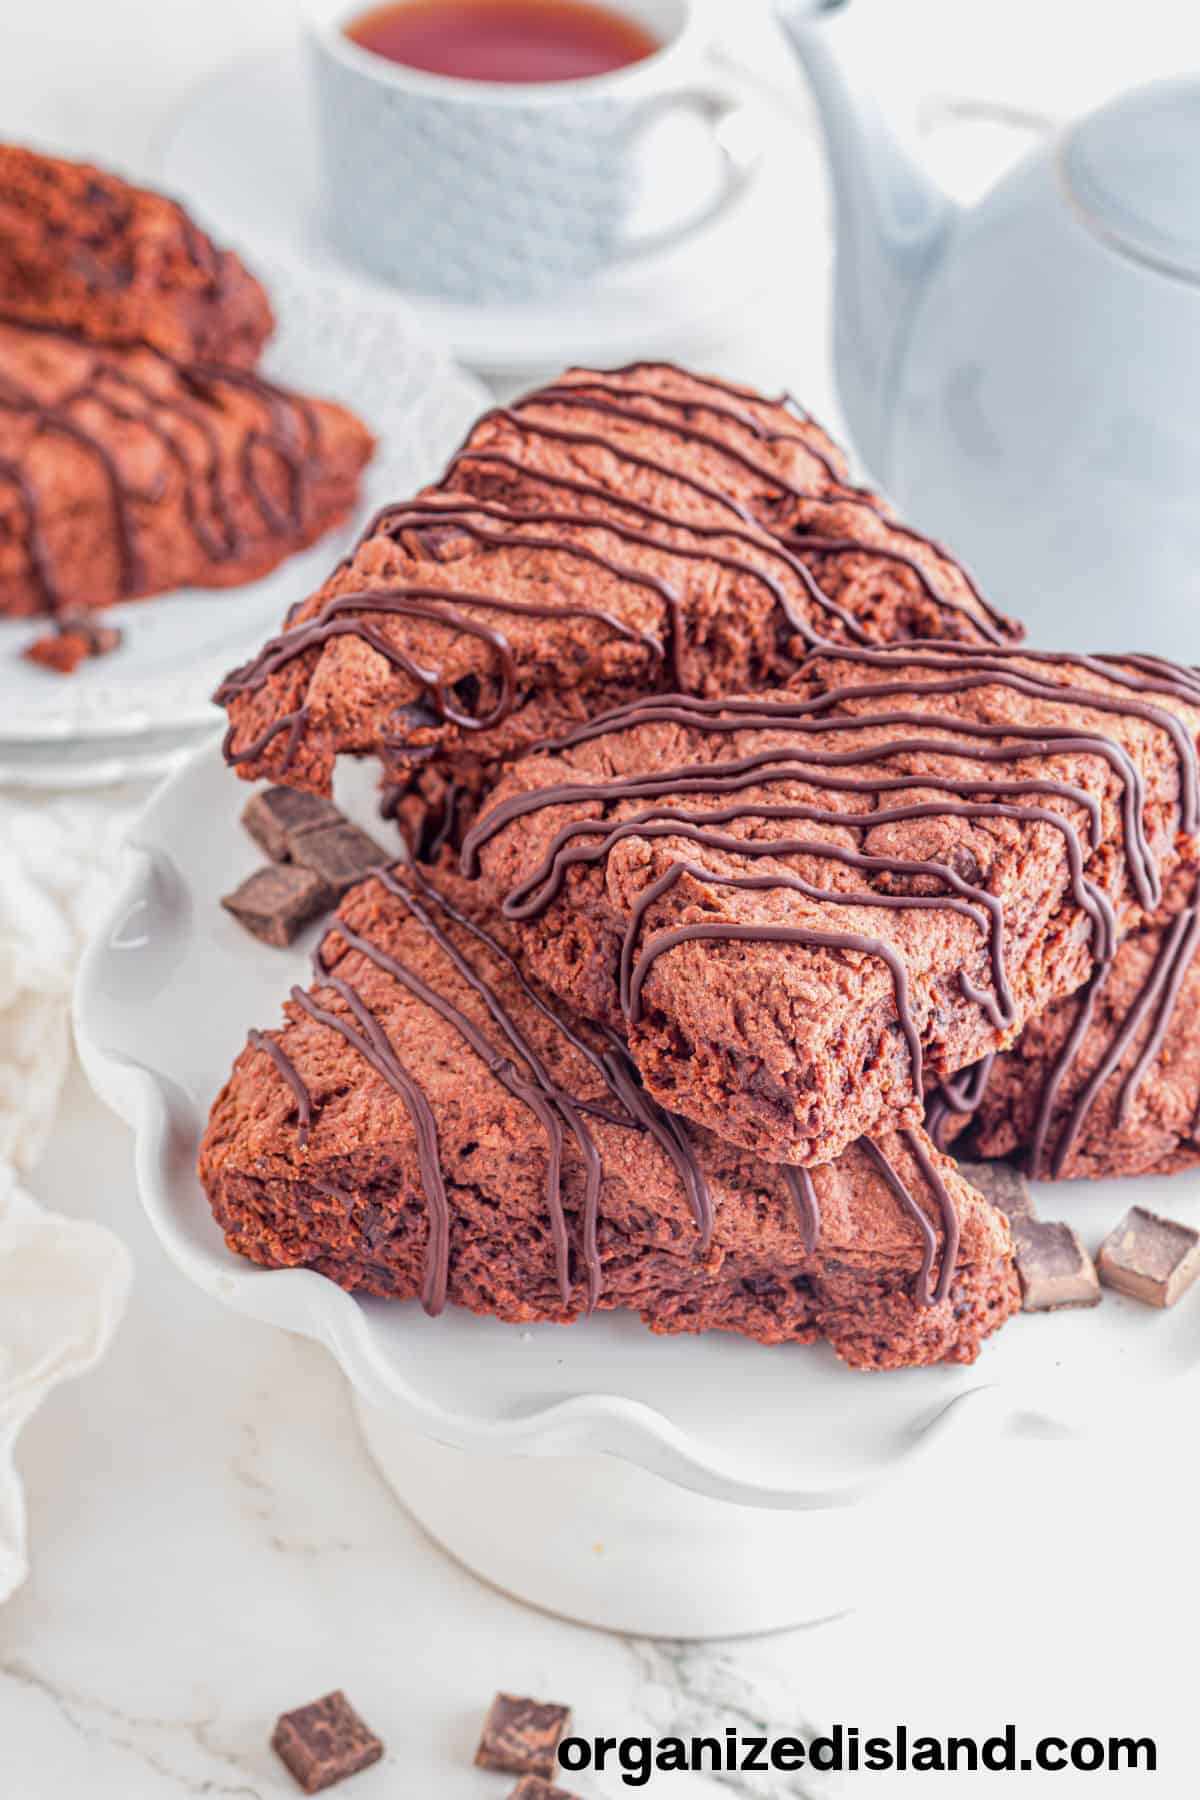
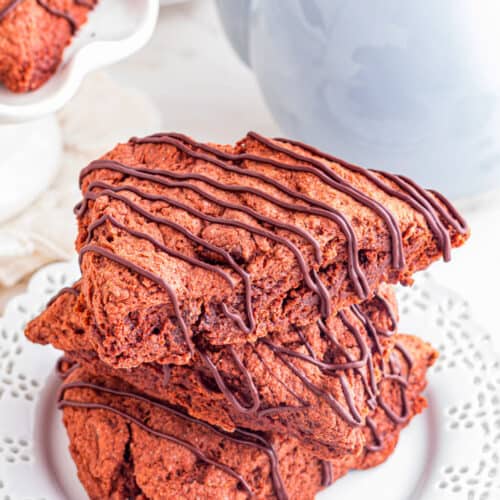
Chocolate Chocolate Chip Scones
This post may contain affiliate links.

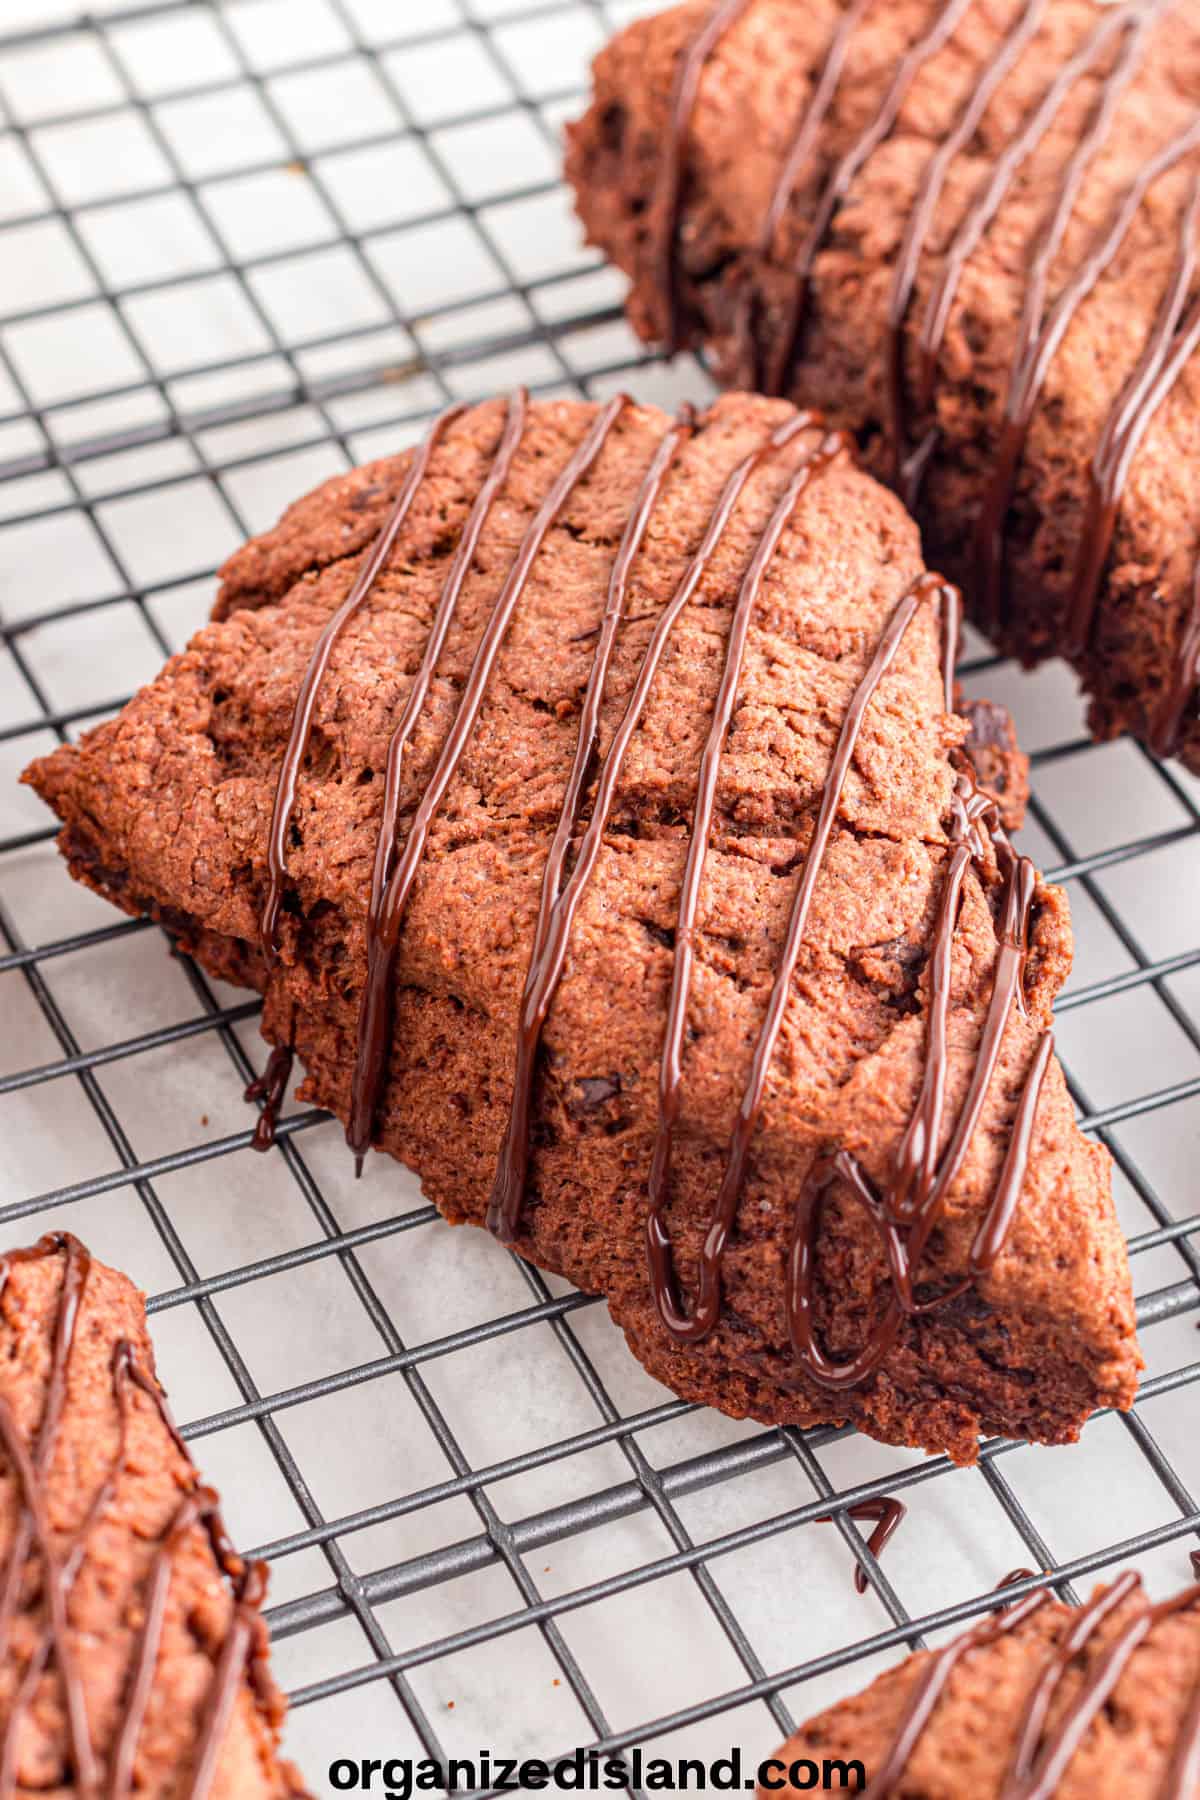
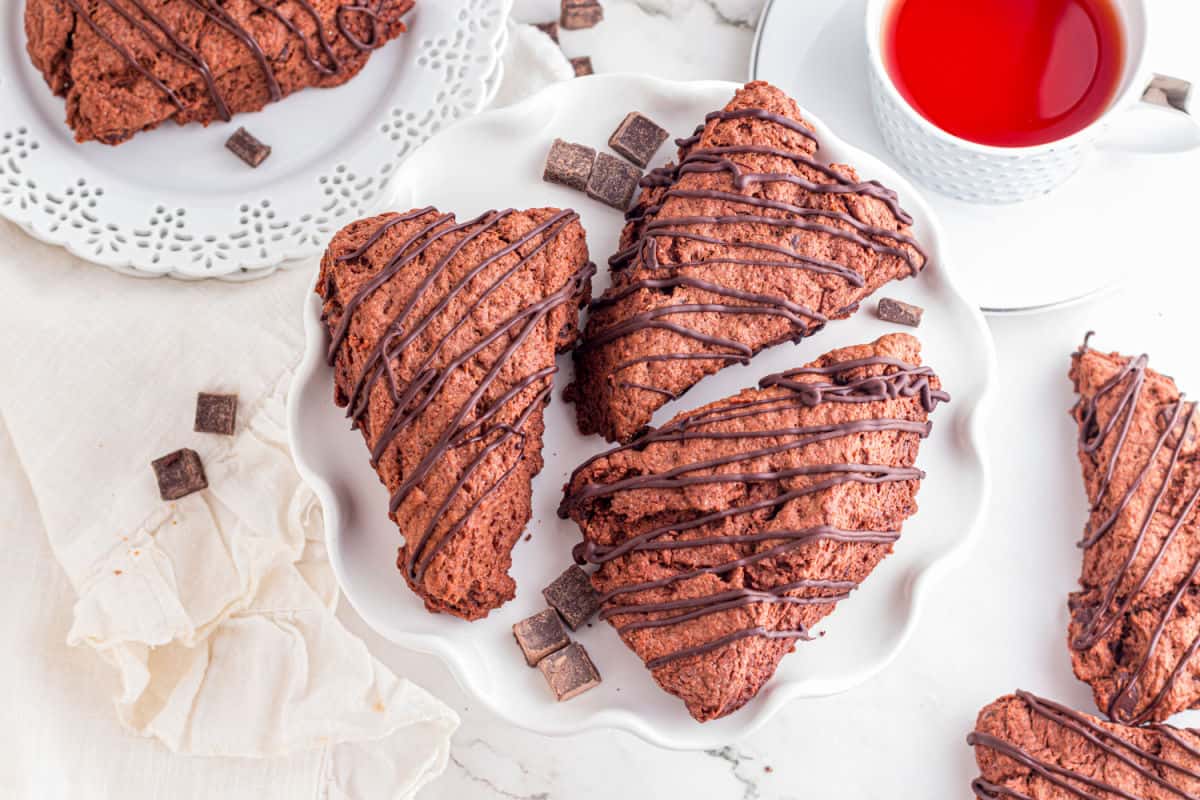
Warm, rich, and full of chocolate flavor, these easy Chocolate Scones are a dream for chocolate lovers. Each bite is soft and a bit crumbly with the deep sweetness of dark chocolate. They’re perfect for breakfast, afternoon tea, or a special occasion treat when you want something homemade and easy.
Like my Cranberry White Chocolate scones, my easy Blueberry Scones and quick Strawberry Scones, these are deliciously simple.
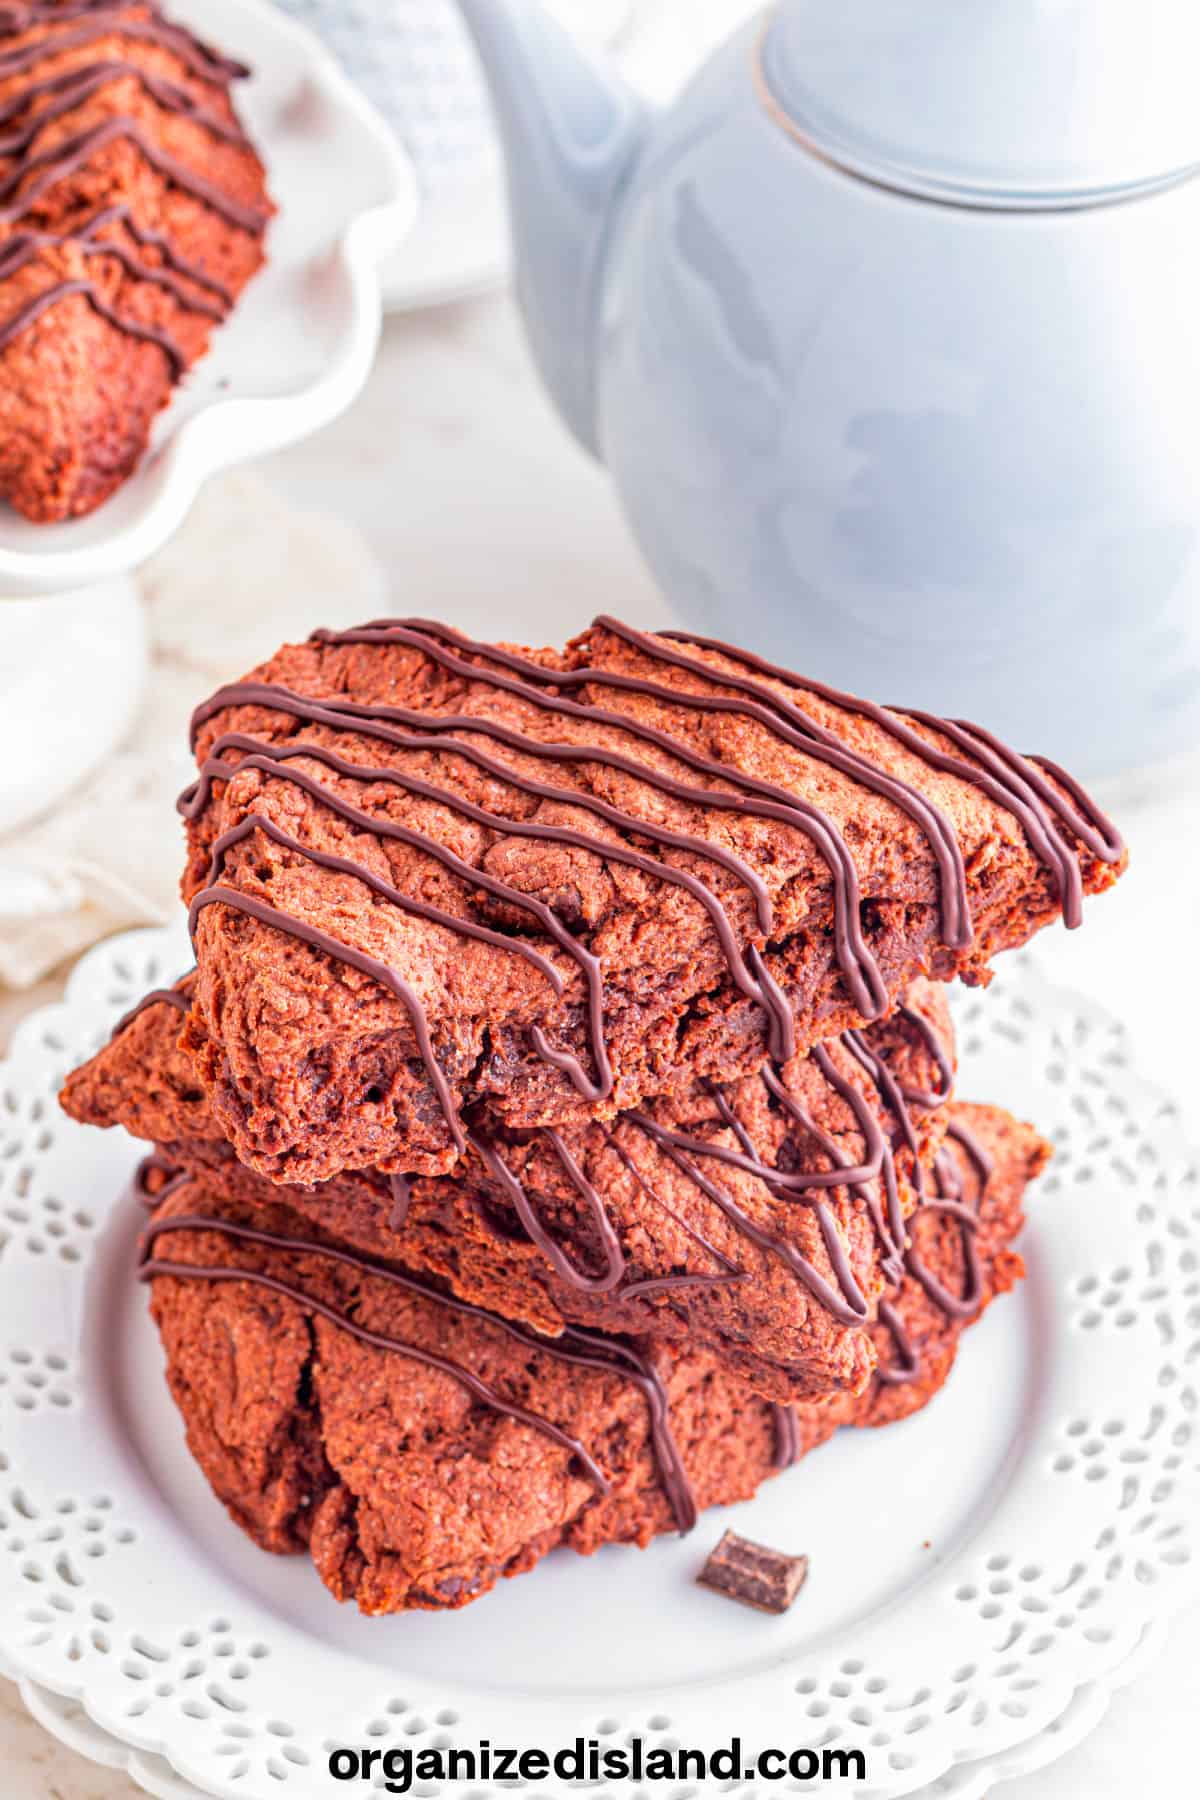
Whether you prefer them plain or topped with a silky chocolate drizzle, these double chocolate scones turn a simple baking process into something truly satisfying.
Why You’ll Love This Recipe
- Uses real cocoa powder and chocolate chunks for deep, bakery-style flavor
- The cold butter creates flaky layers and a tender texture
- Comes together easily in one large mixing bowl without fancy tools
- Tastes amazing fresh from the oven as a warm chocolate scone
- Can be customized with mini chocolate chips, espresso powder, or flavored drizzles
- Freezes beautifully for quick treats any time
Ingredients for chocolate scones
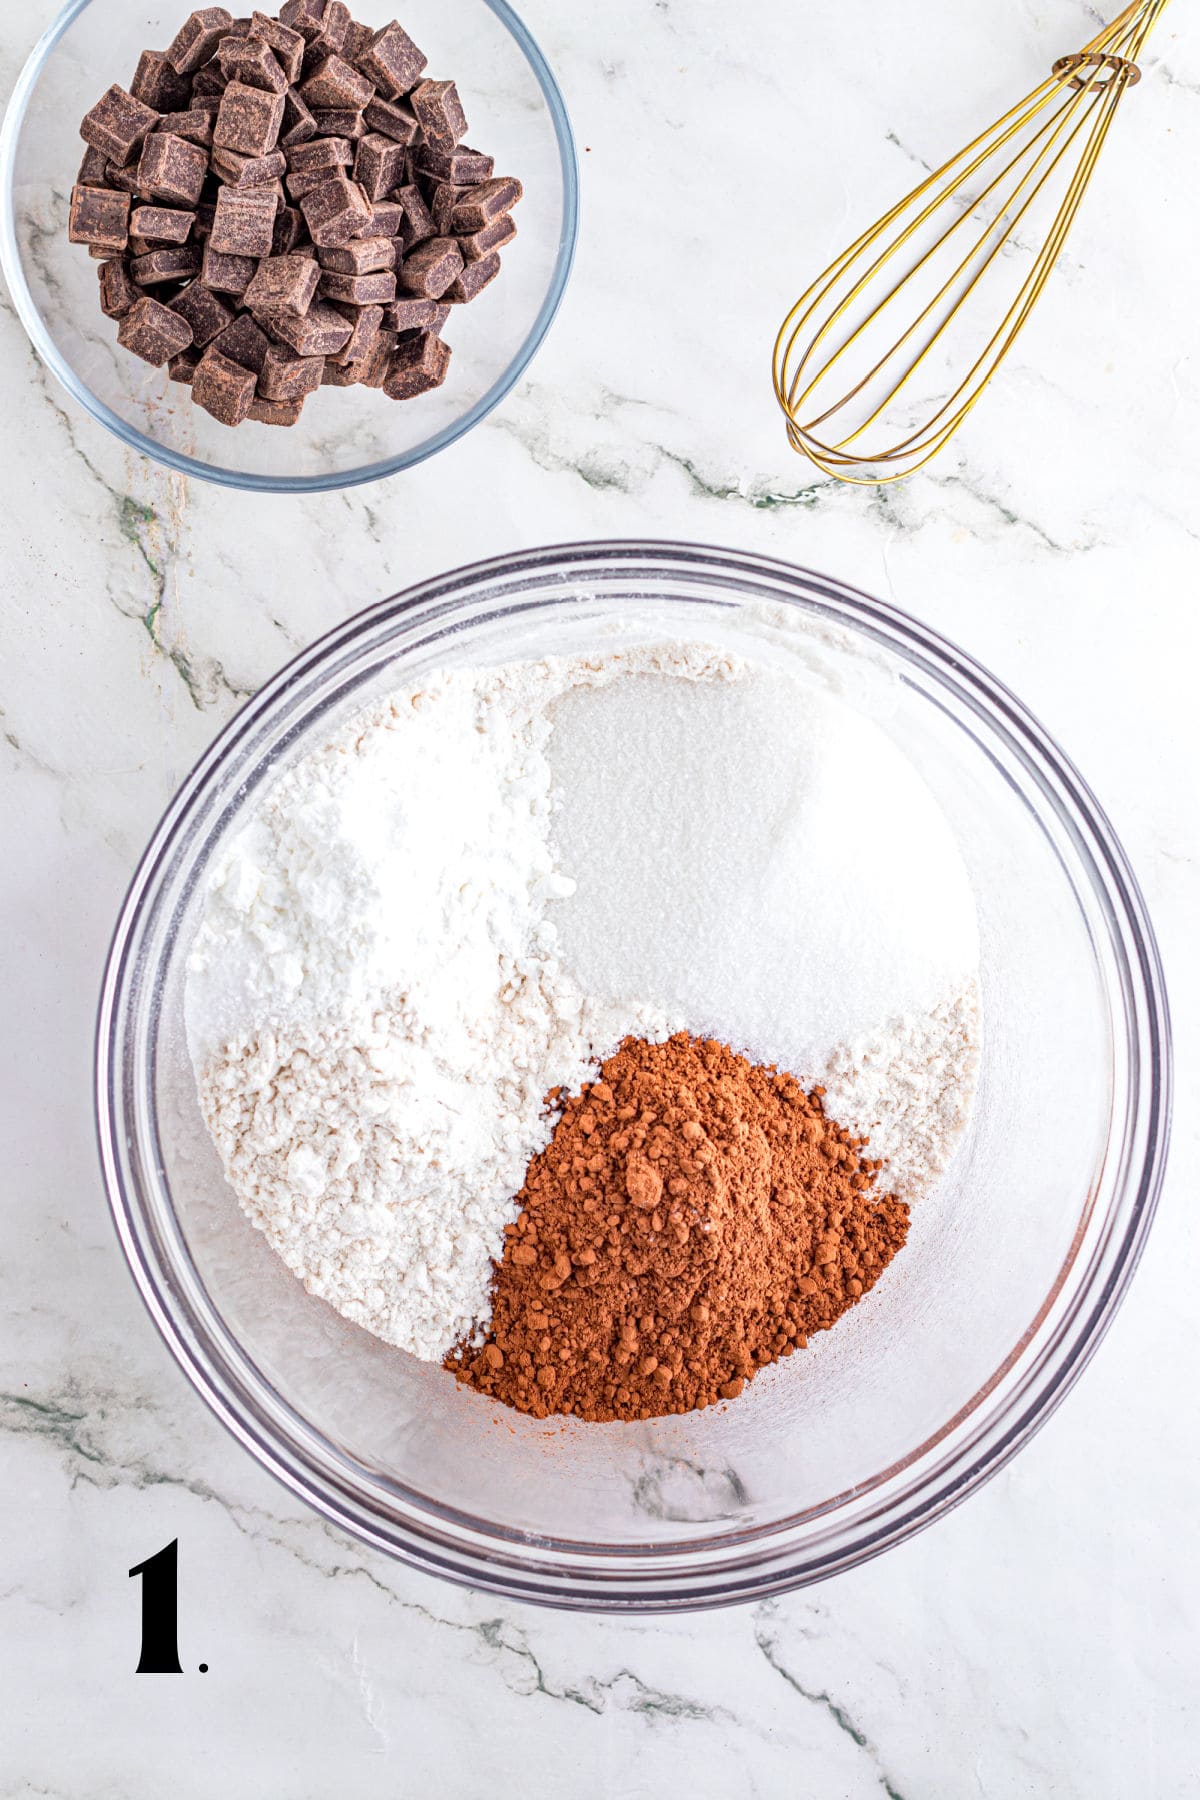
- All-purpose flour
- Unsweetened cocoa powder (Dutch-process preferred)
- Granulated sugar
- Baking powder
- Salt
- Cold unsalted butter, cubed
- Heavy cream (plus extra for optional brushing)
- Large egg
- Vanilla extract
- Semi-sweet chocolate chunks or chips
Optional Chocolate Drizzle:
- Chocolate chips
- Coconut oil or butter

How to make chocolate scones
- Preheat oven to 400°F and line a baking sheet with parchment paper.
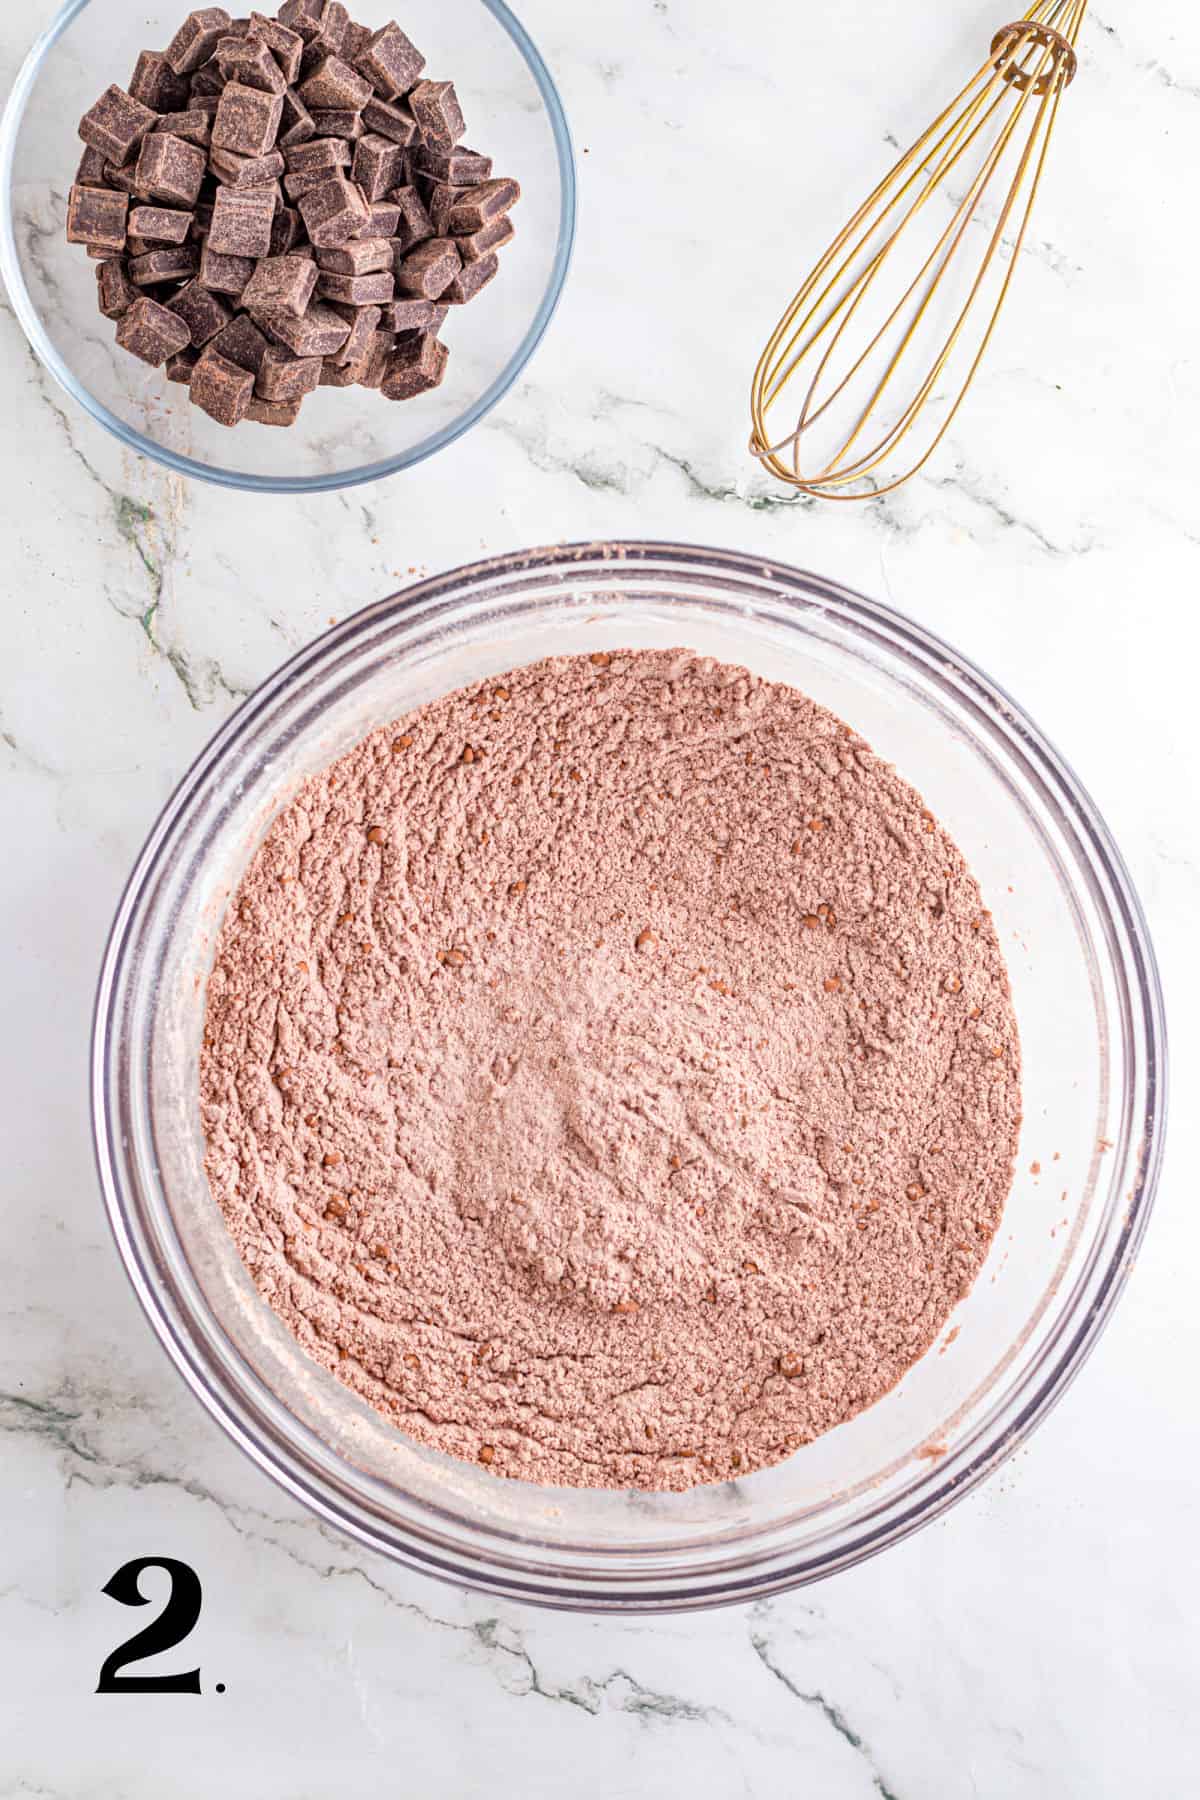
- In a large bowl, whisk together flour, cocoa powder, sugar, baking powder, and salt.
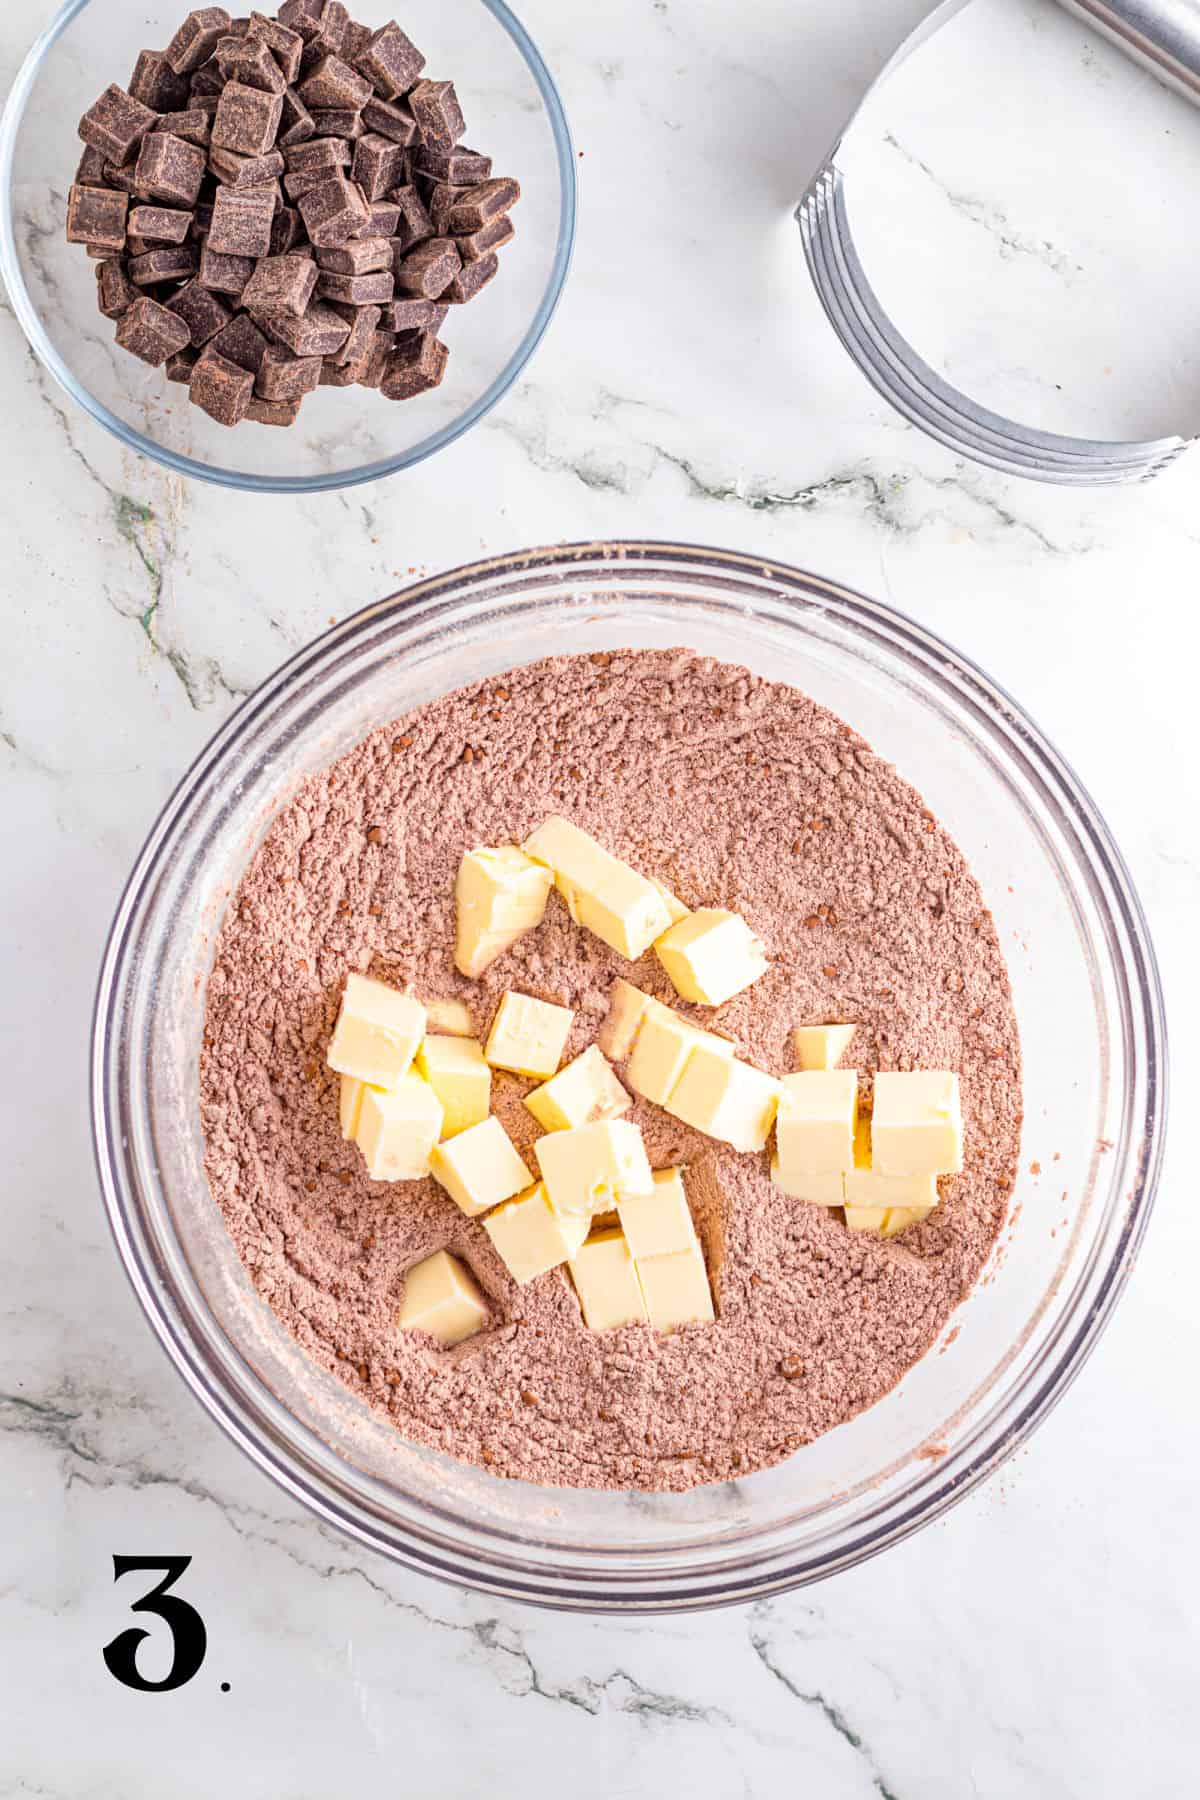
- Cut in the cold butter using a pastry cutter or your fingertips until the mixture resembles coarse crumbs.
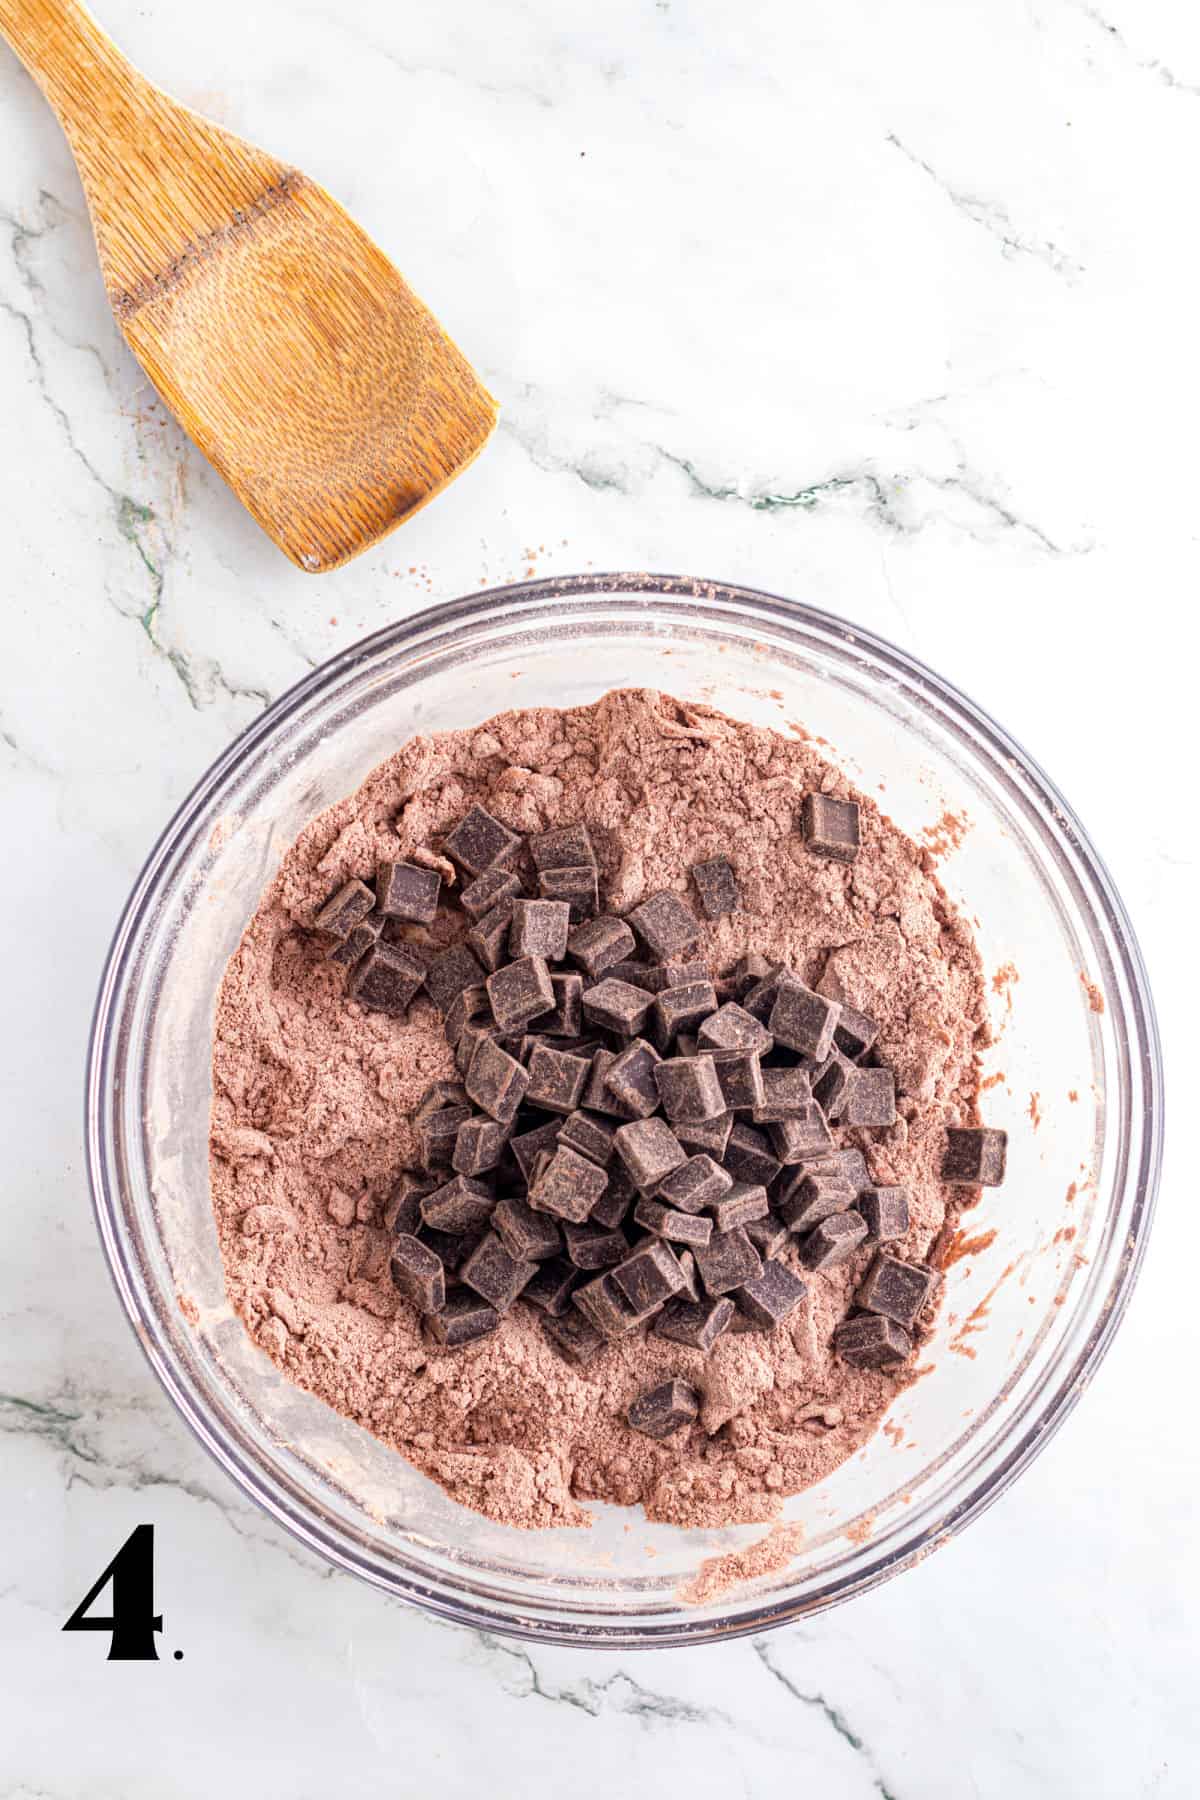
- Stir in the chocolate chunks or chips.
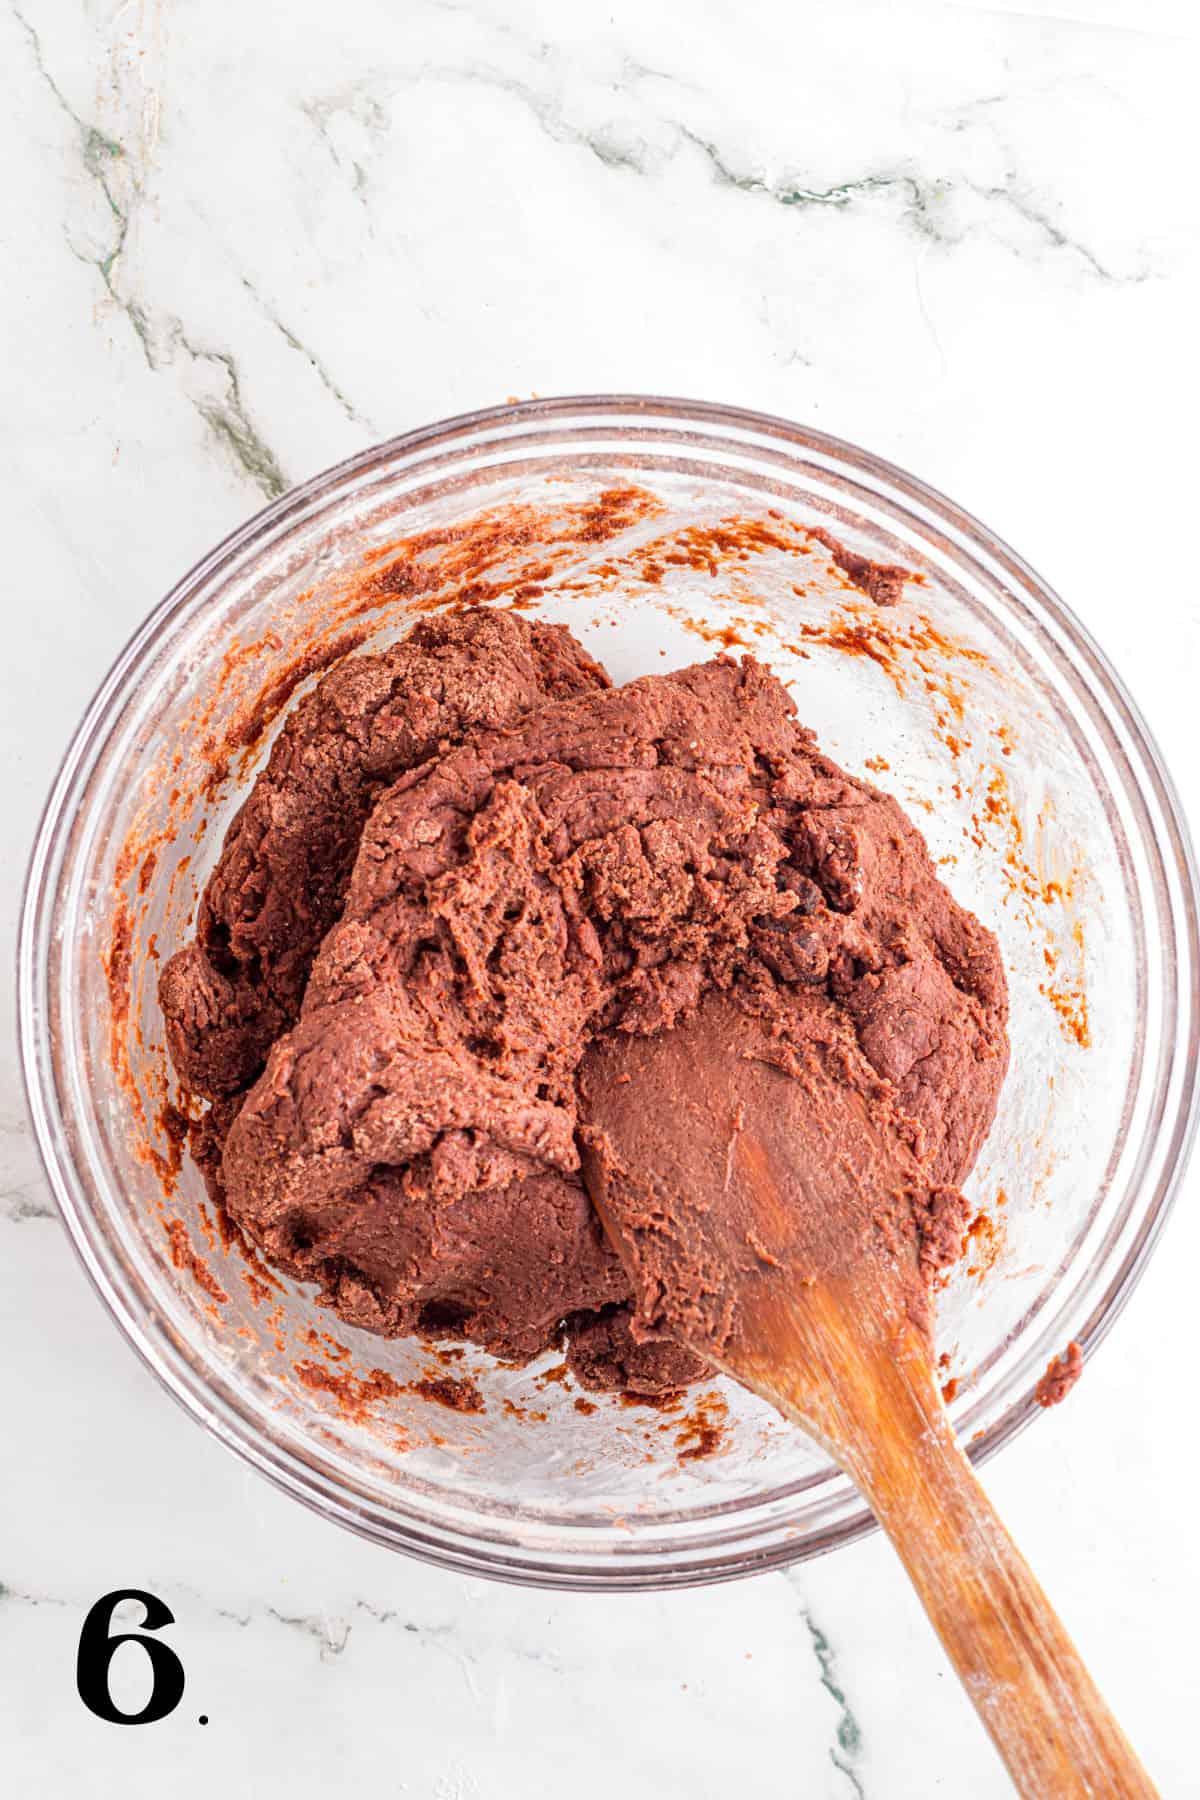
- In a separate bowl, whisk together cream, egg, and vanilla. Pour over dry ingredients and gently mix until just combined. Do not overmix.
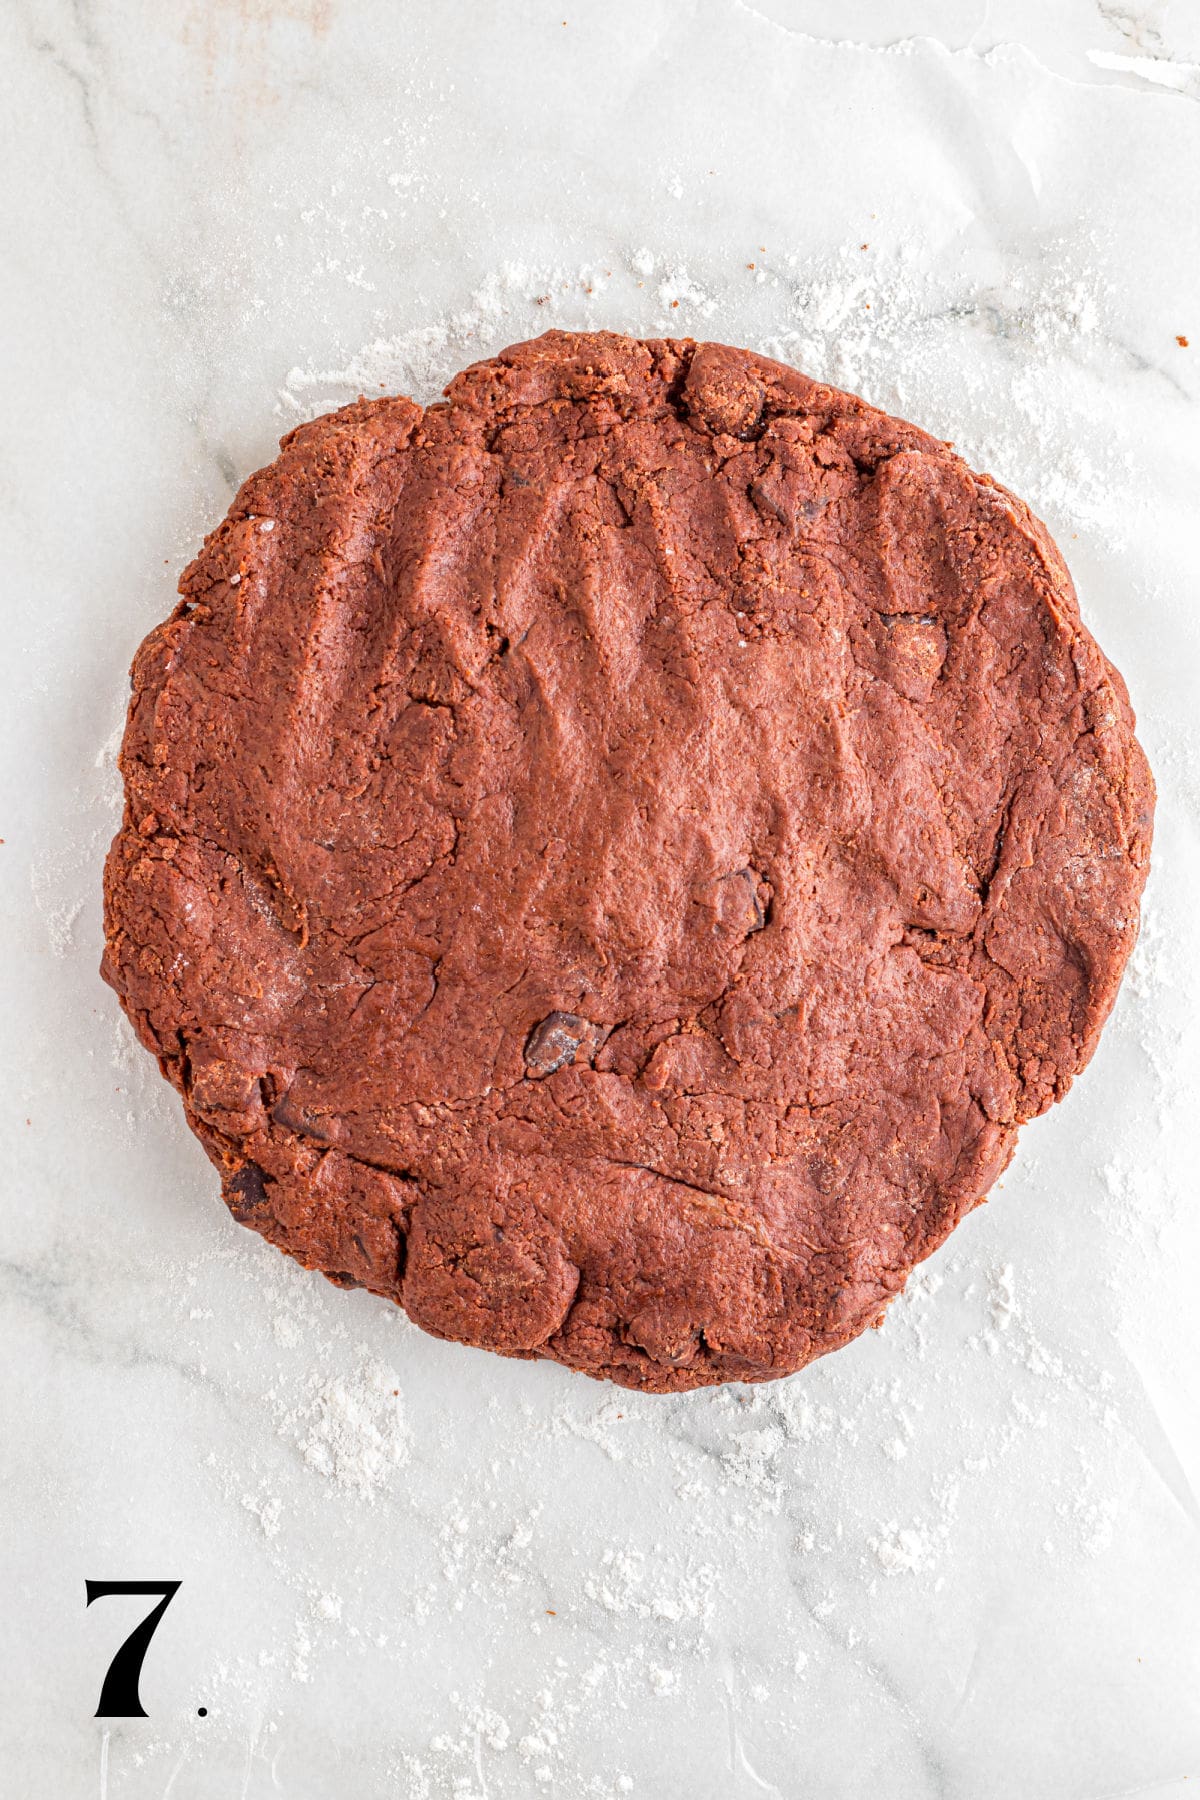
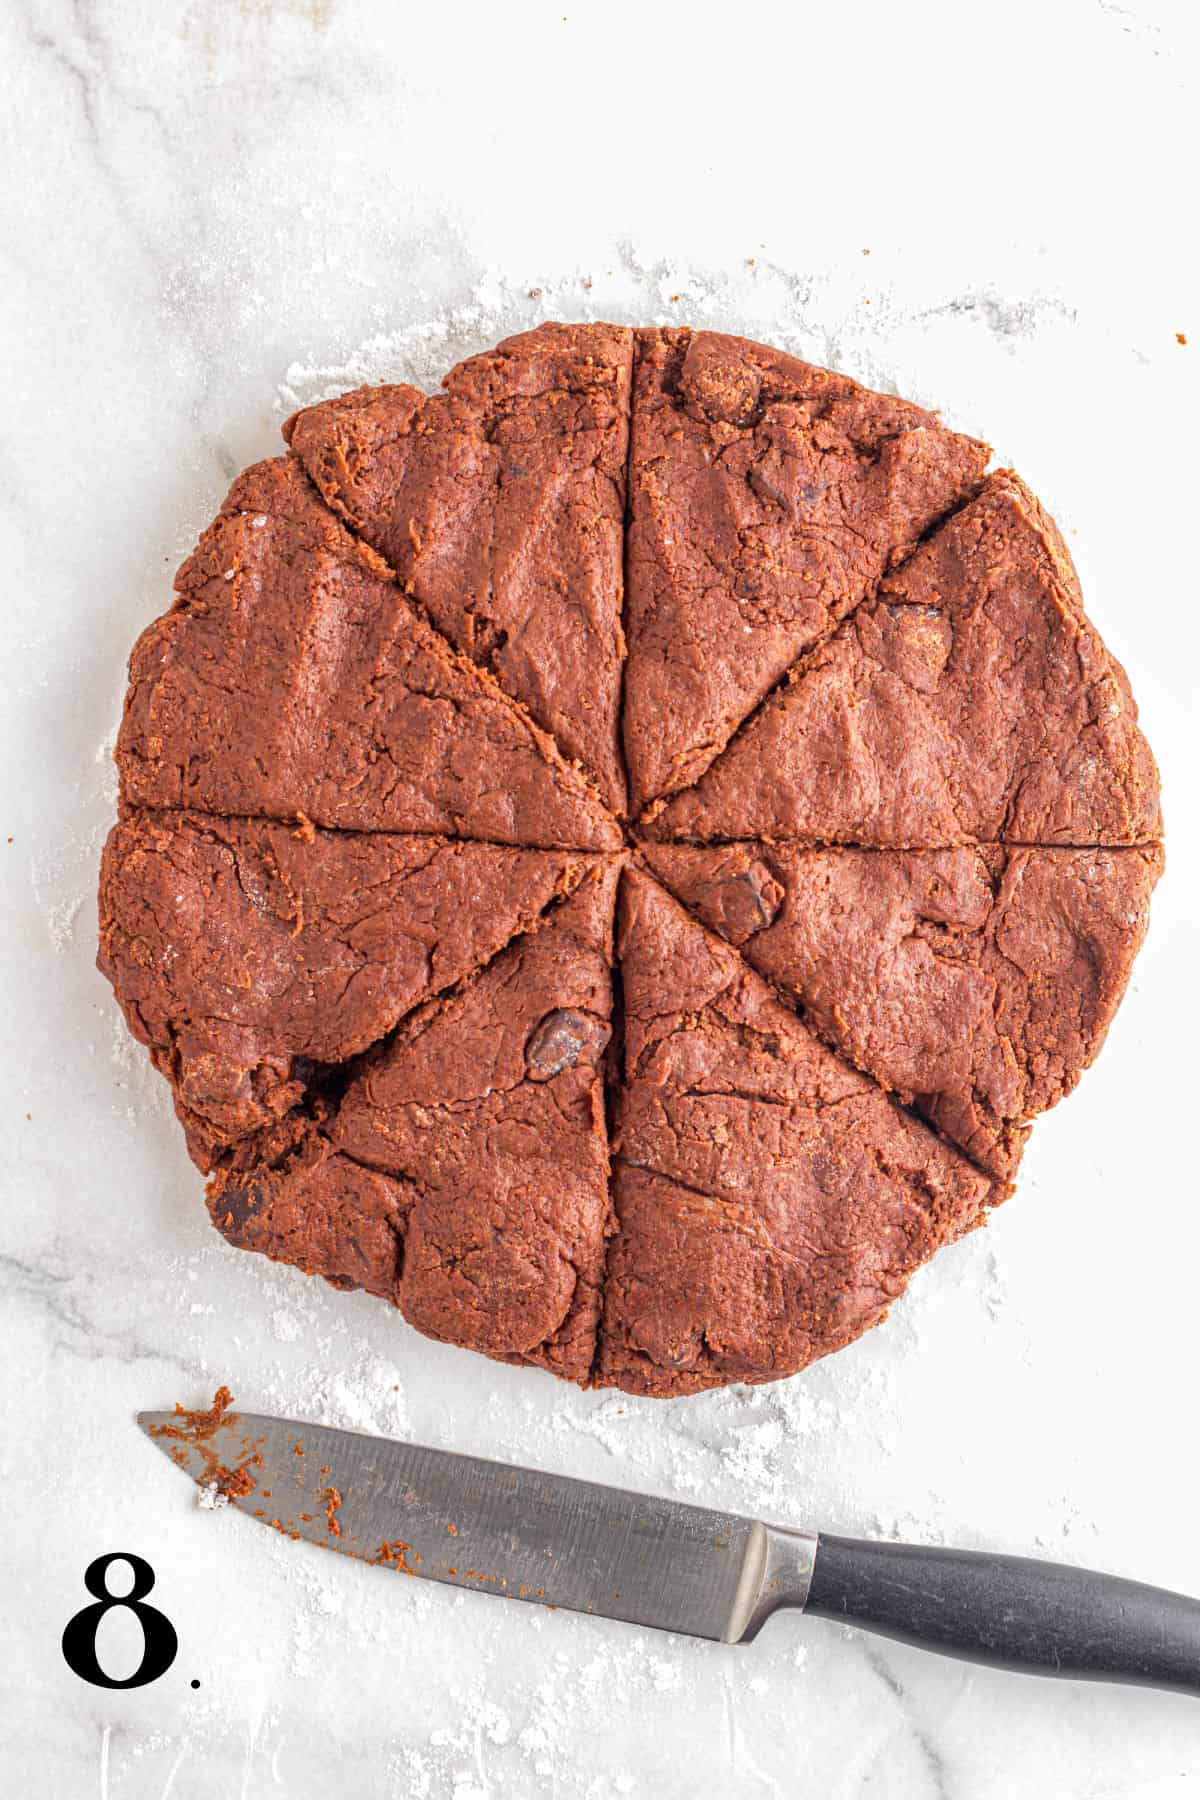
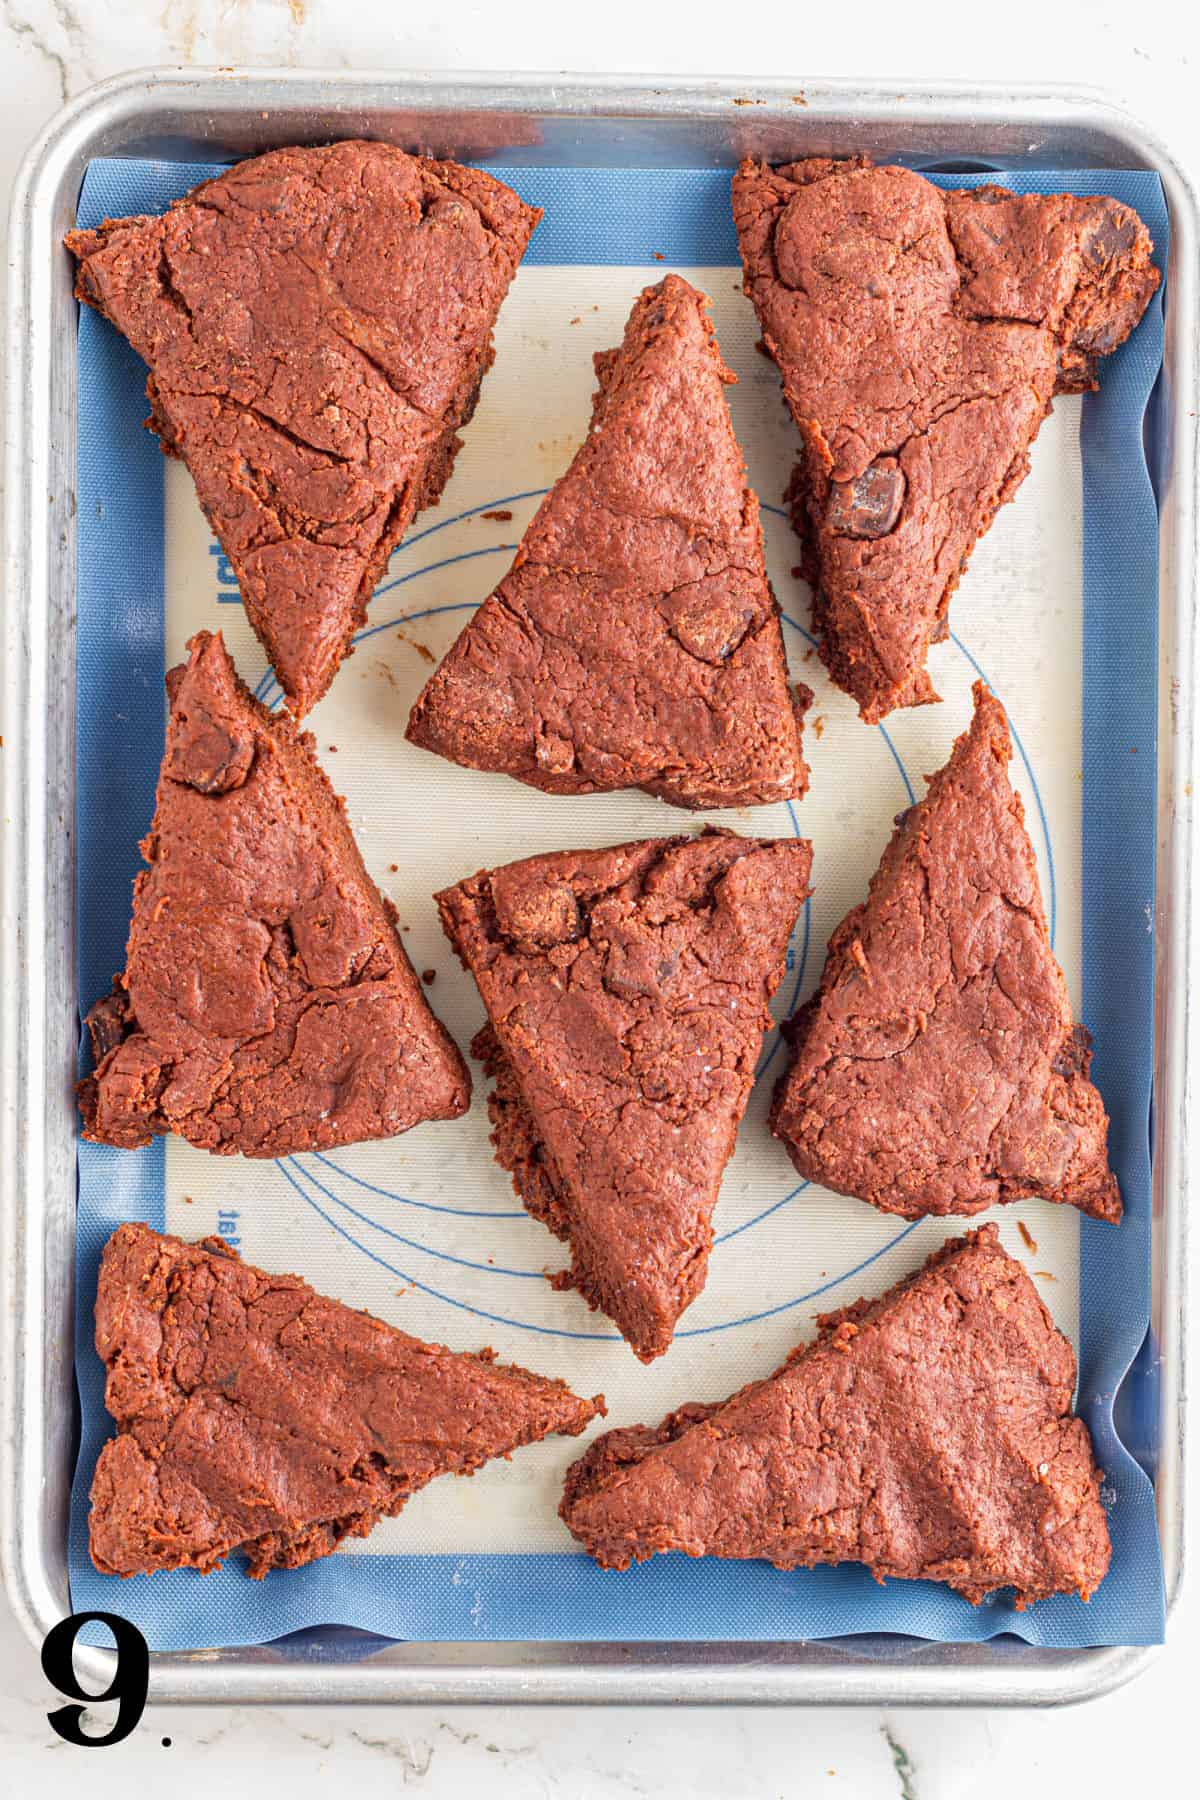
- Turn the dough onto a lightly floured surface and pat into an 8-inch circle about 1 inch thick. Cut into 8 wedges and place on the prepared baking sheet.
- Optional: Brush the tops with a little extra cream for a golden, slightly glossy finish.
- Bake for 18–22 minutes, or until the edges are set and a toothpick comes out with a few moist crumbs.
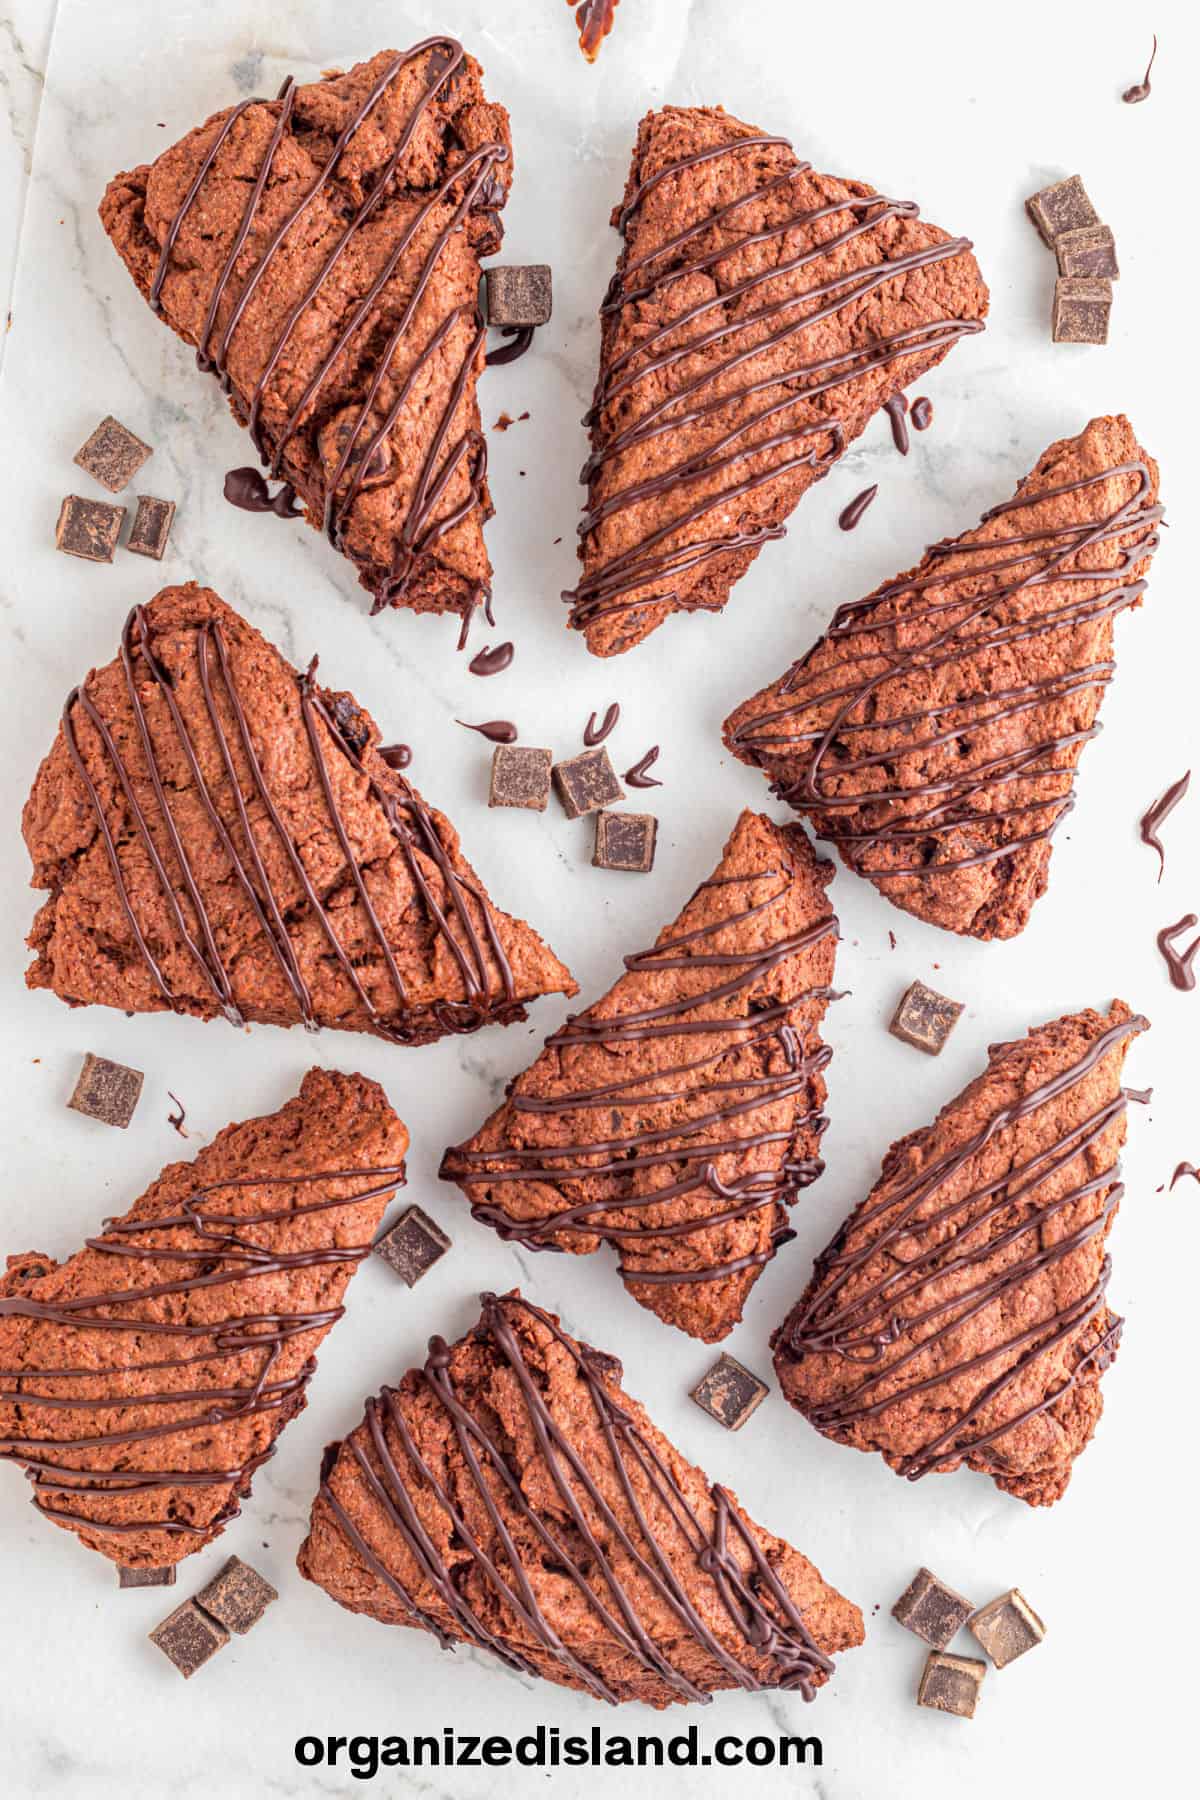
- Let scones cool on a wire rack. Melt chocolate chips with coconut oil until smooth and drizzle over cooled scones.
Save The Recipe!

Raquel’s Time Saving Tips
- Keep the butter cold and visible as small bits of butter in the dough to create those signature flaky layers.
- Mix the wet ingredients gently into the flour mixture so your scone dough stays soft, not tough.
- If using a food processor, pulse the butter into coarse crumbs before adding the cream and egg.
- Chill the shaped scones on a baking sheet for 10 minutes before baking if your kitchen is warm.
- Brush the tops of the scones with heavy cream for a golden brown finish.
- Let them rest on a wire rack before drizzling so the chocolate melts evenly and sets well.
- If you want extra chocolate flavor, add a handful of mini chips or a sprinkle of espresso powder next time.
Substitutions and Variations
- Chocolate type: Swap semi-sweet for dark chocolate or use a mix of mini chips and chocolate chunks.
- Flour: Pastry flour makes slightly more tender scones, while all-purpose flour gives more structure.
- Dairy: Heavy cream can be replaced with half-and-half for a lighter texture.
- Flavor twist: Add orange zest, peppermint extract, or a few espresso chocolate chips for new flavor combinations.
- Size: You can make smaller scones by making 2 smaller discs instead of one before cutting. Reduce the baking time to 13 – 16 minutes.
FAQs About Chocolate Scones
The edges should be firm and the tops golden brown. A toothpick inserted in the center should come out with just a few crumbs.
Yes. Wrap the unbaked scone dough in plastic wrap and refrigerate overnight. Bake straight from the fridge, adding 1–2 minutes to the baking time.
Absolutely. Freeze baked or unbaked scones individually wrapped in an airtight container. Thaw at room temperature before reheating.
Bits of cold butter cut into the dry ingredients create steam during baking, forming those perfect, tender layers that every good scone needs.
For a fruity twist on homemade scones, don’t miss my Strawberry Scones with Glaze or my Flakey Blueberry Scones. While these chocolate scones are rich and indulgent, the fruit versions offers a lighter, fresh berry flavor that’s perfect for breakfast, brunch, or afternoon tea. The sweet glaze takes them to the next level.
More delicious breakfast recipes


Chocolate Scones
Equipment
- 2 medium bowls
Ingredients
- 2 cups all purpose flour
- ½ cup unsweetened cocoa powder Dutch-process preferred
- ½ cup granulated sugar
- 1 tablespoon baking powder
- ½ teaspoon salt
- ½ cup cold unsalted butter cubed
- ¾ cup heavy cream plus extra for optional brushing
- 1 large egg
- 1 teaspoon vanilla extract
- 1 cup semi-sweet chocolate chunks or chips
Optional Chocolate Drizzle:
- ⅓ cup chocolate chips
- 1 tsp coconut oil or butter
Instructions
- Preheat oven to 400°F and line a baking sheet with parchment paper.
- In a large bowl, whisk together flour, cocoa powder, sugar, baking powder, and salt.
- Cut in the cold butter using a pastry cutter or your fingertips until the mixture resembles coarse crumbs.
- Stir in the chocolate chunks or chips.
- In a separate bowl, whisk together cream, egg, and vanilla. Pour over dry ingredients and gently mix until just combined. Do not overmix.
- Turn the dough onto a lightly floured surface and pat into an 8-inch circle about 1 inch thick.
- Cut into 8 wedges and place on the prepared baking sheet.
- Optional: Brush the tops with a little extra cream for a golden, slightly glossy finish.
- Bake for 18–22 minutes, or until the edges are set and a toothpick comes out with a few moist crumbs.
- Let scones cool on a wire rack. Melt chocolate chips with coconut oil until smooth and drizzle over cooled scones.
Notes
For best results with the drizzle, wait until the scones have cooled so the
chocolate sets nicely on top.
Store cooled scones in an airtight container at room temperature for up to 2 days, refrigerate for 5 days, or freeze for up to 3 months individually wrapped in an airtight container.
Nutrition
If you are not yet subscribing to my CELEBRATE THE SEASON newsletter, you can subscribe here. I share easy recipes for the season that the entire family is sure to love and also a few things that I don’t share here.
I don’t think I’ve ever had a chocolate scone–this looks amazing! Pinning to save and share. 🙂 Visiting from Sundays on Silverado.
These look good. Spookily I am eating a cheese scone as I’m reading this! I must make sweet ones next time and give this a try. Thank you for sharing with us at Handmade Monday 🙂
Wow! These were terrific!