Easter Bunny Cookies
This post may contain affiliate links.

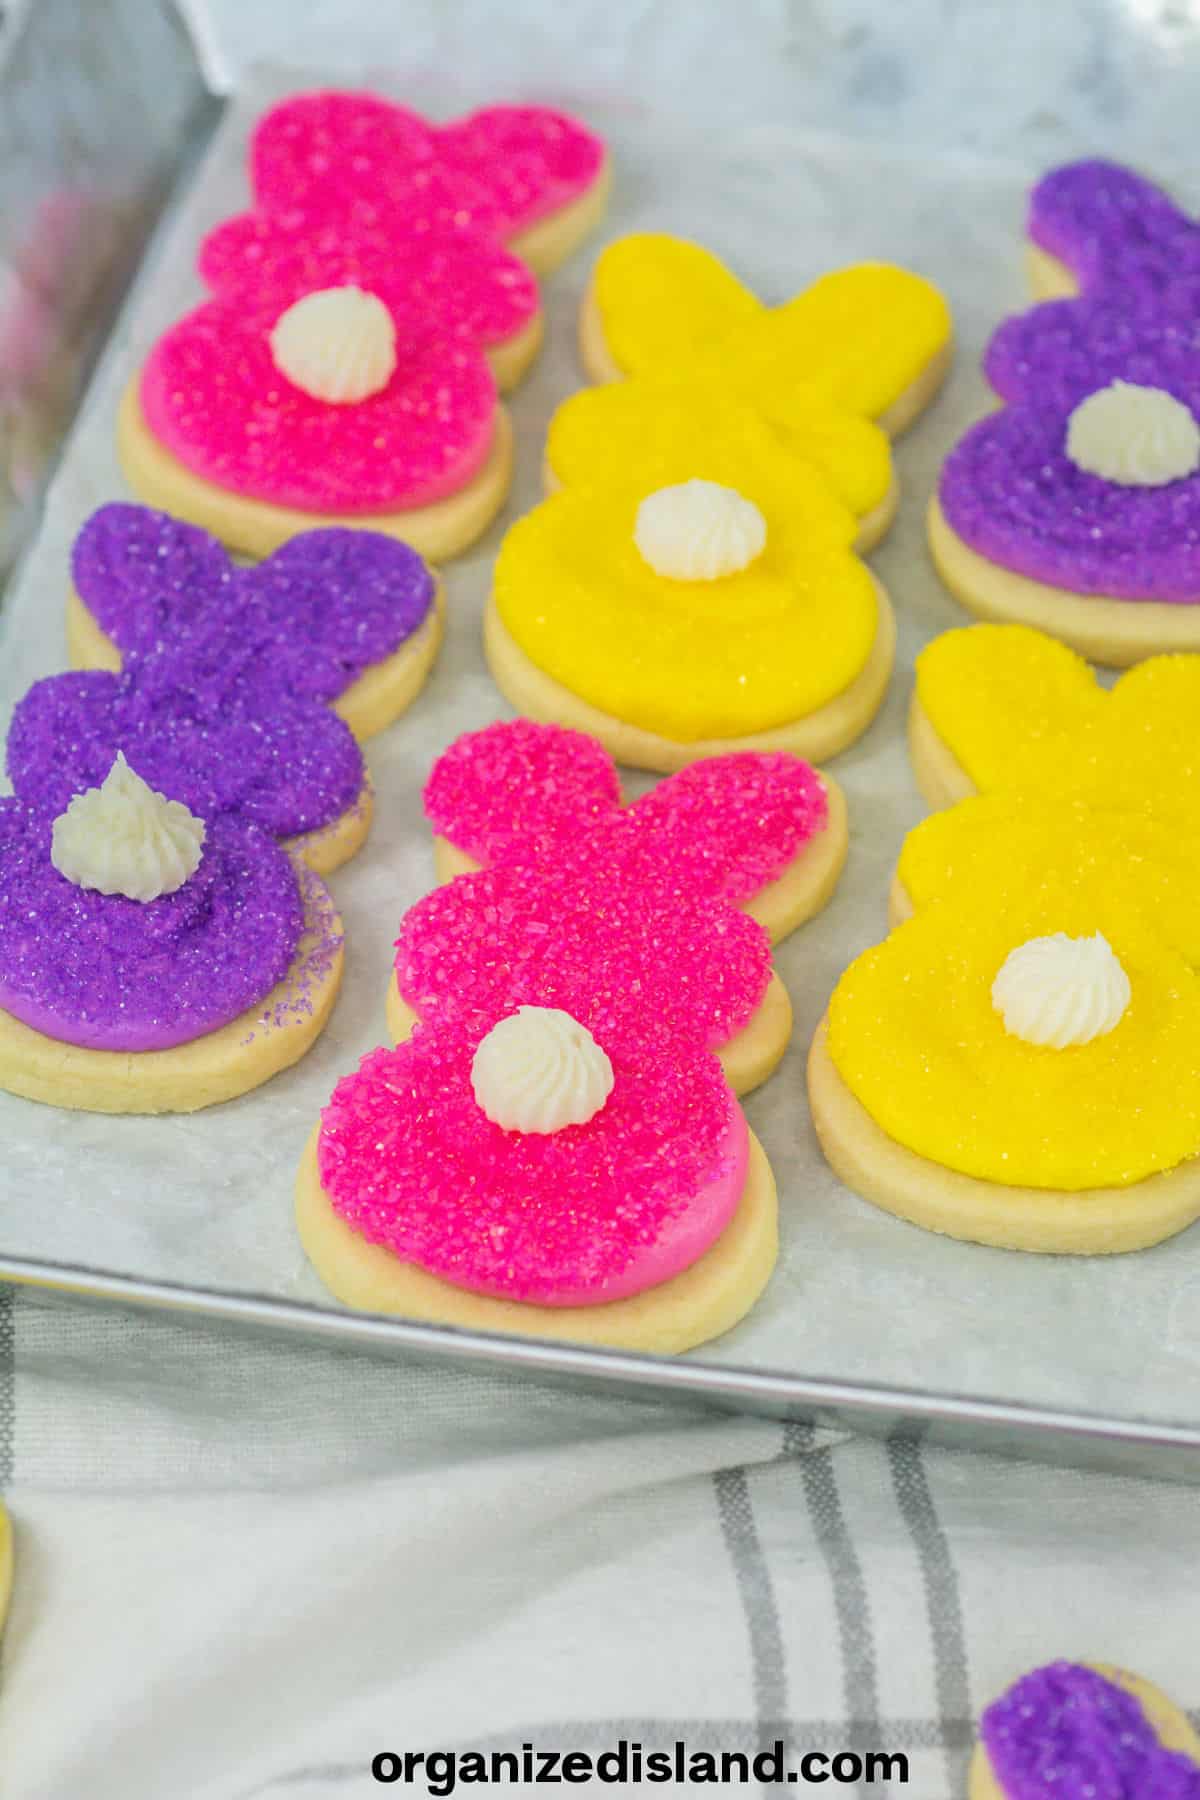
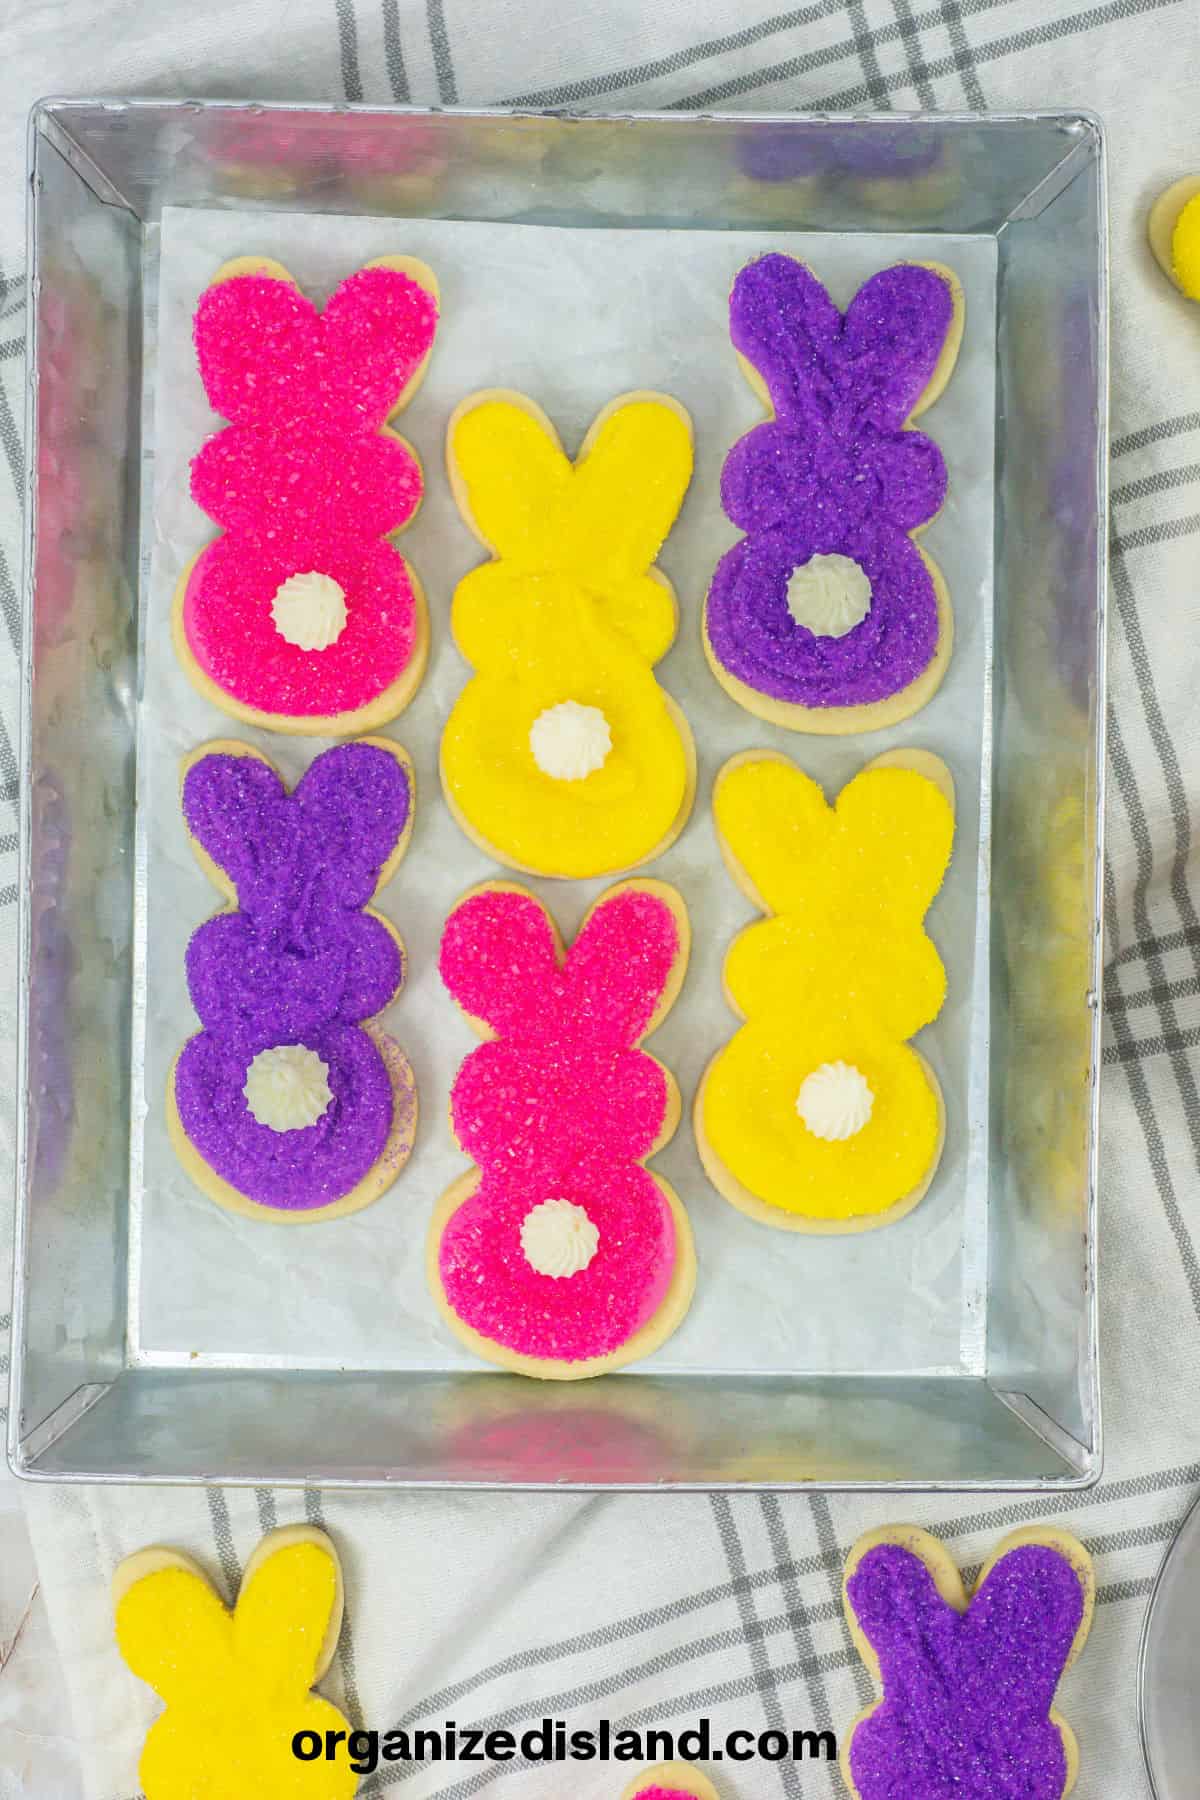
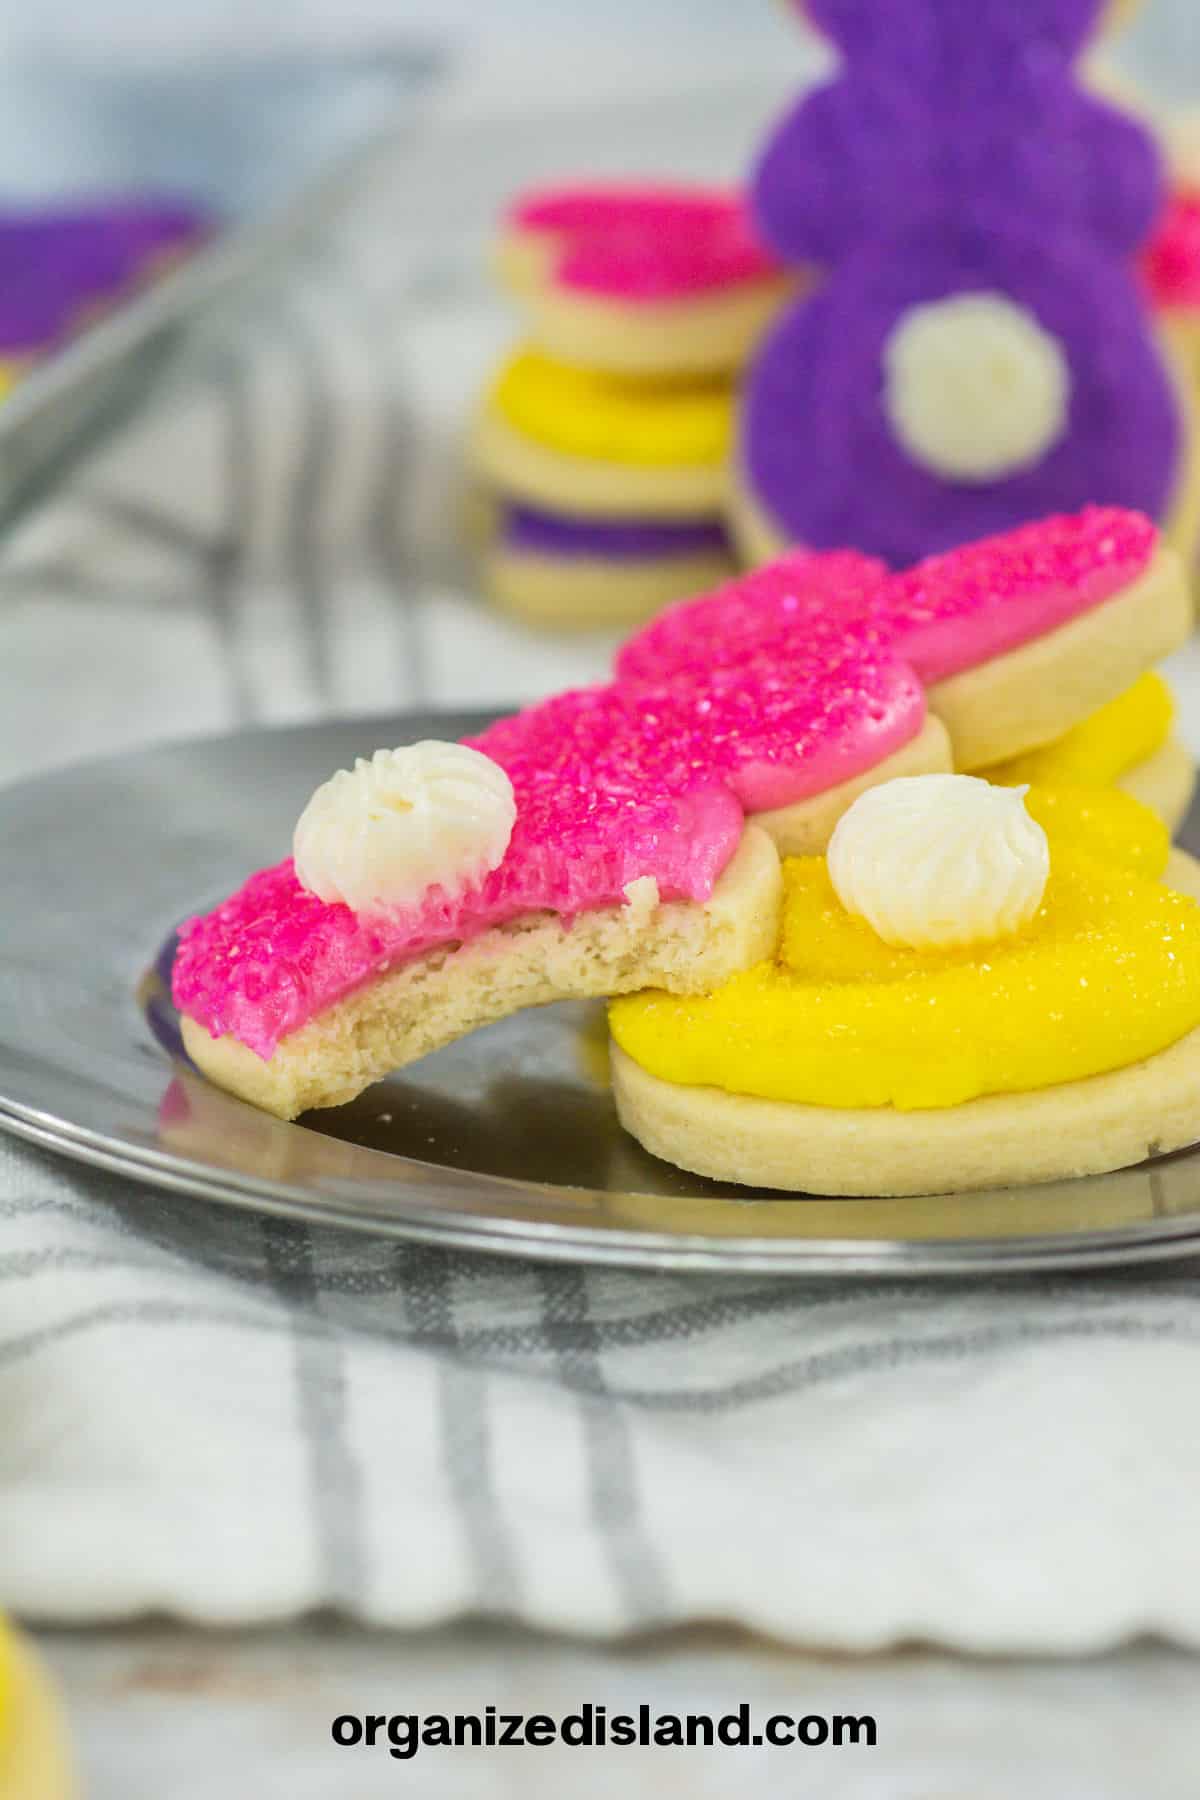
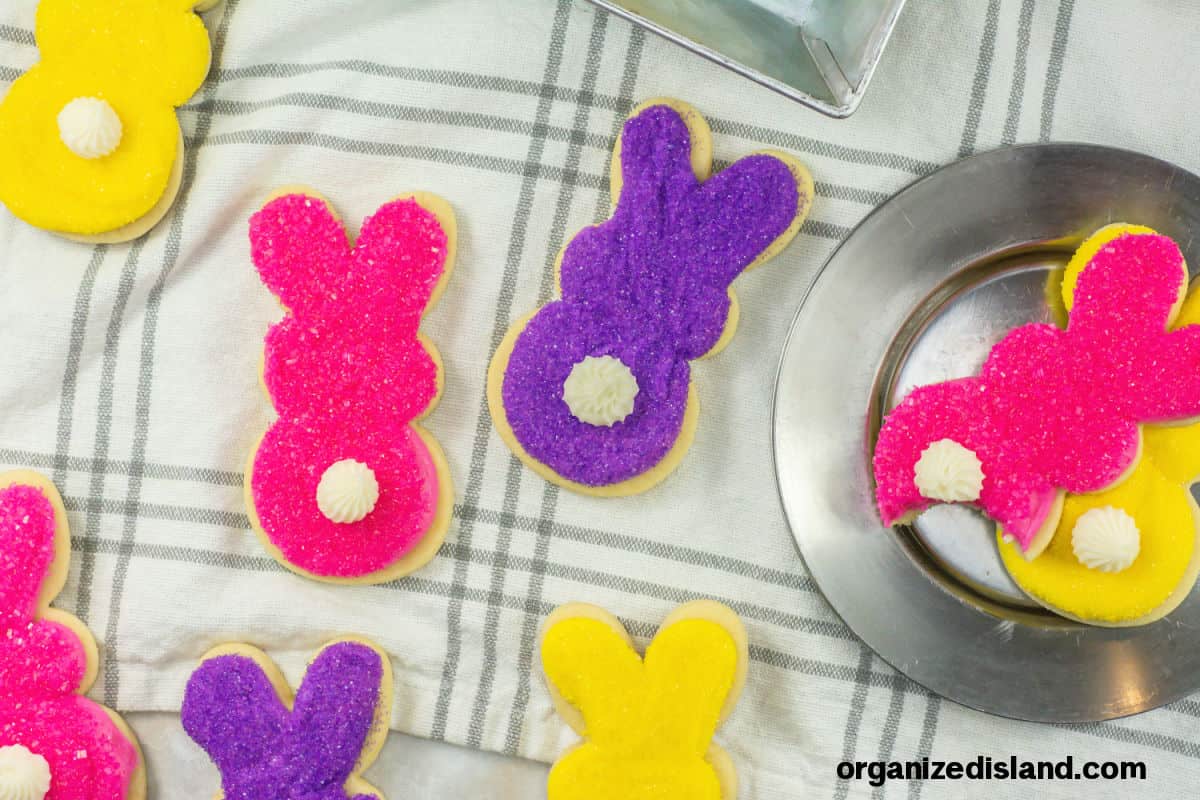
Only the most adorable cookie you’ve ever seen, Easter Bunny Cookies will be the talk of the town when you show up with a plateful at your next Springtime event.
Gorgeously decorated and equally as delicious as they are cute, these Easter Bunny Sugar cookies are a great addition to your Easter dessert table.
True buttercream frosting decorates classic, soft-baked sugar cookies for the perfect pairing.
These buttery cookies also taste great.
Why This Recipe
It doesn’t get any cuter than this. Seriously. These adorable bunny cookies are cuteness personified and the perfect Easter treat. I like to wrap each cute cookie in cellophane bags and place them in Easter baskets.
So easy to make. These fun Easter cookies take about twenty minutes of prep time and 12 minutes of baking time, and then a little bit of time frosting the cookies. No complicated steps or difficult ingredients.
Enough little bunnies for the whole class. Our recipe makes 24 cookies — perfect for a class party or an Easter celebration with style.
Ingredients for adorable Easter Bunny cookies
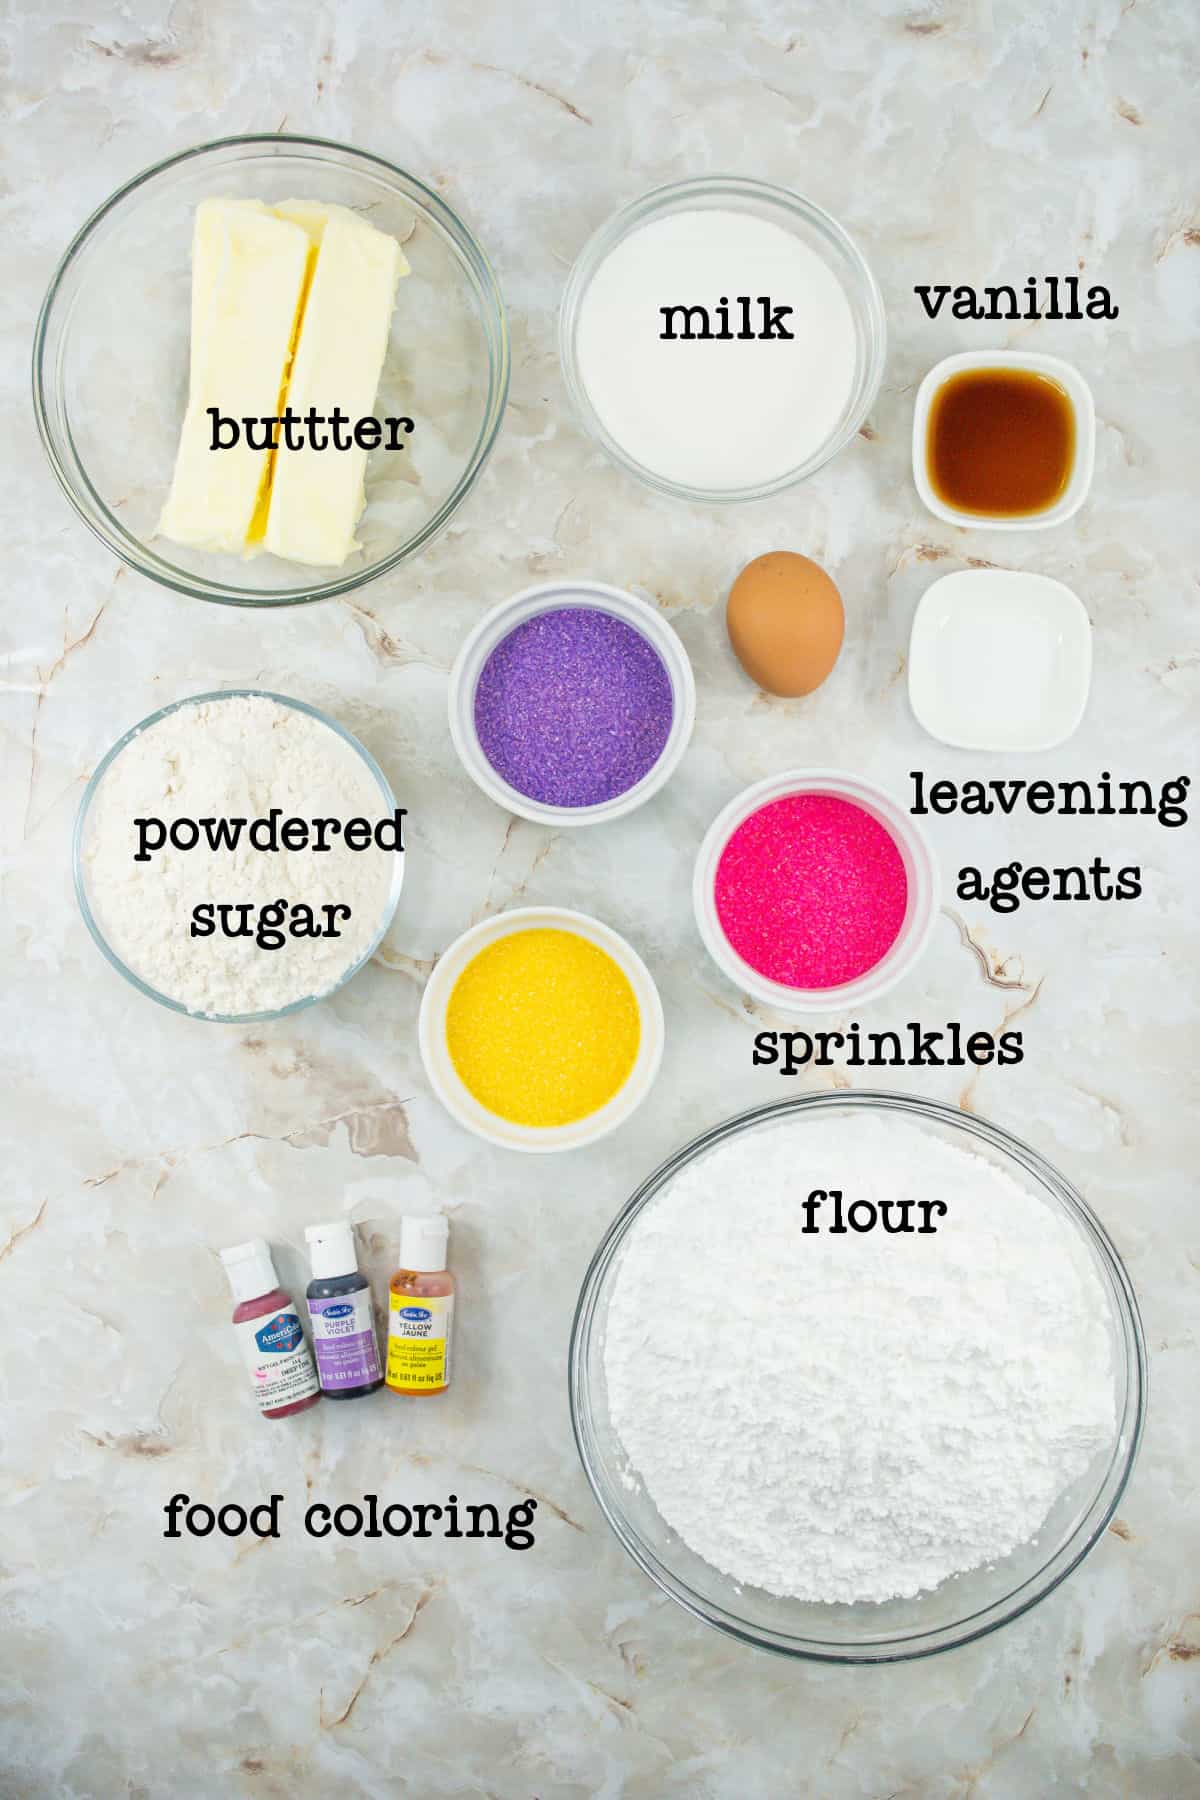
- Unsalted Butter. Set it out to soften a couple hours before you want to bake.
- Sugar. A simple cookie with just five ingredients, this one only uses white granulated sugar.
- Egg. One large or extra-large egg will do. Perfect when you are down to the end of your pantry!
- Vanilla. I recommend pure vanilla extract.
- Flour. All-purpose flour works great.
Buttercream Frosting Ingredients
- Unsalted Butter.
- Vanilla.
- Salt. If you only have salted butter on hand, adjust the salt accordingly.
- Powdered Sugar. When you don’t have in the house, make your own from granulated sugar in a food processor.
- Milk. Whole milk brings more fat to the frosting and gives it a better flavor and body.
- Food Coloring. You will need pink, purple, and yellow.
- Sanding Sugar. You will need pink, purple, and yellow. I like this sanding sugar set for Easter.
Equipment and Kitchen Tools
- large bowl
- electric hand mixer or stand mixer
- rolling pin
- bunny cookie cutter – I like this bunny cookie cutter
- baking sheet
- wire rack
Full details in recipe card below.
How to Make Bunny Sugar Cookies
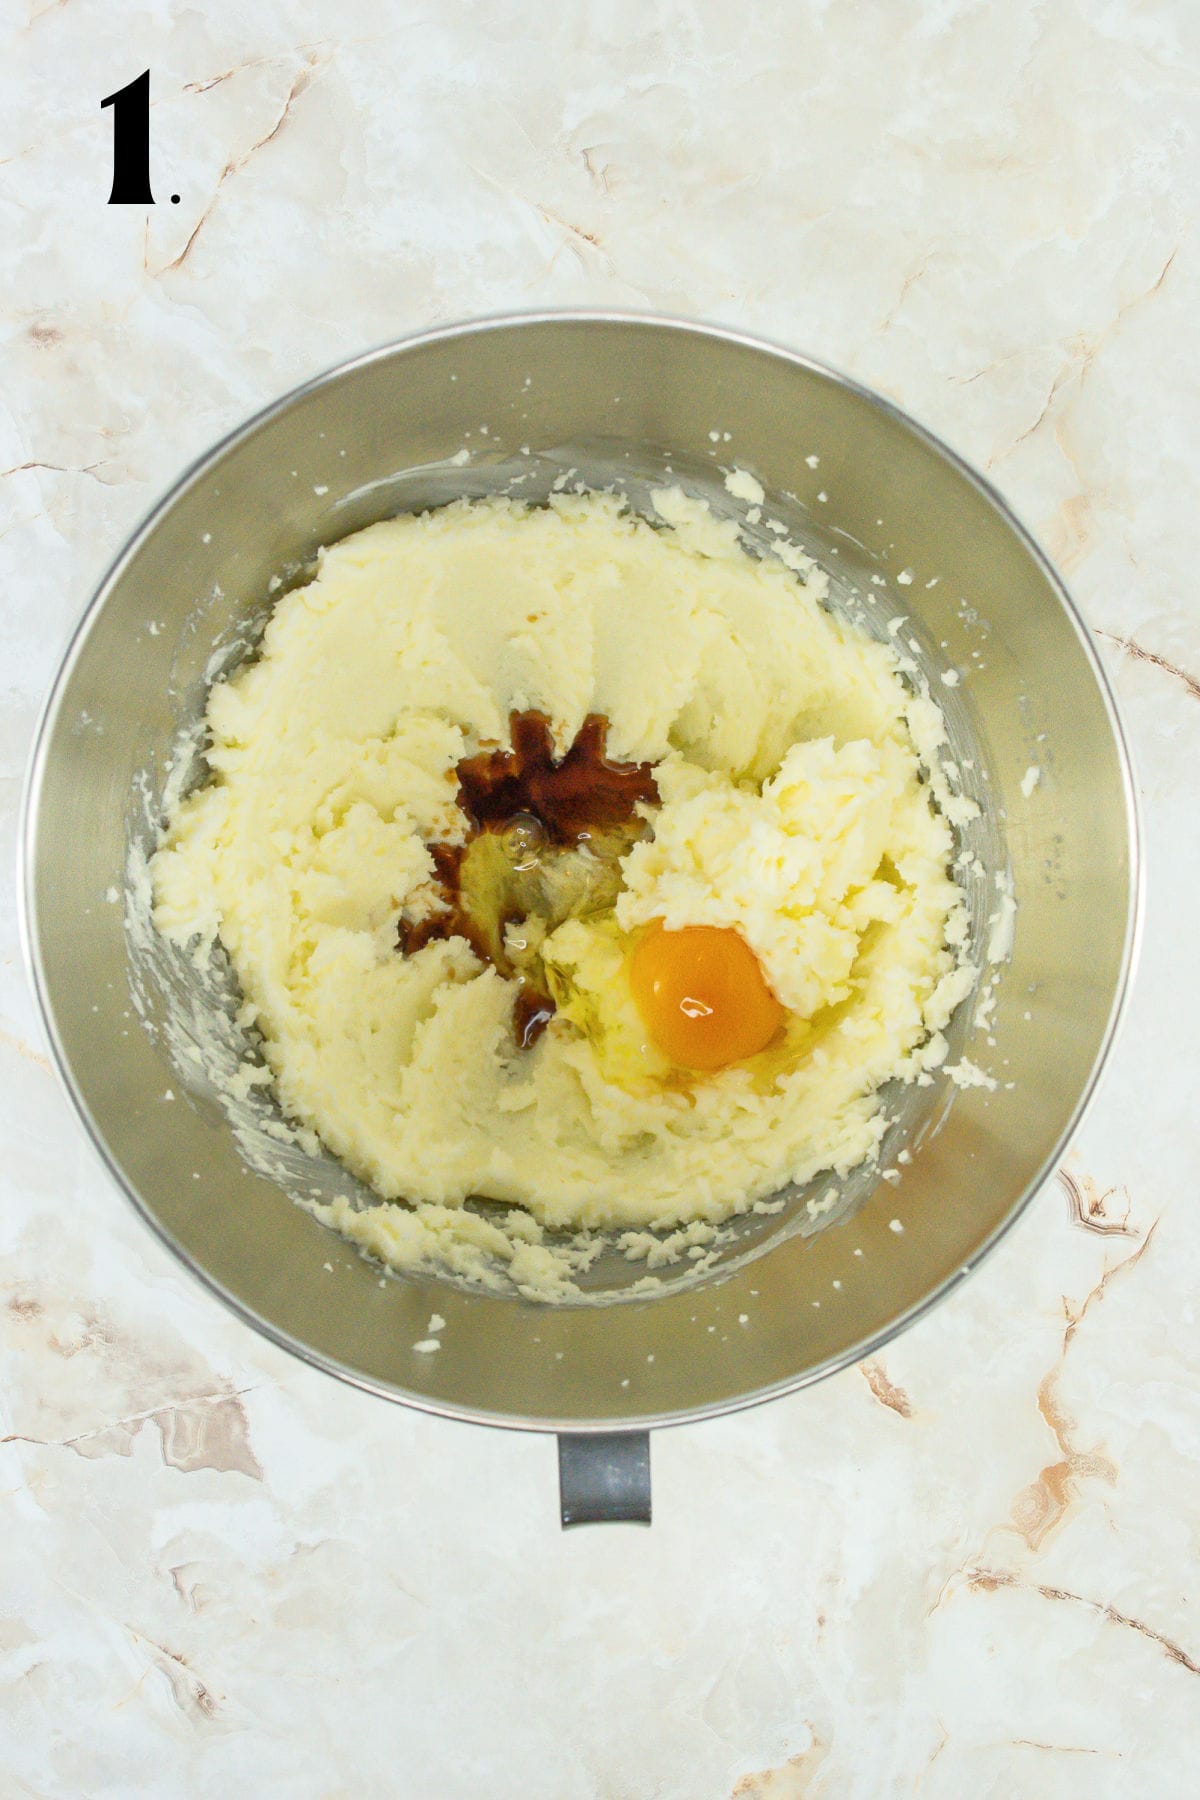
Step 1 – If you haven’t set the butter out to soften, get it out now and come back in an hour to bake. Once you have softened butter, it’s time to preheat your oven, line your pans, and pull out your ingredients.
In a large bowl (or bowl of a stand mixer with paddle attachment), cream the sugar and softened butter on medium speed. Add in the egg and vanilla and mix until combined.
Save The Recipe!
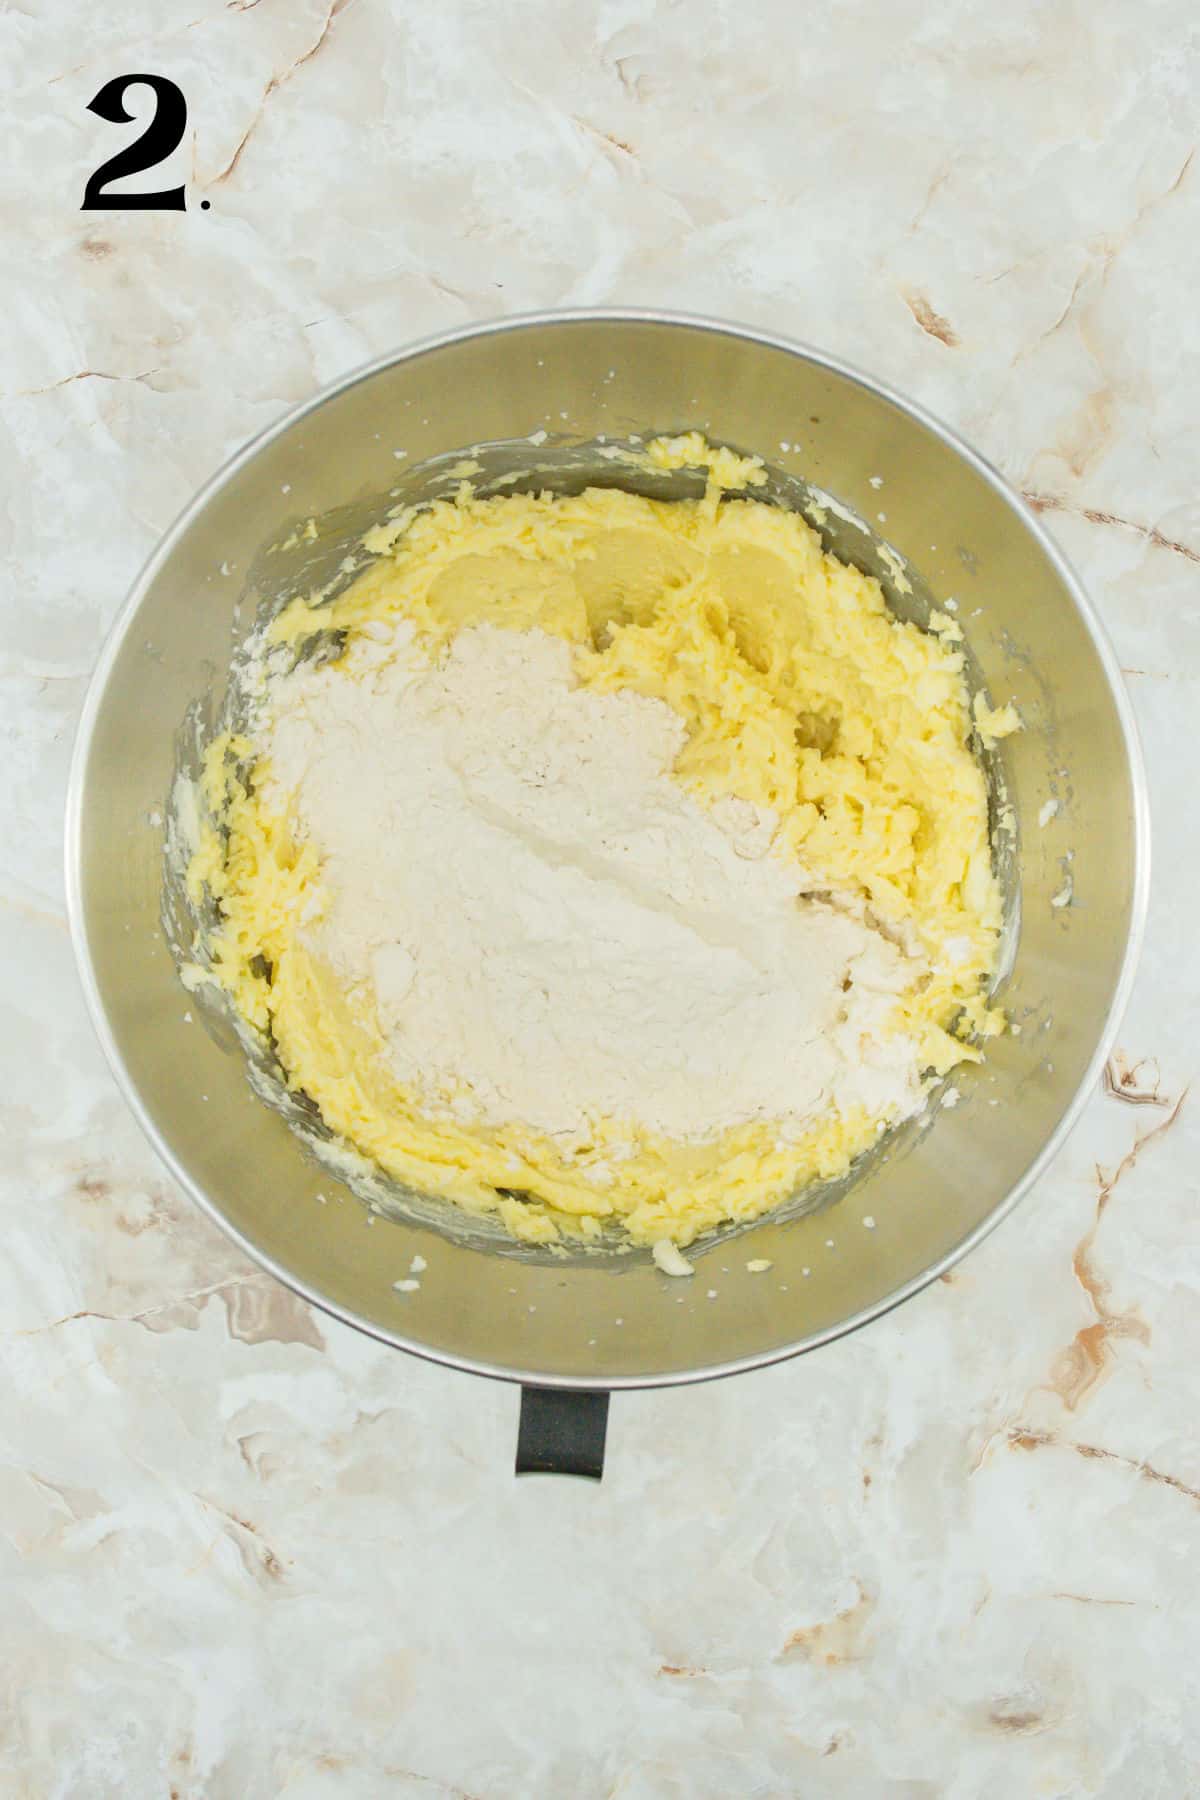
Step 2- Mix in one cup of flour on low speed until combined.
Then add an additional cup of flour and mix again.
,
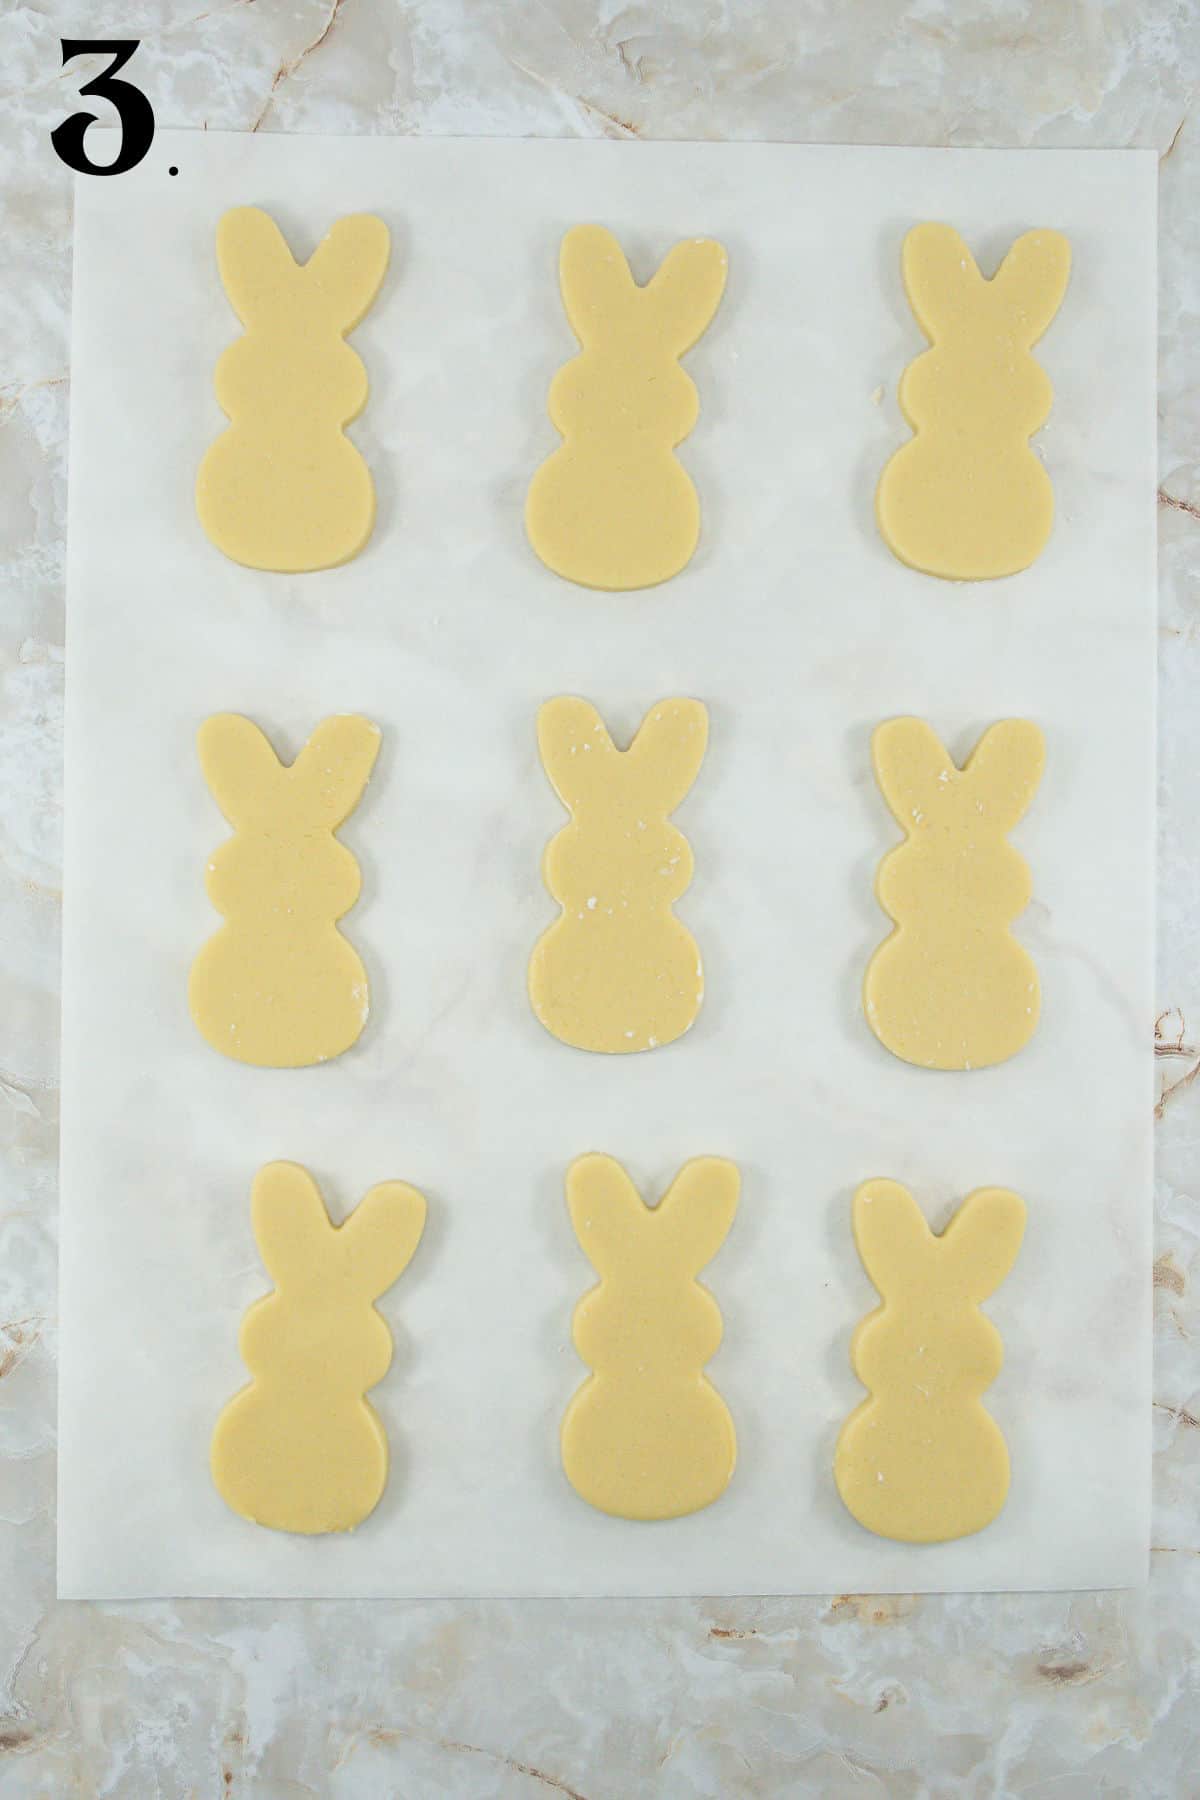
Step 3 – Turn out the sugar cookie dough onto the counter. Knead in the remaining cup of flour until you have a cohesive dough. Roll out the dough with a rolling pin and cut your bunny shapes, placing them carefully on the lined cookie sheet.
Bake sugar cookies as directed. Let unfrosted cookies cool completely before frosting
Step 4 –While the cookies are cooling completely, cream the butter, vanilla, salt and one cup of powdered sugar with your mixer on low speed. Then, add in another cup of powdered sugar and a dash of milk or water. Mix until combined
Add in the remaining powdered sugar and mix on low speed until combined. Bump up the speed to medium and mix for an additional minute or so, until the frosting is light and fluffy looking.
Scoop out about ½ of a cup and transfer to a piping bag fitted with a small star tip. Divide the remaining frosting between three separate bowls. Tint one yellow, another pink and the last one purple.
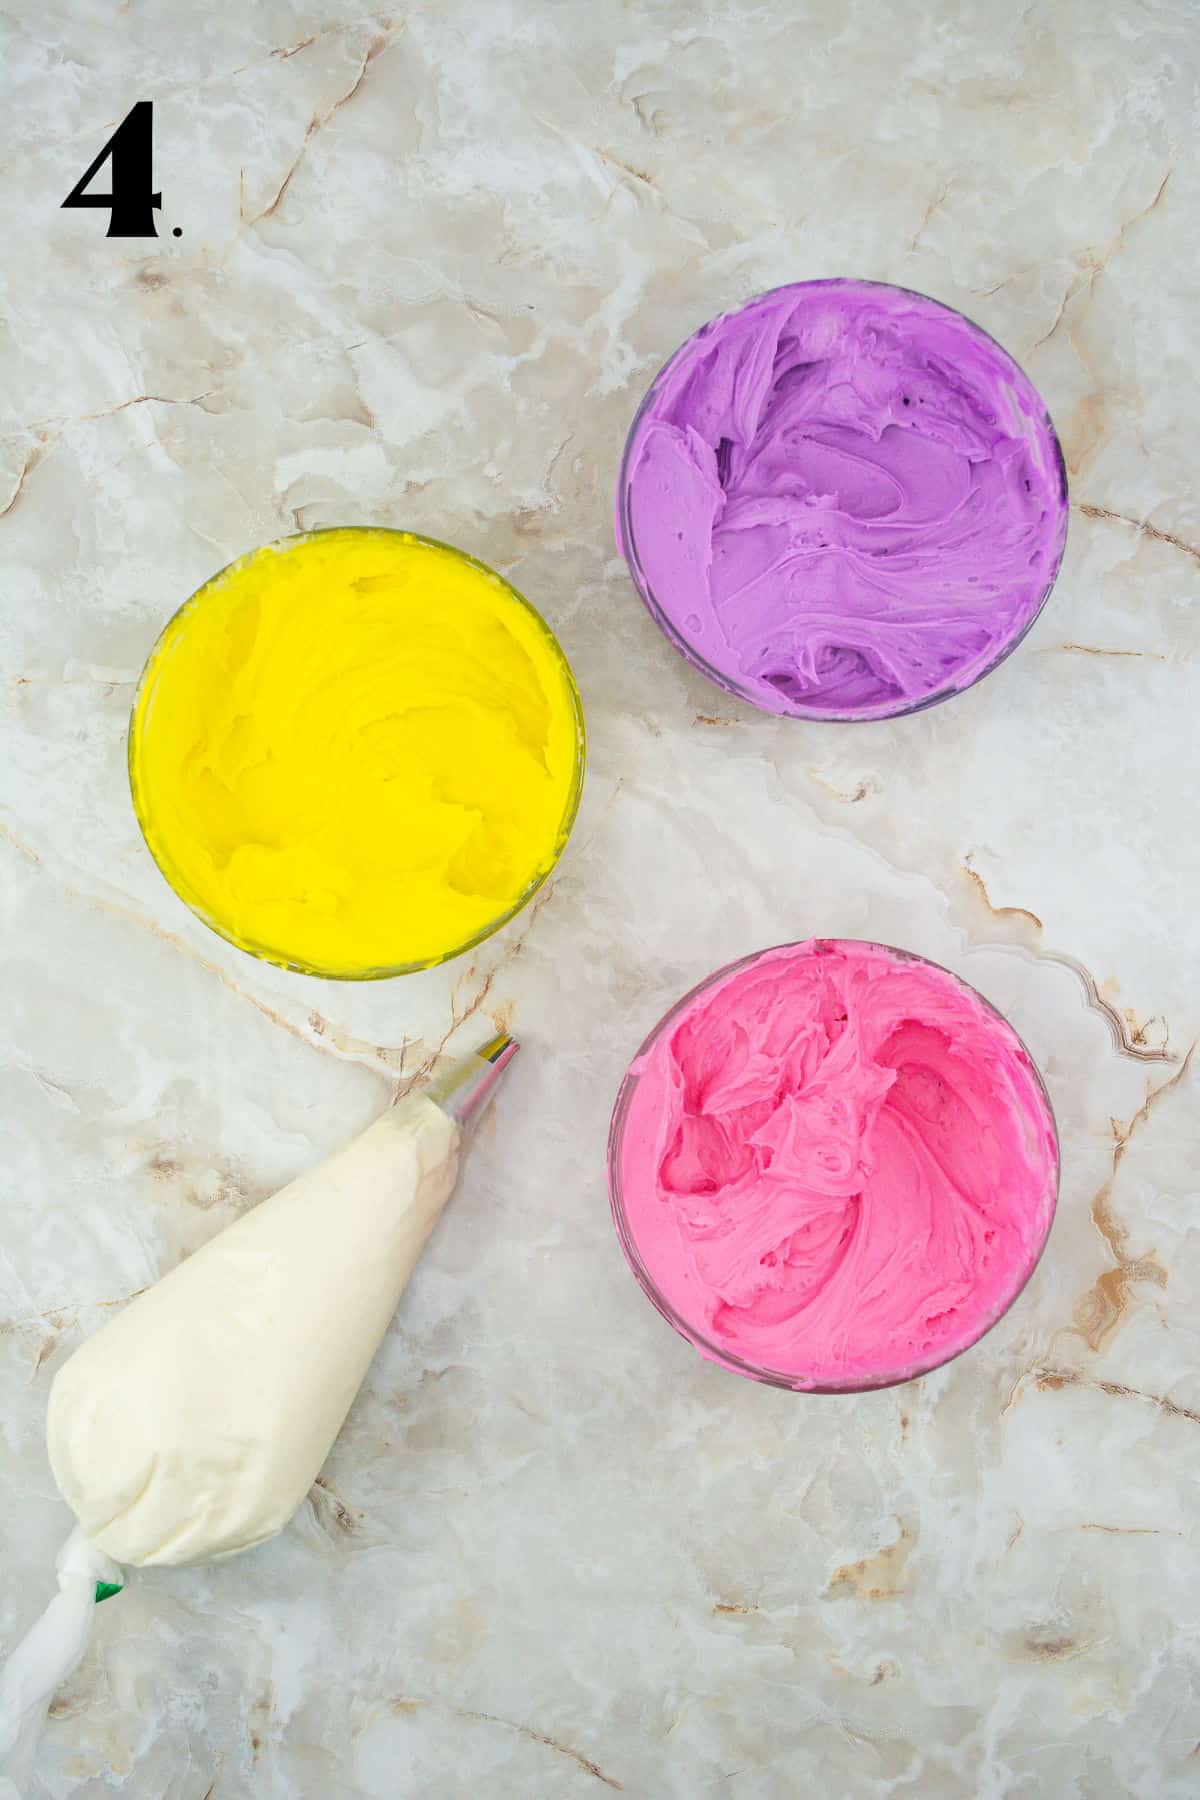
Step 5 – Transfer the tinted frosting to their individual piping bags.

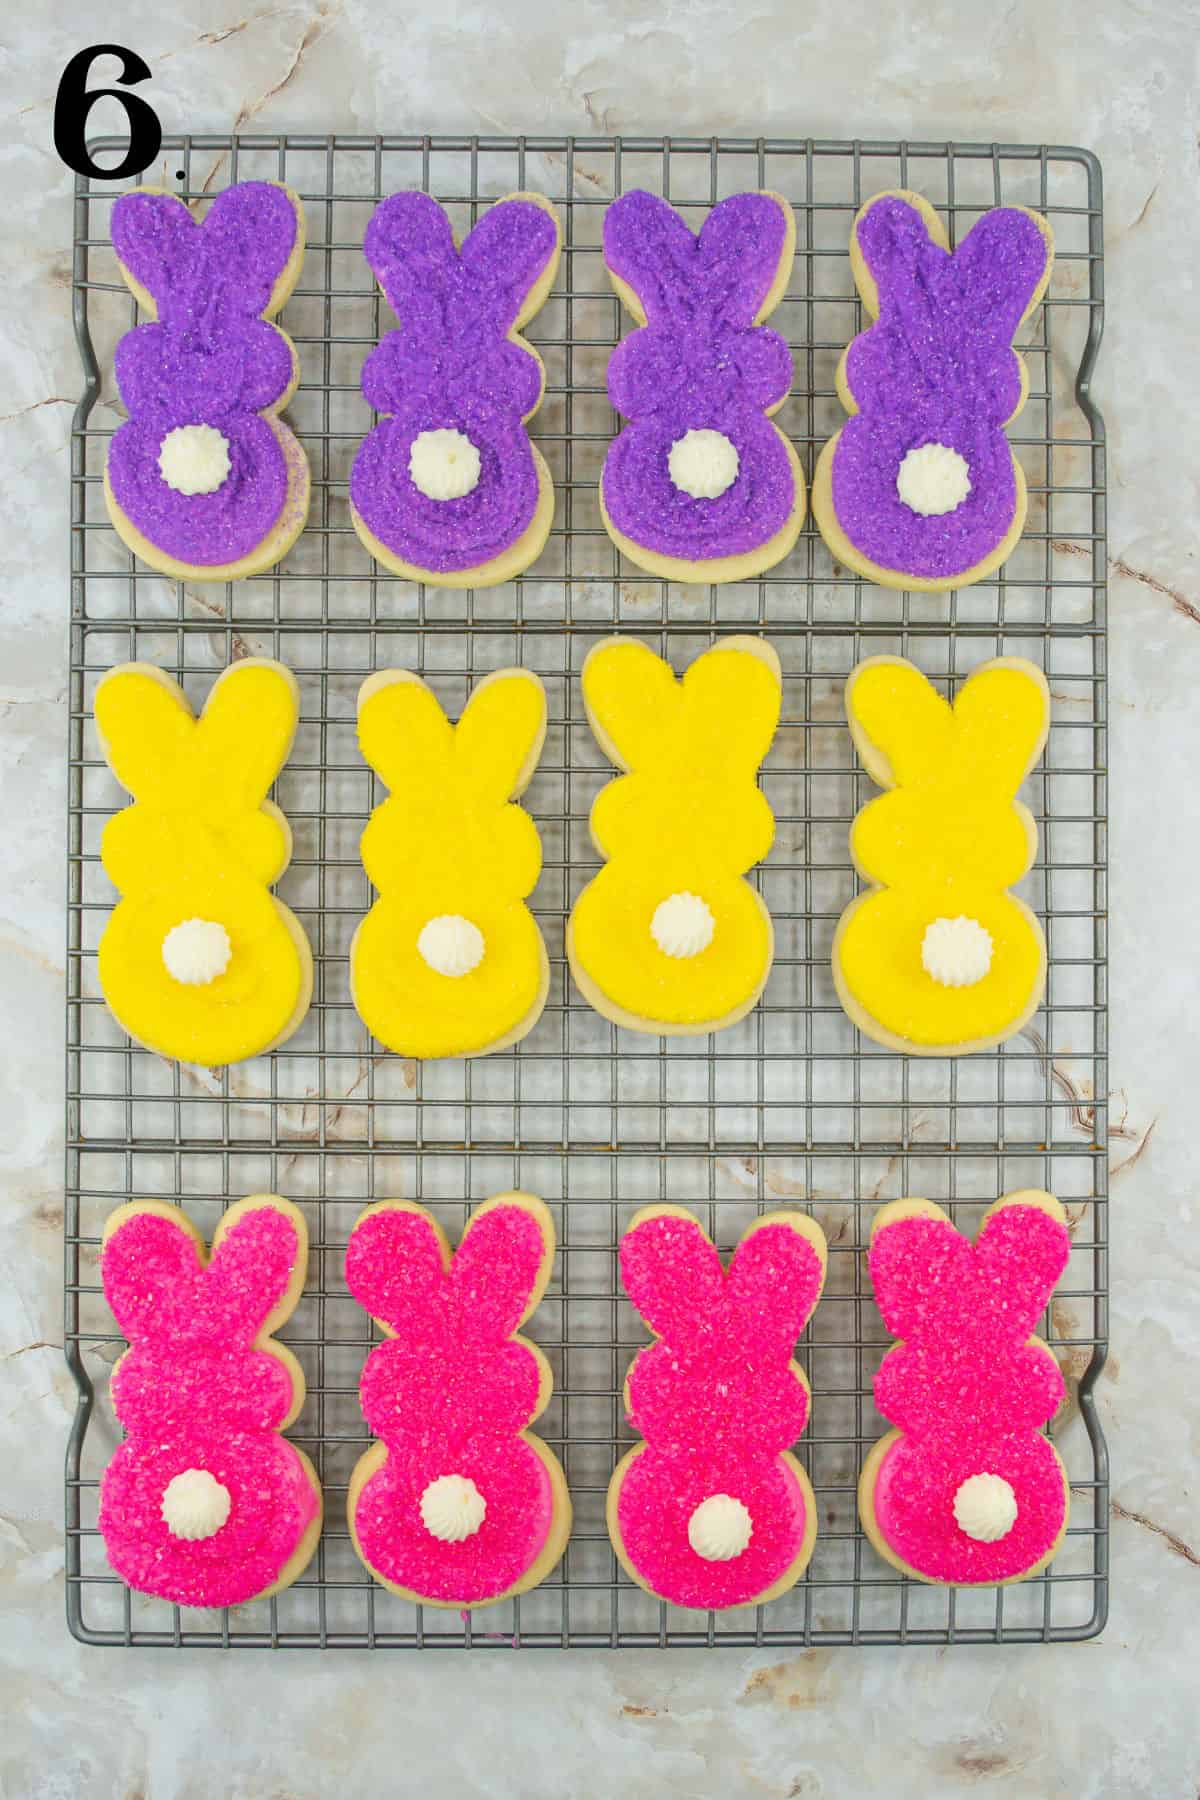
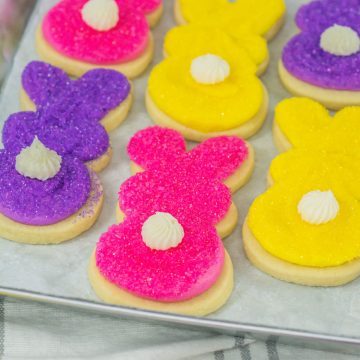
Step 6 – Once the cookies are cool, cut a small hole off the tip of a tinted frosting bag. Pipe the cookie with an even layer of frosting. Use a knife or spatula to even out the frosting if needed. Repeat with each of the colors.
Pipe a small tail on each of the cookies with the white frosting fitted with the star tip. Add the sanding sugar and your cookies are ready for the show!
Tips for Best Results
- You can make the dough the day ahead and chill in the refrigerator.
- Bake the cookies just until the edges are set and the center is no longer glossy. Do not wait for them to turn golden brown, or they will be crunchy.
- Add the sanding sugar right away. The buttercream will crust if allowed to set uncovered. I recommend letting the cookies crust over once the sugar is on, because that way they can be stacked on a tray without messing up the frosting.
- Sprinkle with the same color of sanding sugar or place the sprinkles on a plate, invert the cookie, and press the frosting into the sprinkles. Either way works.
- If you don’t love the look of this sanding sugar, you can use sprinkles instead or leave them plain with frosting.
- Store decorated cookies in an airtight container.
More Easter-Themed Desserts
- Bunny Cupcakes
- Peep Cupcakes
- Easter Egg Rice Krispie Treats
- Italian Easter Bread
- Homemade Peeps
- Easter egg cookies
- Bunny Cookies recipe
Easter Bunny Cookies
Equipment
- Large Bowl
- electric mixer
- bunny cooike cutter
Ingredients
Easter Bunny Cookies
- 1 cup unsalted butter softened
- 1 cup sugar
- 1 egg
- 1 teaspoon vanilla
- 3 cups flour
Easter Bunny Cookies Icing
- 1 cup unsalted butter softened
- 1 teaspoon vanilla
- 1 teaspoon salt
- 4 cups powdered sugar
- 2 tablespoons milk or water
- Food coloring – pink purple, yellow
- Sanding sugar – pink purple, yellow
Instructions
- Preheat the oven to 350 degrees. Line your baking sheet(s) with parchment and set aside.
- In the bowl of a stand mixer, combine the sugar and softened butter. Cream until smooth.
- Add in the egg and vanilla and mix until combined.
- Add in one cup of flour. Mix on low speed until combined.
- Add in another cup of flour and mix until combined.
- Turn out the cookie dough onto the counter. Knead in the remaining cup of flour until cohesive.
- Roll out the cookie dough approximately ⅜ of an inch thick. Using a bunny cookie cutter, cut out the shapes and carefully transfer to the prepared baking sheet. Reroll and cut the scraps as many times as you can.
- Bake the cookies in the preheated oven for approximately 10-12 minutes or just until the edges are set and the center is no longer glossy. Do not wait for them to turn golden brown or they will be crunchy.
- Allow to cool completely before decorating.
- For the frosting – In the bowl of a stand mixer, combine the softened butter, vanilla, salt and about one cup of the powdered sugar. Mix on low speed until combined.
- Add in another cup of powdered sugar and a dash of milk or water. Mix until combined.
- Add in the remaining powdered sugar and mix on low speed until combined. Bump up the speed to medium and mix for an additional minute or so, until the frosting is light and fluffy looking.
- Scoop out about ½ of a cup and transfer to a piping bag fitted with a small star tip.
- Divide the remaining frosting between three bowls. Tint one yellow, another pink and the last one purple. Transfer the tinted frosting to their individual piping bags (no tip needed).
- Once the cookies are cool, cut a small hole off the tip of a tinted frosting bag. Pipe the cookie with an even layer of frosting. Use a knife or spatula to even out the frosting if needed. Sprinkle with the same color of sanding sugar or place the sprinkles on a plate and then invert the cookie and press the frosting into the sprinkles. Either way works.
- Repeat with each of the colors.
- Pipe a small tail on each of the cookies with the white frosting fitted with the star tip.
- The buttercream will crust if allowed to set uncovered.
Notes
- You can make the dough the day ahead and chill in the refrigerator.
- Bake the cookies just until the edges are set and the center is no longer glossy. Do not wait for them to turn golden brown, or they will be crunchy.
- Add the sanding sugar right away. The buttercream will crust if allowed to set uncovered. I recommend letting the cookies crust over once the sugar is on, because that way they can be stacked on a tray without messing up the frosting.
- Sprinkle with the same color of sanding sugar or place the sprinkles on a plate, invert the cookie, and press the frosting into the sprinkles. Either way works.
- If you don’t love the look of this sanding sugar, you can use sprinkles instead or leave them plain with frosting.
- Store decorated cookies in an airtight container in the refridgerator for up to 3 days or frozen for 3 months.
Nutrition
If you are not yet subscribing to my CELEBRATE THE SEASON newsletter, you can subscribe here. I share easy recipes for the season that the entire family is sure to love and also a few things that I don’t share here.